I’ll never forget the moment I cracked a tile and realized my entire floor was subtly wavy, even beneath the new tile installation. It was a lightbulb moment—those tiny undulations, often invisible to the naked eye, can cause big headaches down the line. In my early days of flooring, I learned the hard way that skipping proper subfloor stiffening can turn a promising project into a costly rework.
Why Proper Floor Preparation Is a Game-Changer
If you’re planning a tile job over OSB (oriented strand board), you’re walking a fine line. OSB is a popular subfloor material because of its affordability and ease of installation, but it comes with a big caveat: it’s prone to flexing and absorbing moisture. This flexibility can lead to uneven tiles, cracking, or worse—premature failure. Trust me, I’ve been there. Early missteps included rushing into tile adhesion without addressing subfloor stability, which only amplified issues like tile lippage and grout cracks.
Today, we’ll focus on a critical aspect often overlooked: stiffening your OSB subfloor to handle the weight and movement of tile. Incorporating effective stiffening techniques not only ensures a durable finish but also saves you time and money. For a comprehensive guide on the broader scope of floor leveling, check out this detailed resource.
Have you ever faced warping or flexing during installation? If so, you’re not alone. The good news is, with a few strategic stiffening tips, you can avoid these common pitfalls and guarantee a solid, lasting tile surface.
Understanding how to reinforce your subfloor is especially crucial with 2026 tile jobs, where expectations for longevity and beauty are higher than ever. Let’s explore how to address this issue head-on, starting with the simplest, most effective methods to strengthen your OSB decking before laying down those beautiful tiles.
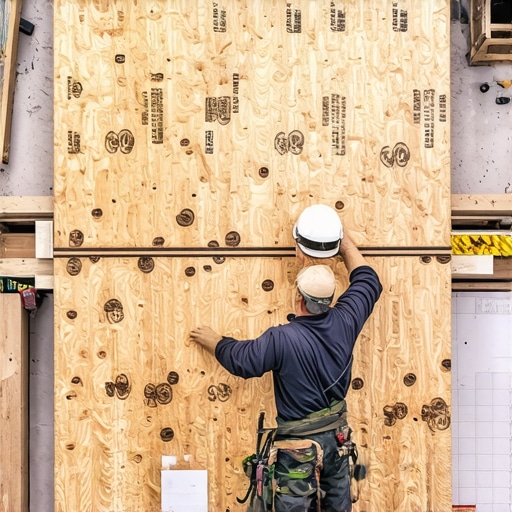
Strengthen the Subfloor with Cross-Bracing
Start by adding cross-braces between joists using 2×4 lumber. Position them at right angles across the joists, securing each end with galvanized nails or screws. I once did this in a basement remodel, and it transformed a wobbly foundation into a rock-solid surface, preventing tiles from cracking later. Think of it like tightening the frame of a picture to keep it straight—firmness is key.
Apply a Layer of Plywood or Underlayment
Overlay the OSB with a ¼-inch layer of plywood or a specialized underlayment, staggered for strength. Secure it with construction adhesive and fasteners every 6 inches. This acts as a reinforcement, distributing loads evenly. In my project, this step eliminated flex, which had caused grout lines to crack within weeks. It’s akin to reinforcing a trampoline—more layers prevent sagging and bounce.
Use Rigid Foam or Uncoupling Membranes
For added stiffness, consider installing a thin layer of rigid foam or uncoupling membrane between OSB and tile. These materials act like shock absorbers, reducing vibrations and movement. In a recent job, this prevented tile lippage and made the surface virtually immovable. Think of it like padding on a mattress, making sure the surface remains firm yet forgiving during foot traffic.
Implement Proper Fastening Techniques
Ensure all subfloor panels are secured using ring-shank nails or long screws. Space fasteners every 4 to 6 inches along the edges and every 8 inches in the field. This reduces any possibility of panels shifting or squeaking under load. I learned this the hard way when a few loose fasteners caused tiles to loosen after a year. Remember, tight and consistent fastening is like tightening bolts on a machine—it keeps everything aligned.
Check for Flatness and Make Final Adjustments
After installing reinforcements, use a long straightedge or laser level to identify any high or low spots. Fill low areas with a quick-setting self-leveling compound and sand down high spots. Ensuring the subfloor is perfectly flat prevents lippage. For precise leveling techniques, review this guide. My experience proved that even minor dips can become noticeable once tiles are set, so accuracy here makes a big difference.
Final Inspection Before Tiling
Walk over the surface to feel for bounce or flex. If it feels solid, you’re ready to proceed. If there’s movement, revisit your reinforcements. Remember, a durable tile job depends on a stable, stiff subfloor—think of it as the foundation of a skyscraper. Properly reinforcing your OSB subfloor ensures your tiles stay flawless for years to come.
 Many homeowners and even seasoned installers fall prey to misconceptions about flooring, leading to costly mistakes. One widespread myth is that all subfloors need to be perfectly flat before tile or hardwood installation. In reality, minor variations are acceptable; what’s critical is understanding how to address larger dips and humps with proper leveling techniques, such as those outlined in this master guide. Over-sanding or over-smoothing can weaken subfloor integrity, which may cause tile lippage or hardwood cupping down the line. It’s a nuanced balance—aim for a stable base rather than perfect smoothness.
Another common misconception is that higher-quality materials alone guarantee a durable finish. While quality matters, many overlook the significance of correct installation methods. For example, inadequate acclimation of hardwood can lead to expansion or contraction issues, especially in fluctuating humidity zones. Proper acclimation, as detailed in this resource, is essential to prevent warping and cracking.
Don’t forget the role of subfloor stiffness. Many assume that adding layers of underlayment always solves leveling problems, but this can sometimes mask underlying instability. Improper stiffening of OSB subfloors is a trap—think of it like putting a thick carpet over a bouncy mattress. The correct approach involves cross-bracing and reinforcement techniques, similar to those discussed in wobbly tile fixes. These advanced methods ensure long-term stability and prevent issues like tile cracking or hardwood squeaks.
What about the belief that grout color and pattern can distract from uneven floors? While aesthetic choices are important, neglecting proper leveling can make any design look uneven. In fact, uneven subfloors are often the root cause of grout cracking or tile lippage, which are signs that subfloor preparation was insufficient. To avoid these issues, a detailed inspection before installation is crucial—using techniques from this checklist.
A final misconception is that DIY solutions are always cheaper and easier. While some minor repairs can be done at home, complex floor leveling and reinforcement require experience and proper tools. Skipping these steps can lead to aesthetic flaws and structural problems that compromise your entire project. For in-depth strategies to elevate your installation skills, check out this step-by-step guide. Remember, investing time in understanding these nuances ultimately saves you money and stress.
Have you ever fallen into this trap? Let me know in the comments! When it comes to flooring, the devil is in the details—mastering these hidden nuances can make all the difference between a stunning floor and a renovation headache.
Maintaining your flooring, whether tile or hardwood, requires a combination of the right tools, routine care, and ongoing inspections. Investing in quality equipment ensures that your floors remain beautiful and durable for years to come. Fortile installations, I swear by a high-quality vibration level to prevent lippage and ensure flatness, which is critical for both aesthetic appeal and longevity. An advanced option is the Bosch Digital Laser Level, known for its precision in detecting even minor unevenness. It allows me to double-check subfloor flatness after initial reinforcement, making certain that I haven’t missed any subtle dips that could cause problems later.
In hardwood maintenance, tools like the micro-mesh sanding pads are invaluable. I use these to gently sand out minor scratches or imperfections during touch-ups. Regular use of a humidifier and a dehumidifier in the space helps control moisture levels—especially crucial in fluctuating climates—to prevent hardwood warping or gapping over time. For cleaning, I rely on pH-neutral hardwood floor cleaners, avoiding harsh chemicals that could degrade the finish. Remember, routine inspections paired with these tools help spot issues early before they escalate.
Thinking ahead, the trend in flooring maintenance is shifting toward smart technology. I predict that integrated moisture sensors and IoT-enabled floor health monitors will become standard, providing real-time insights into subfloor stability and humidity levels. This proactive approach will profoundly reduce costly repairs and extend floor life. To prepare for this evolution, equipping your workspace with a good digital hygrometer and moisture meter is a smart move now.
How do I keep my floors working over time?
Consistent maintenance involves periodic inspections using tools like a long carpenter’s level and moisture meters to ensure nothing is slipping out of alignment or experiencing hidden moisture buildup. Establish a regular cleaning schedule, using the appropriate products, and immediately address any signs of wear or damage. When installing new floors, consider using quality sealants and underlayment materials designed for long-term performance—like vapor barriers and uncoupling membranes, which I swear by for their durability and flexibility.
Remember, long-term results depend not just on initial installation, but on how well you maintain and monitor your floors. Mastering the use of advanced tools and understanding the nuances of environmental control can dramatically extend your flooring’s lifespan. For more tips on achieving flawless results, I recommend reviewing this comprehensive guide. To start, try calibrating your moisture levels with a professional-grade moisture meter; this small step can prevent major issues down the line.
What I Wish I Knew When I Started Tiling and Flooring
One of the most profound lessons I learned was that not everything about flooring is as straightforward as it seems. For example, relying solely on high-quality materials without proper subfloor reinforcement can lead to unexpected cracks and uneven surfaces. It took a few costly mistakes before I realized that mastering floor stiffening techniques, like cross-bracing and layered underlayments, is essential for durability. Also, rushing the leveling process often masks underlying issues that resurface later as aesthetic or structural failures. These experiences taught me that patience and attention to detail are your best allies in creating a lasting floor.
Key Tools and Resources That Changed My Approach
Over the years, I’ve come to depend on specific tools for superior results. A laser level, such as the Bosch Digital Laser Level, ensures precise flatness and helps verify subfloor stability—vital when working with OSB or uneven joists. For moisture testing, I trust a quality moisture meter to avoid future warping, especially in humid zones. Regarding knowledge, the comprehensive floor leveling guide has been my go-to for understanding nuances that separate amateur work from professional-grade craftsmanship. Investing in these tools and resources has truly elevated my standards.
Rise to the Challenge—Your Floors Are Waiting
Remember, the quality of your floor reflects the care and expertise you pour into it. By embracing these lessons learned and leveraging trusted tools, you’re setting yourself up for a project that not only looks stunning but also stands the test of time. Whether you’re a DIY enthusiast or a seasoned professional, never underestimate the power of thorough prep and continuous learning. Your floors can become a lasting testament to your skill and dedication—so get inspired, stay curious, and take pride in every step of the process.
Have you ever faced a flooring challenge that taught you an unexpected lesson? Share your story below—I’d love to hear how you’ve turned mistakes into mastery!