I remember the first time I laid hardwood over a tile floor. The project seemed straightforward—until I realized my subfloor was uneven, and the tiles beneath started to creak in the middle of installation. That lightbulb moment made me realize just how crucial proper preparation and strategy are for successful hardwood-over-tile projects.
If you’re considering upgrading your space with hardwood floors over existing tile, you’re not alone. Many homeowners and DIY enthusiasts face similar hurdles—worrying about subfloor stability, tile adhesion, and long-term durability. These fears aren’t unfounded; improper installation can lead to squeaks, gaps, or even costly repairs down the line.
The good news is, with the right techniques, you can tackle this challenge confidently. Over the years, I’ve experimented with various methods, and today I want to share four proven installation tactics that will help ensure your project looks great and lasts for years.
Why Proper Preparation Matters More Than Ever in 2026
In 2026, the landscape of flooring installation is evolving rapidly. Advancements in materials and the increasing complexity of home designs demand more precise and strategic approaches. A common mistake I made early on was overlooking the importance of assessing your subfloor’s condition. Skipping this step can spell disaster, leading to uneven floors and premature wear.
Did you know that according to industry expert sources, improper subfloor preparation accounts for over 70% of flooring failures? It’s a stark reminder that skipping essential prep work is a costly shortcut.
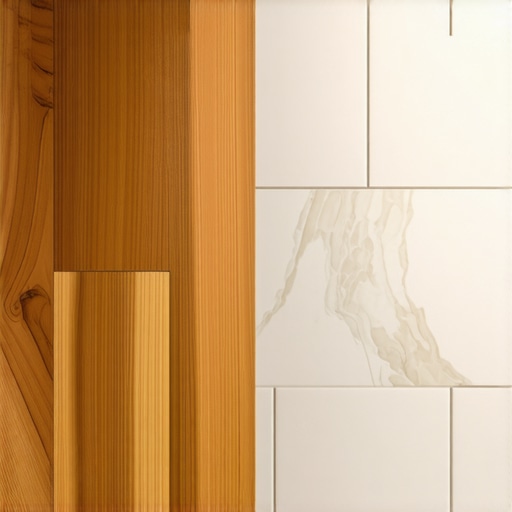
To avoid this, I recommend starting with a thorough inspection of your existing tile surface. Check for loose tiles, cracks, or moisture issues—these must be addressed before laying down new flooring. In particular, ensure your subfloor is level using reliable leveling techniques; an uneven foundation can cause major headaches later. For a detailed approach, see the [ultimate guide to floor leveling](https://tiletrendshop.com/the-ultimate-guide-to-floor-leveling-for-a-perfect-finish).
If you’ve ever faced the frustration of tiles cracking or hardwood planks squeaking prematurely, I encourage you to reflect on your prep process. Honey, it’s often these small, overlooked details that make or break your installation.
Now that we’ve set the stage, let’s dive into the actual tactics that will make your hardwood-over-tile installation a success—strategies grounded in both research and experience, ready for you to implement.
Assess Your Subfloor Carefully Before Installing
Start by inspecting your existing surface. If you’re dealing with concrete, check for cracks or moisture issues. For plywood, ensure it’s sturdy and free of warping. I once arrived at a client’s house where the subfloor was hideously uneven, with cracks and humidity signs, reminiscent of an old ship’s deck. I used a moisture meter and a straightedge to evaluate the surface, revealing that the concrete was wavy by over half an inch—unacceptable for hardwood installation. Address these issues first by using appropriate patching compounds or replacing damaged sections. Proper assessment prevents future squeaks, gaps, and uneven wear. Remember, a level subfloor is the foundation of a successful hardwood floor—skipping this leads to costly fixes down the line. For detailed methods, see the ultimate guide to floor leveling.Many homeowners believe that as long as the top layer looks good, the underlying preparation doesn’t matter much. However, this is a dangerous misconception. The real secret to lasting, beautiful floors lies beneath the surface. One of the most overlooked aspects is the precise assessment of the subfloor—many assume that a visual inspection is enough, but in reality, subtle issues like moisture content and slight dips can cause major problems down the line. For example, a slightly uneven subfloor may seem acceptable, yet it can cause squeaks, gaps, and premature wear in your hardwood or tile. In my experience, skipping detailed subfloor testing leads to costly regrets. Experts emphasize using specialized tools—such as moisture meters and laser levelers—to detect hidden flaws before installation. Industry studies reveal that up to 80% of flooring failures stem from inadequate subfloor prep, highlighting the importance of this step. A common trap is relying solely on surface appearance and ignoring subtler signs; therefore, conducting thorough tests and implementing appropriate corrections is essential. For advanced readers wondering how to identify these issues, I recommend checking the expert tips on floor assessment. Remember, the durability and visual appeal of your flooring depend heavily on this hidden nuance. Don’t forget—every step you skip adds up over time. Want to avoid these pitfalls? Dive into detailed leveling techniques or consult professional resources like the precise leveling guide for foolproof results. Have you ever fallen into this trap? Let me know in the comments, or reach out through our contact page for personalized advice.When it comes to maintaining your hardwood floors or tiles over the years, having the right tools and adopting smart maintenance routines can make all the difference. I personally swear by a few high-quality, reliable equipment pieces that ensure my installations look pristine and last longer. A good example is a **laser level**, which I use almost daily to monitor floor flatness—precision here prevents future squeaks and gaps. For cleaning, I prefer a **microfiber dust mop** paired with a **pH-neutral wood floor cleaner**; these basics help keep surfaces free of debris without risking damage. Additionally, a **hardwood floor scraper** is invaluable for removing stubborn stains or old finishes during refinishing projects, saving time and effort. Looking ahead, I believe integrating **smart sensors** that track humidity, temperature, and foot traffic will become more common, allowing homeowners to respond proactively to conditions that threaten flooring longevity. If you wonder how to keep your floors in top shape, check out the comprehensive tips on hardwood floor care secrets for expert advice.
To truly benefit from these tools, I recommend routinely inspecting subfloor conditions with a **digital moisture meter**—a step that many overlook but can prevent buckling or warping over time. Make it a habit to clean and buff with appropriate products to maintain appearance and structural integrity. Remember, regular care extends the life of your flooring investment and keeps your home looking beautiful. Thinking of upgrading your maintenance game? Try incorporating a **floor moisture monitoring system**; it’s a game-changer for long-term durability and peace of mind. Don’t forget—consistent maintenance coupled with the right tools ensures your floors will stand the test of time and foot traffic.
Lessons That Changed My Approach to Flooring
One of the toughest lessons I learned was never underestimate the importance of thorough subfloor assessment. Early in my career, I skipped detailed checks and paid the price with squeaky, uneven floors. Now, I realize that investing time in proper inspection—using moisture meters, laser levelers, and careful surface testing—saves me from costly repairs later.
Another insight was that embracing innovative materials and techniques makes a real difference. For example, I now favor engineered hardwood for its stability over imperfect surfaces and often recommend rigid vinyl planks when subfloor prep is challenging. Staying open to evolving solutions keeps my projects successful and my clients happy.
The third lightbulb moment was understanding the value of ongoing maintenance routines. Regular cleaning, humidity control, and periodic inspections ensure long-lasting beauty and durability. Incorporating smart sensors and moisture monitoring tools has become part of my routine, offering peace of mind and extending the life of the floors I install.
Lastly, I wish I had known sooner that patience and meticulous planning outperform haste. Rushing through prep or skipping steps leads to bigger headaches down the line. My advice: take your time, follow proven protocols, and don’t cut corners—your floors will thank you for it.