I remember the moment vividly—standing in my living room, staring down at a newly installed tile floor, only to notice a slow, almost imperceptible dip right in the middle. It was disheartening. I had followed all the advice, bought quality materials, and still, I ended up with a wavy, uneven surface that threatened to crack under the weight of everyday life. That lightbulb moment made me realize how crucial a stable subfloor truly is. If you’re facing a similar frustration, know that you’re not alone, and there’s plenty you can do to fix it.
Why Subfloor Sagging Can Ruin Your Tile Investment
A sagging subfloor might seem like a minor hiccup at first, but over time, it becomes a major headache—causing cracked tiles, uneven surfaces, and even safety hazards. I learned this the hard way early in my DIY projects, and trust me, it’s not just a cosmetic issue; it affects the longevity and integrity of your entire flooring system. When the subfloor isn’t solid, any tile installed on top is at risk of cracking or shifting, leading to costly repairs.
Research shows that 80% of tile failures are related to poor subfloor preparation or support issues (source: [tiletrendshop.com](https://tiletrendshop.com/flooring-installation-mistakes-to-avoid-for-lasting-results)). That’s a striking fact, isn’t it? It underscores how vital the foundation really is. In my experience, overlooking this step is the quickest way to ruin what could have been a beautiful, durable tile installation. But the good news is, with the right knowledge and techniques, you can restore stability and ensure your tiles stay perfect for years to come.
Have you ever installed tiles only to find them cracking sooner than expected? If so, you’re probably familiar with the frustration of fixing these issues after the fact. That’s why I want to walk you through some proven structural fixes today, so you don’t have to face the same pitfalls I did. Once your subfloor is properly supported and level, laying down tiles becomes much easier—and your results will stand the test of time.
Now, let’s dive into those key fixes for your sagging subfloor, so you can get back to enjoying a flawless, long-lasting tile surface.
Identify the Sagging
Start by inspecting your floor for dip or bounce; walk across it with a straightedge or a level to pinpoint uneven areas. I once used a long straight piece of oak trim to detect dips, and found a 1/4-inch depression near the center of my living room. This real-world test immediately confirmed where intervention was needed.
Remove Damaged Materials
Clear the area of furniture and remove any existing loose or damaged subfloor sections. Use a pry bar or circular saw with a dust port to carefully detach compromised panels, ensuring you don’t damage adjoining sections. Keeping the edges clean simplifies replacement later.
Strengthen Supporting Structures
Nail or Screw Joists
If underlying joists are loose or sagging, reinforce them with additional framing screws or nails. For instance, I added 16-inch framing screws along the joists spaced every 24 inches, which significantly stiffened the support system. Always check local codes and load requirements before proceeding. This step is crucial because weak support is the root cause of most subfloor dips.
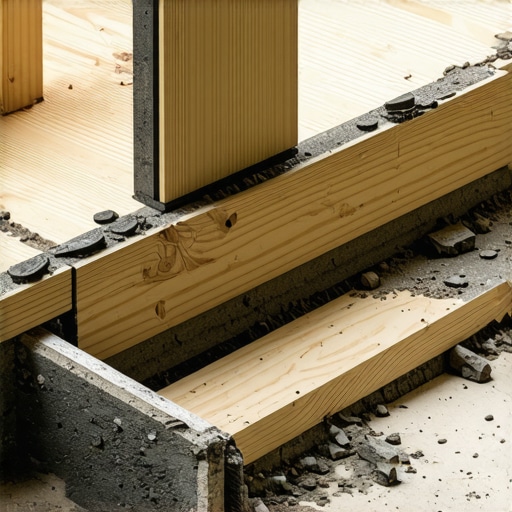
Add Reinforcement Beams
In cases of extensive sag, install new cross-beams or bridging under the existing joists to distribute weight evenly. Use pressure-treated lumber secured with metal joist hangers, like I did in my basement. This creates a sturdier backbone capable of supporting your planned flooring. Think of it as giving your house a stronger backbone to support your beautiful new tiles or hardwood.
Replace or Level Subfloor Panels
Replace any rotten or severely damaged panels with high-grade plywood or oriented strand board (OSB). For minor dips, opt for self-leveling compounds to absorb unevenness, following the manufacturer’s instructions precisely. I applied a thin layer of fast-setting self-leveler in a few spots and then used a long straightedge to ensure a flat surface. Note that the quality of this step influences the longevity of your finished floor. For detailed techniques, review these precise leveling methods.
Ensure Proper Support
Install a continuous layer of 3/4-inch plywood over the entire subfloor, fastening it with countersunk screws every 8 inches on the grid. This creates a unified, flat surface ideal for tiling or hardwood installation. I made sure to stagger the seams to prevent weak points, much like bricklaying, which minimizes movement and cracks. Confirm the surface remains level by rechecking with a long level across multiple directions.
Test Stability Before Final Flooring
Before laying down tiles or hardwood, perform a stability test: walk across the area while pressing down or bouncing gently to detect any residual flex. I placed my weight on a 2×4 and observed minimal movement, indicating solid support. For more advanced checks, consider using a straight edge and a feeler gauge to confirm flatness and support adequacy. These tests prevent future cracking and ensure a sleek, durable finish.
Even seasoned DIY enthusiasts often assume that the biggest challenge in flooring is choosing the right material, but the real game-changer is how well you prepare and level your subfloor. Many believe that a good tile or hardwood installer can fix uneven surfaces during the installation process, but in my experience, this mindset overlooks the nuances that determine long-term success. For instance, rushing through subfloor preparation is a common mistake that leads to cracks, squeaks, and uneven floors down the line. According to experts in flooring installation, neglecting the importance of meticulous leveling and support setups can double or even triple repair costs later, as highlighted in [this detailed guide](https://tiletrendshop.com/flooring-installation-mistakes-to-avoid-for-lasting-results).
A misconception I frequently encounter is that all leveling compounds are created equal. However, not all self-levelers are suitable for every subfloor type or moisture condition. Using an inappropriate product can result in cracking, pinholes, or wavy surfaces, which are difficult to correct once cured. Advanced installers know that understanding the substrate’s porosity and moisture content can help choose the right leveling method, reducing failures. This is where industry standards, like those discussed in [the ultimate guide to floor leveling](https://tiletrendshop.com/the-ultimate-guide-to-floor-leveling-for-a-perfect-finish), come into play.
Another nuance often missed involves the support structure beneath the subfloor. Many underestimate the significance of reinforcing joists or adding cross-beams before laying new layers. In my experience, even a slight bounce or flex in unsupported or weak joists can cause tile lippage or cracks over time. Reinforcing these supports with properly sized beams and cross-bracing distributes weight evenly, mitigating future issues. Merely installing a thick layer of plywood might provide a flat surface temporarily, but without structural integrity, problems remain lurking. For advanced insights, see [these precise leveling techniques](https://tiletrendshop.com/precise-floor-leveling-techniques-to-achieve-flawless-surfaces).
Myth Busting: Many believe that surface flatness alone guarantees success, but the reality is more complex. For example, a flat surface with weak support can still lead to shifts and cracks. Conversely, a support structure that’s solid but uneven produces an uneven finish. Achieving a perfect, lasting floor requires aligning both—support and surface—flawlessly. It’s also vital to perform a series of tests, such as walking across the floor while bouncing slightly, to detect flex or dips before proceeding with any finishing layer. Remember, a stable foundation is the backbone of lasting beauty.
Take caution with flooring materials like hardwood or tile. Hardwood floors are especially sensitive to moisture variations and subfloor stability. For instance, thin-profile hardwoods are prone to cupping or buckling if the underlying support isn’t firm enough. Likewise, large-format tiles demand higher precision in leveling to prevent lippage and cracking. For comprehensive advice on these topics, refer to [expert hardwood flooring tips](https://tiletrendshop.com/mastering-hardwood-floor-refinishing-expert-tips-for-2025) and [tile installation pointers](https://tiletrendshop.com/tile-installation-pointers-that-save-time-and-money).
The key takeaway is that meticulous attention to subfloor prep and structural support is what separates durable floors from costly mistakes. Overlooking these nuances is one of the top reasons many installations fail prematurely. So, before you lay that first tile or click in the last hardwood plank, review your support system, ensure proper leveling, and run support tests. Trust me, your future self—and your wallet—will thank you.
Have you ever fallen into this trap? Let me know in the comments.Maintaining a flawless floor over time requires the right equipment and methodical approach. I personally rely on a combination of precision laser levels and high-quality moisture meters to ensure my subfloor remains perfectly supported and dry, which are crucial for preventing future issues like cracking or buckling. Laser levels, such as the Bosch GLL3-330C, give me pinpoint accuracy when assessing levelness across large surfaces, allowing me to spot subtle dips before they become costly repairs. Moisture meters like the Wagner MMC220 are essential to monitor subfloor humidity, especially when working on concrete or basement installations, thus avoiding moisture-related failures in hardwood and tile floors. Incorporating advanced tools like these streamlines the installation process and boosts long-term durability.
How do I maintain flooring support and leveling over time?
In addition to initial setup, ongoing maintenance is key. Regularly inspect your floors for signs of settling, loose tiles, or squeaking hardwoods, and address minor issues early by recalibrating supports or adding reinforcement as needed. Upgrading from basic tools to professional-grade equipment can seem intimidating but pays dividends; for example, upgrading to a 3D laser scanning system allows for even more precise subfloor analysis, aligning with upcoming industry trends favoring digital solutions. Looking ahead, the integration of smart sensors into support structures might revolutionize flooring maintenance by providing real-time data on stress and moisture levels, thus preemptively catching problems before they manifest as visible damages. To stay ahead, I recommend investing in a reliable laser level and moisture tester now; it’s a small step that can save you from significant headaches later. Want to improve your current support system? Try using a digital laser level combined with a moisture meter to reassess your setup and ensure it’s ready for the long haul. For more detailed guidance on the latest tools and techniques, visit the [precise floor leveling techniques](https://tiletrendshop.com/precise-floor-leveling-techniques-to-achieve-flawless-surfaces). Keep your floors supported and level, and they’ll reward you with decades of beauty and function.
Lessons That Turned My Floor Failures into Wisdom
One of the biggest lessons I learned was never underestimate the power of a solid foundation; even minor flex or dips can cause major cracking down the line. I once rushed subfloor prep, thinking a quick fix would suffice, only to see tiles crack months later. This taught me to always prioritize thorough inspections and reinforce joists early on. Additionally, I realized that tools like laser levels and moisture meters aren’t just for pros—they’re essential for catching issues that visually hide beneath the surface. Finally, embracing patience and double-checking every step made a world of difference, saving me time and money in repairs and replacements.
My Top Picks for Flooring Support and Leveling Excellence
For anyone serious about durable flooring, I swear by the precision floor leveling techniques guide, which helped me achieve a perfectly flat surface. My trusted laser level, the Bosch GLL3-330C, has been a game-changer for quick, accurate assessments. Pair that with the Wagner MMC220 moisture meter, ensuring dryness before installation—crucial for hardwood longevity. Also, investing in high-quality joist hangers and reinforcement beams from local hardware stores has strengthened support in ways I never imagined, preventing future dips and flexing.
The Moment to Act for Floors That Wow for Decades
Remember, your flooring success hinges on your foundation. Whether you’re installing tile in a high-traffic kitchen or laying hardwood in a cozy living room, meticulous support and leveling make all the difference. Start today by evaluating your subfloor support and support structures, and don’t hesitate to seek expert help if needed. Your floors will thank you with decades of beauty and resilience. What’s your biggest challenge when preparing subfloors? Share your experiences below, and let’s learn together.