
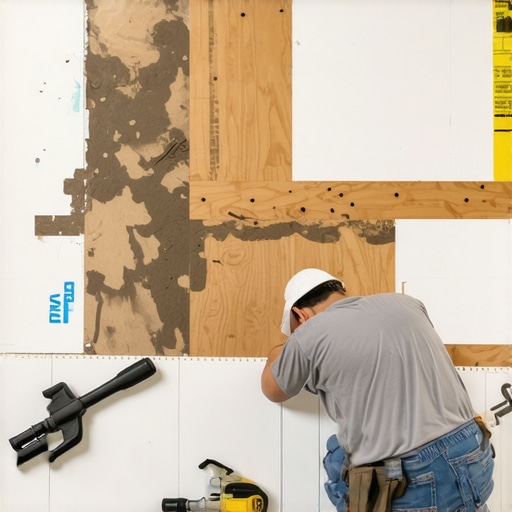
Ever spent hours installing beautiful tile or hardwood only to realize your floor feels uneven underfoot? I remember the lightbulb moment when I stepped onto my newly laid flooring and felt that annoying, uneven bounce. It was discouraging — like all my hard work might be for nothing. But after some trial, error, and a bit of neighborly patience, I discovered a practical trick that saved the day. Today, I want to share how I used simple household materials—shims and plywood scraps—to level my subfloor effectively. Trust me, this approach is not just budget-friendly; it’s surprisingly straightforward once you get the hang of it. If your subfloor isn’t as flat as you’d like, this post promises to guide you step-by-step through a foolproof process to create a solid, level foundation for your finish flooring.
Why Ignoring Floor Unevenness Can Cost You Big Time
Before we dive into the how-to, let’s talk about why a level subfloor matters so much. An uneven surface isn’t just a visual flaw; it risks cracking your tiles, causing squeaks in your hardwood, and ultimately shortening the lifespan of your new floor. According to flooring experts, unaddressed subfloor imperfections could lead to costly repairs down the line. That makes leveling your base crucial from the get-go. I learned this the hard way early in my renovation—skipping proper leveling led to a wobbly, frustrating finish that I had to redo months later. So, if you’re feeling overwhelmed about tackling unevenness, don’t worry. The good news is, there’s a fairly simple way to fix it without breaking the bank or losing your mind. Want to skip the pitfalls? Check out our comprehensive guide to common leveling mistakes. Now, let’s get into the practical steps I used to smooth out my subfloor with some basic household items. If you’ve faced similar issues, you’re in the right place to learn how to correct the unevenness effectively and confidently.
Identify the High and Low Spots Carefully
Begin by inspecting your entire floor with a long, straight 2×4 or a spirit level. Lay it across different sections, paying attention to where it tilts or wobbles. Mark these spots with painter’s tape or chalk for easy identification. Remember, just like finding uneven patches on a road, pinpointing these areas accurately is crucial for effective leveling. I once spent a whole afternoon running the level over my living room subfloor, discovering hidden dips I hadn’t noticed before, which made me realize how critical this step is before proceeding.
Prepare Your Household Materials and Tools
Gather materials such as shims, plywood scraps, a hammer, a putty knife, and a straight edge. Shims are thin wedges—many are made from plastic or cardboard—perfect for filling gaps under the subfloor. Plywood scraps can serve as a sturdy base for larger dips. Prepare your workspace, and ensure safety gear like gloves and goggles are within reach. Think of this as gathering your arsenal before a DIY battle; preparedness makes the process smoother.
Create a Level Foundation with Plywood and Shims
For dips less than half an inch deep, insert shims beneath the plywood scraps placed directly on the subfloor. Use a hammer to gently tap shims into place around the perimeter, ensuring they sit snugly. Place the plywood over these shims, pressing down firmly to create a flat surface. For larger dips, cut plywood to size and lay it across the area, bridging the gap. Secure it temporarily with nails or screws, then check the surface with your spirit level. It’s akin to building a tiny bridge over a pothole—gradually creating a smooth ride.
Adjust and Fine-Tune the Level
Step back and inspect your work with your level or straightedge. Use the putty knife to add or remove shims, tightening or loosening to achieve that perfect flatness. Remember, small adjustments make a big difference; it’s similar to tuning a musical instrument. I recall fiddling with shims multiple times, each tweak bringing me closer to that seamless floor finish. Recheck after each adjustment to avoid overcorrecting.
Secure the Materials Firmly
Once satisfied with the level, permanently fix the plywood and shims in place using construction adhesive or screws. Spread a generous amount of adhesive on the shims before setting the plywood for added stability. Drive screws diagonally to prevent lifting. This step is like anchoring a ship—firmness ensures stability and durability. For added strength, consider sealing any gaps with leveling compound or floor patch men to prevent future shifts. Remember, a well-secured subfloor forms the backbone of a lasting finish.
Verify the Final Level
After securing everything, give the surface one last check with your level. Walk across the area to confirm no unexpected bounce or wobble remains. If any minor irregularities persist, add small shims or patches as needed. Think of this as the final polish—ensuring your floor is as smooth and stable as possible before laying your finished surface. Applying these simple household materials transformed my uneven floor into a solid foundation, saving me from future tile cracks and squeaks. For in-depth tips on tile installation or understanding common leveling challenges, check our comprehensive guide to common leveling mistakes. Now, with your subfloor properly leveled, you’re ready for the next stage of a perfect flooring project—be it tile, hardwood, or laminate.While many homeowners focus on choosing the right tile or hardwood finish, a significant nuance often gets overlooked: the misconceptions about floor leveling and installation that can lead to costly mistakes. One widespread myth is that existing subfloor imperfections are negligible, but expert advice underscores that even minor unevenness can cause long-term damage, including tile cracks and squeaks in hardwood floors. Don’t assume that a visible bump or depression isn’t critical; understanding the tolerances for different flooring types is essential for a durable, flawless finish. For instance, tiles require a very flat surface—within 1/8 inch over 10 feet—yet many still ignore this, risking future grout lines cracking or tiles lifting. Checking with professional standards or advanced leveling techniques can save you time and money in the long run.
How can advanced leveling techniques prevent subtle subfloor issues from becoming disasters?
Many DIYers underestimate the importance of proper subfloor preparation, thinking that quick fixes or patching are sufficient. However, studies by flooring industry experts demonstrate that inadequate leveling can significantly reduce the lifespan of your flooring. Instead, investing in precise methods—like self-leveling compounds, proper underlayment, and torque-controlled fasteners—can ensure an even surface that meets industry tolerances. Skipping these steps might seem like a time-saver initially but often results in shadow lines, warping, or tile cracking later. To deepen your understanding, visit our comprehensive step-by-step guide to flooring installation and leveling success. Remember, the devil is in the details, especially when it comes to creating a stable base. One common trap is assuming that flooring adhesives and finishes can mask subfloor imperfections, but in reality, they bind to every flaw, amplifying irregularities. Ensuring a perfectly level subfloor isn’t just an aesthetic choice; it’s a foundational requirement for long-term performance. If you want to prevent these pitfalls, consider consulting with professionals or utilizing advanced tools. Would you be surprised to learn that even experienced installers sometimes overlook these nuances? Share your experiences and learn more about avoiding costly mistakes in our dedicated guide on flooring installation mistakes.Maintaining a flawless floor over time requires more than just initial skill; it demands reliable tools and a strategic approach. One essential piece of equipment I swear by is a high-quality laser levelsystem. Unlike traditional bubble levels, laser levels project a continuous horizontal or vertical line, making it effortless to check for flatness across large expanses. I personally use the Bosch GLL 3-80, which offers precise readings up to 130 feet, ensuring your flooring remains level as your project scales or as the environment shifts. For delicate adjustments, I rely on a digital moisture meter to monitor humidity levels in subfloors and concrete slabs, preventing issues like mold or warping. Accurate moisture readings are crucial, especially when working with materials like hardwood or tile, where excess moisture can compromise longevity. In my experience, combining these tools with a trusty cordless drill fitted with adjustable torque control allows for swift, controlled fastening without damaging substrates. As technology evolves, I predict smart sensors integrated with IoT will soon monitor floor health in real-time, alerting homeowners to issues before they become costly. For those interested in detailed flooring project management, software like MeasureSquare streamlines measurements, layouts, and material estimates, which I find invaluable when planning multi-room installations. A final tip: develop a routine of regular inspections using your laser level and moisture meter, especially before major transitions or installations. This habit helps catch potential problems early and keeps your flooring projects on track. To deepen your understanding, check our comprehensive guide to expert flooring tips. Give one of these advanced techniques a try—such as investing in a laser level—to see how it elevates your craftsmanship and ensures long-term durability. Remember, the right tools don’t just simplify the process; they make the difference between a good finish and a professional one.
Uncovering Hidden Pitfalls That Hit Home
One of my surprise lessons was realizing that even minor imperfections in my subfloor could lead to major headaches down the line. I once thought a slight dip was insignificant, only to discover it caused cracked tiles months later. It’s like ignoring a tiny crack in a dam—eventually, it can lead to disaster. I learned the hard way that careful inspection and understanding industry tolerances are keys to a durable finish.
Why Rushing Can Cost More Than Doing It Right
In my eagerness to finish quickly, I skipped some essential steps like thoroughly checking my leveling with a proper tool. That mistake taught me patience—it’s better to invest time upfront than to redo the whole floor later. Using advanced tools such as a laser level significantly improved my precision, which you can see in action at this detailed guide. Remember, quality results come from meticulous prep.
Embracing Simple Household Tools for Lasting Results
I wholeheartedly believe you don’t need fancy equipment to get a perfect, level subfloor. Household items like plywood scraps and shims are surprisingly effective when used correctly. Tapping in shims and bridging dips with plywood saved me a lot of money and frustration. This approach underscores that with a bit of patience and ingenuity, DIY projects can match professional standards.
Strategic Fixes for an Unshakeable Foundation
After my initial leveling, I locked everything in place with adhesive and screws, knowing durability depends on secure attachment. Ensuring every component was firmly secured made my final flooring look and feel perfect. This reinforces the importance of proper securing techniques — a lesson I now swear by. For deeper insights, consider reviewing our comprehensive how-to.
Small Tweaks Make Big Impact
The final inspect-and-adjust phase was where I had my lightbulb moment. Checking with my level and making tiny shims adjustments transformed my uneven floor into a solid, wobble-free surface. It’s a gentle reminder that patience and attention to detail are what truly elevate a DIY flooring project from okay to exceptional. If you’re tackling similar challenges, remember, every small tweak counts.