
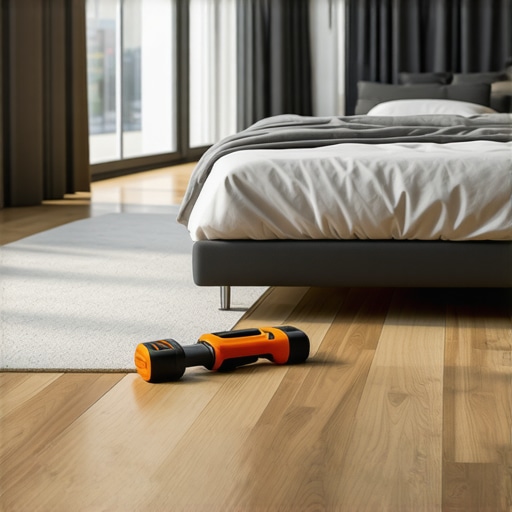
I remember the moment clearly—after finally finishing the hardwood installation in my condo, I expected a peaceful retreat. Instead, every step I took sounded like a drumbeat echoing through the walls. That light, yet persistent noise was my wake-up call: I had overlooked one crucial detail—soundproofing. It was a frustrating realization that the beautiful floor I had invested in was also amplifying every creak and footstep, making me question whether I had chosen the right underlayment.
Why Soundproofing Matters More Than Ever in Condos
Condo living comes with its unique challenges, especially when it comes to noise transfer. Whether you’re in a high-rise or a cozy unit, the sounds from your neighbors and your own footsteps can create a lot of discomfort. Proper underlayment isn’t just about cushioning your feet; it’s the key to creating a peaceful haven where noise doesn’t invade your space. Personal experience taught me that skimping on soundproofing can turn a condo into a source of constant frustration.
Is the Hype About Underlayment Overblown?
Early in my project, I made the mistake of believing all underlayments were created equal. That was a costly assumption, leading me to choose a low-quality option that failed to dampen footfall noise effectively. I learned the hard way that not all underlayment is designed for soundproofing—some focus mainly on cushioning or moisture barriers. Trust me, cutting corners here only results in more noise, and sometimes, additional costs down the road.
Choosing the right underlayment can significantly improve your living environment, but with so many options, it’s easy to get overwhelmed. In the upcoming sections, I’ll share what I discovered through trial, error, and plenty of research, including insights from flooring professionals. And if you’ve faced similar issues, I’d love to hear about your experience—have you struggled with noisy floors when you were expecting tranquility? Let’s dive into how you can turn your condo into the quiet oasis you deserve.
Start with a Solid Subfloor Base
Before installing your chosen flooring, ensure the subfloor is level, clean, and sturdy. Use a long level to check for any dips or humps—any deviation over 1/4 inch across 10 feet needs correction. For minor unevenness, apply a self-leveling compound, following the manufacturer’s instructions precisely. This process is vital; a wobbly foundation will compromise not only the appearance but also the longevity of your floor. I remember applying leveling compound in my living room, which was riddled with small humps, and witnessing the transformation into a perfectly flat surface after curing.
Level the Surface With Precision
Next, tackle the leveling process with exactness. For large discrepancies, use shims or plywood scraps to fill dips, then top with a thin layer of leveling compound. When I leveled my dining area, I used a screed—a straightedge—to guide the application and ensure uniformity. This technique resembles laying a beam across uneven ground, smoothing out the surface for a stable, even finish. Learn more about precise floor leveling techniques here.
Prep the Floor for Soundproofing
Before laying down your underlayment, clean the subfloor thoroughly. Remove dust, debris, and any loose particles that can cause irregularities. Think of it as preparing a canvas before painting—details matter. For added soundproofing, choose an underlayment specifically designed to dampen noise transfer. I opted for a high-quality cork underlayment, which significantly reduced footstep sounds and felt like walking on a cushioned surface, akin to pacing through a cloud.
Choose and Install the Right Underlayment
Not all underlayments are equal; select one based on your flooring type and soundproofing needs. For hardwood floors, dense rubber or specialized acoustic underlays are effective. For tile, consider foam or cork options that provide both sound insulation and moisture barrier. During installation, cut the underlayment to size, avoiding overlaps or gaps that can diminish soundproofing. Secure it with appropriate tape or adhesive if necessary, ensuring a continuous layer. If you’re unsure, consult professional tips at this guide.
Lay Flooring Carefully
With a firm, level, and insulated base in place, proceed to install your flooring. For hardwood, leave expansion gaps around the perimeter—about 1/4 inch—using spacers to maintain uniformity. When laying tiles, use proper adhesive and maintain consistent spacing with spacers for clean grout lines. I personally found that marking the first row of tiles with a chalk line kept everything straight; a simple trick that saves frustration. For overall success, follow detailed installation tutorials like this comprehensive guide.
Seal and Finish for Longevity
After installation, seal the grout and any gaps with high-quality caulking to prevent moisture ingress and reduce noise transfer further. Regular maintenance, including cleaning with suitable products, ensures your floor remains durable and quiet over the years. The effort invested in these steps results in a flawless, noise-resistant surface that elevates your home’s comfort and style.
Many DIY enthusiasts and even some professionals overlook the subtle nuances that can make or break a flooring project. One of the most prevalent misconceptions is that choosing a high-quality tile or hardwood automatically guarantees a flawless finish. However, even the best materials can fall short if the underlying issues—like improper leveling or poor preparation—aren’t addressed properly. For instance, many assume that installing tiles directly over an uneven surface won’t affect the final outcome, but this often leads to cracked tiles and uneven grout lines. Ensuring a perfectly flat subfloor isn’t just a recommendation; it’s a necessity for lasting durability.
What’s the True Impact of Floor Leveling on Long-Term Performance?
In my experience, neglecting meticulous floor leveling is where most projects go awry. Even minor deviations—less than a 1/8 inch across a 10-foot span—can cause tiles to crack or develop lippage in hardwood floors. Experts like those at this guide emphasize that precision in leveling isn’t just about aesthetics; it’s about structural integrity. Common myths suggest that using self-leveling compounds is a quick fix that masks underlying issues, but in reality, it’s crucial to identify and correct subfloor flex or moisture problems beforehand. Failing to do so can lead to costly repairs or replacements down the line.
Another advanced mistake many make involves understanding the materials’ response to environmental changes. For example, hardwood expands and contracts with humidity fluctuations, which can be exacerbated by improper installation. Using inappropriate expansion gaps or failing to acclimate the wood before installation can result in gaps or buckling months later. As highlighted in this article, recognizing and accommodating these nuances is vital for longevity and appearance.
Furthermore, advanced installers know that the skillful use of tools like laser levels and moisture meters is critical. Ignoring moisture content differences across the subfloor can lead to adhesion failures and moisture damage, especially in basement-level or humid environments. A study published in the Journal of Building Engineering underscores that precise moisture testing and correction are often overlooked but essential steps for a successful flooring installation.
Have you ever fallen into this trap? Let me know in the comments. Remember, mastering these details elevates your craftsmanship and saves you from costly mistakes. For comprehensive techniques on achieving a flawless finish, check out this resource and never underestimate the power of meticulous preparation.Once your flooring is expertly installed, maintaining its integrity is crucial to ensuring long-term performance. Having the right tools simplifies this process and allows you to address issues proactively, saving money and extending the lifespan of your floors. For instance, I rely heavily on a high-quality moisture meter, like the Tramex CME4, to monitor humidity levels in the subfloor periodically. This device has helped me identify potential moisture problems before they manifest visibly, which is essential since undetected moisture can cause tiles to crack or hardwood to warp over time. Regularly checking moisture levels aligns with the insights offered in the [Smart Moisture Management](https://tiletrendshop.com/the-ultimate-guide-to-floor-leveling-for-a-perfect-finish) guide, emphasizing proactive care.
What I Wish I Knew Before Laying My Floors
One of the most valuable lessons I learned was that even a minor overlook in soundproofing can turn your peaceful retreat into a constant noise nuisance. Paying attention to detail during the subfloor preparation saved me from costly repairs later and made my condo a true sanctuary.
Why Skipping the Underlayment Costs More Than You Think
I initially believed that investing in premium flooring materials was enough, but I overlooked the importance of quality underlayment. That mistake taught me that soundproofing isn’t just an add-on—it’s the foundation of a quiet, comfortable home.
The Power of Precise Floor Leveling
Achieving a perfectly flat subfloor is more than aesthetics; it’s about structural integrity and noise reduction. Using tools like laser levels and moisture meters, as I did, can make the difference between a durable surface and ongoing problems. Learn from my experience: meticulous prep leads to lasting peace.
The Hidden Benefits of Quality Underlayment Choices
Choosing the right underlayment—whether cork, foam, or rubber—can effectively dampen sound and improve footstep comfort. Trust me, the right material transforms your living space into a refuge of tranquility.
How Proper Sealing Extends Your Floor’s Life
Sealing grout and gaps was an extra step I underestimated. It not only protects against moisture but also further insulates against noise. Regular maintenance of these seals prolongs your floor’s beauty and quietness.
Insider Wisdom for Future Projects
- Always double-check subfloor flatness; minor deviations can cause big problems down the line.
- Invest in quality underlayment designed for soundproofing—it pays for itself over time.
- Use environmental tools like moisture meters to prevent issues before they start.
My Go-To Tools for Floor Perfection
From laser levels to moisture testers like the Tramex CME4, the right tools are essential. They provided me with the confidence to tackle challenging spots and ensure that every inch was correctly prepared.
Step Up Your Flooring Game Today
Remember, a flawless floor is born from careful planning, quality materials, and attention to detail. By applying these lessons and utilizing trusted resources, you can create a space that’s both beautiful and peaceful. If you’re ready to upgrade your space, start by reviewing the best floor leveling techniques and see the difference one quality step can make.
Your Turn to Elevate Your Home
Have you ever overlooked an essential step in your flooring project? Share your experience—I’d love to hear what you wish you’d known from the beginning!