
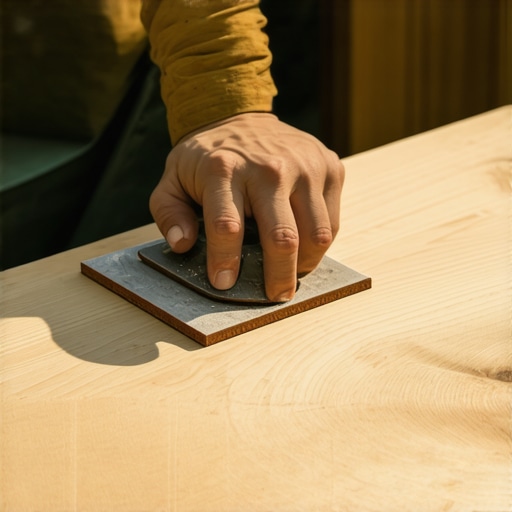
Anyone who’s ever tried to sand red oak hardwood floors knows the struggle. I once spent hours on my knees, tirelessly switching grits, only to end up with a surface that’s uneven, with visible scratches or dull patches that stole the shine I was desperately after. That lightbulb moment hit me then—what if I wasn’t using the right grit sequence? It’s an incredibly common dilemma, and honestly, it can be daunting for even seasoned DIYers. But don’t worry—today, I’m sharing my proven approach to sanding red oak to that perfect mirror finish, based on personal experience and expert tips.
Why Choosing the Correct Grit Sequence Makes All the Difference
Could a Simple Grit Switch Transform Your Floor?
When I first started refinishing my floors, I naively believed that jumping straight to a high grit for that glossy look was the way to go. Spoiler alert—it’s not. Early on, I made a costly mistake of skipping the intermediate grits, which resulted in a surface teeming with tiny scratches that only became more visible after finishing. That misstep taught me a critical lesson: the grit sequence isn’t just a step in the process; it’s the backbone of a flawless finish.
Interestingly, according to professional flooring experts, a proper grit progression is responsible for removing the scratches of the previous grit, smoothing out the wood fibers, and preparing the surface for finishing. Skipping or rushing this sequence can jeopardize the entire project, leading to uneven sheen and a less durable surface.
If you’ve ever wondered whether all grit steps are equally important, I assure you—they are. Each grit level serves a purpose, and mastering the sequence is what elevates your sanding game from amateur to pro. Ready to ditch the guesswork and learn the exact sequence that transformed my floors? Stay tuned—next, we’ll go through the step-by-step process to achieve that mirror-like sheen on your red oak flooring, with tips that even seasoned pros swear by.
**Have you faced difficulties in achieving a smooth, mirror finish on your hardwood floors?** If so, you’re not alone. The good news is, with the right grit sequence, your floors will not only look stunning but also stand the test of time. For more insights on maintaining that pristine shine, don’t forget to check out hardwood floor care secrets. Now, let’s dive into the exact grit progression that made all the difference in my project.
Establish a Consistent Grit Progression
Start by choosing the right initial grit depending on the condition of your surface—typically 60 or 80 grit for heavily scratched or stained floors. For my recent project, I initially used 80 grit discs on my orbital sander to remove deep scratches, which worked efficiently and prevented further damage. Moving systematically from coarse to fine grits ensures each layer smooths out the scratches left by the previous one, akin to sanding a piece of wood to remove rough patches gradually.
Follow a Strict Sanding Pattern
Maintain uniform sanding strokes—always overlap each pass by about half the disc or pad width. I remember my first attempt skipping this detail; my floor had uneven patches that required re-sanding. By following a consistent back-and-forth motion, parallel to the grain, I achieved a uniform surface. Think of it like brushing your teeth—consistent overlapping prevents missed spots and ensures even wear.
Progress Sequentially Without Skipping Grits
Transition gradually—from 80 grit to 120, then 180, and finally 220 grit—allowing each abrasive to smooth the imperfections of the previous one. Skipping intermediate grits is like trying to polish a rough stone directly—your finish will be speckled with scratches. During my last refinement, I meticulously moved through each grit, which resulted in a mirror-like shine that made all my effort worthwhile.
Use Proper Sanding Equipment and Techniques
Equip your sander with quality sanding discs matching your chosen grit sequence. For hand-edging and corners, use hand-held pads with corresponding grits, applying steady pressure—too much can gouge the wood, too little won’t effectively remove scratches. I once pressed too hard against a corner, creating an uneven spot that I had to go back and re-sand, demonstrating the importance of controlled, even pressure throughout the process.
Clean Between Grit Changes
Remove all dust after each sanding stage using a vacuum and tack cloth. Dust particles trapped in the abrasive can scratch the wood surface, undermining your efforts. During my project, pausing to clean the surface extensively before moving to finer grits preserved the clarity of my finish and prevented unnecessary scratches.
Test and Adjust as Needed
Regularly inspect the surface under lighting to identify any scratches or dull patches. Don’t hesitate to re-sand lightly if imperfections are visible, especially before moving to finer grits. When I noticed slight scratches after 120 grit, I re-sanded with 120 grit to ensure a perfectly smooth base for the final polish. This step ensures your final finish will be flawless and long-lasting.
Applying these precise grit transitions and techniques transforms rough, scratched surfaces into smooth, reflective floors. For expert insights on maintaining this finish, visit hardwood floor care secrets. The key lies in patience and consistency—every pass matters for that mirror shine.
When it comes to installing tile and hardwood floors, many DIY enthusiasts and even some professionals fall victim to misconceptions that can sabotage their projects. One of the most pervasive myths is that a perfectly level subfloor isn’t crucial for a successful installation. In reality, ignoring proper floor leveling can lead to cracked tiles, uneven surfaces, and long-term durability issues. According to experts, such as those highlighted in the ultimate guide to floor leveling, achieving a flawless finish starts well beneath the surface. Skimping on this step often results in repairing or replacing tiles prematurely, costing more in the long run.
Many assume that the evenly spaced grout lines are the only aesthetic concern, but advanced flooring work requires meticulous attention to substrate preparation. For example, uneven surfaces can cause grout gaps to widen or crack over time. This isn’t just a visual problem; it compromises the integrity of your entire flooring system. Investing in proper subfloor preparation ensures that your efforts will yield a lasting, stunning result.
Another widespread mistake is underestimating the importance of the right adhesive or thinset for your specific tile material. For instance, using standard thinset on large-format porcelain tiles can lead to insufficient bonding and future cracks. The key is to choose an adhesive formulation designed for your tile type and application environment. Expert advice from the best adhesive choices emphasizes that this seemingly minor decision has major repercussions.
A nuanced mistake that often trips up even seasoned installers involves the sequencing of operations—such as grout sealing and cleaning. Using harsh chemicals too early can loosen grout joints, undermining the entire installation. Similarly, neglecting to clean excess grout thoroughly before it sets can cause staining and surface hazing that is difficult to remove. These oversights highlight the importance of following proven protocols, like those in installation pointers, which detail optimal timing for each step.
Lastly, a critical but often overlooked detail is the environmental conditions during installation. High humidity levels and temperature fluctuations can impair adhesive curing and affect the bonding process. Proper climate control and ventilation are essential to ensure your tile or hardwood adheres correctly and remains stable over time. Experts recommend monitoring these factors diligently, especially for large or complex projects.
Have you ever fallen into this trap? Let me know in the comments. Navigating these hidden nuances is what separates a good installation from a professional masterpiece. For more insights on perfecting your flooring projects, check out expert tips for flooring combinations and keep elevating your skills.
Keeping Your Floors in Prime Condition
Once you’ve achieved that stunning, mirror-like finish on your hardwood or tile surfaces, the next challenge is ensuring they stay beautiful over the years. Proper maintenance isn’t just about routine cleaning; it requires selecting the right tools and adopting effective methods tailored specifically to your flooring type.
For hardwood floors, I personally swear by a microfiber mop with a pivoting head and a damp cloth, such as the Bona Microfiber Dusting Pad. It’s gentle yet effective at trapping dust without scratching the surface. I avoid harsh chemicals and instead opt for pH-neutral cleaners like Bona Hardwood Floor Cleaner, which preserves the finish and prevents dullness. Regular cleaning helps prevent debris from scratching or indenting the finish over time.
Tile floors demand a different approach. I recommend a high-quality grout brush and a steam cleaner for deep cleaning grout lines—this keeps mold and grime at bay and restores the surface’s original polish. For daily upkeep, a microfiber mop combined with a mild detergent suitable for tiles works wonders. Avoid using abrasive scrubbers or overly aggressive chemicals, as they can erode grout and damage tiles.
Essential Tools I Rely On for Lasting Results
One tool I consistently recommend is a wet-dry vacuum designed for delicate flooring. It efficiently picks up dust, hair, and spilled liquids without causing scratches. Investing in a commercial-grade vacuum with adjustable settings ensures you’ll remove debris without compromising your finish. Additionally, maintaining your tools—such as regularly replacing sander pads or cleaning your brushes—prevents unnecessary damage and helps sustain your project’s flawless results.
Looking toward the future, I believe floor maintenance will increasingly incorporate smart technology. Imagine sensors embedded in floors that alert you to moisture, scratches, or wear—allowing proactive care. While such tech isn’t mainstream yet, adopting current high-quality tools now lays a solid foundation for integrating future innovations seamlessly.
How do I keep my flooring looking pristine over time?
Maintaining your floors involves a combination of proper cleaning, timely repairs, and using specialized tools designed for your material. Regularly inspecting your surface for scratches, wear, or moisture issues enables swift action—preventing minor problems from escalating. For example, applying a scratch-repair pen suitable for hardwood can hide minor imperfections before they become more visible, keeping your surface looking fresh and polished for years. Explore our hardwood floor care secrets to discover more expert tips that extend the lifespan of your flooring investments.
Don’t hesitate to invest in the best tools; a high-quality microfiber mop or steam cleaner can make routine maintenance faster and more effective. Remember, the key to long-lasting beauty is consistency combined with the right equipment. Why not try upgrading your cleaning tools today and see the difference it makes in preserving that perfect finish? Implementing these strategies will ensure your floors remain stunning, whether in a cozy living room or a busy kitchen.
And as technology advances, keep an eye on innovations that will revolutionize long-term flooring care. For now, though, focusing on effective tools and proper maintenance routines is your best bet for enduring beauty and durability.
Lessons from the Trenches of Floor Refinishing
One of the hardest lessons I learned was that patience and attention to detail matter more than rushing through each step. Early on, I believed that skipping intermediate grits would save time, but it only led to more sanding and rework later. The importance of following a meticulous grit progression became crystal clear when I finally achieved that mirror finish—proof that quality work pays off.
Additionally, I realized that tools are as crucial as technique. Investing in a high-quality orbital sander and maintaining it properly made a noticeable difference in the smoothness of my floors. Cutting corners with cheap equipment almost always resulted in uneven surfaces and scratches that marred the final look.
Perhaps most surprisingly, consistent cleaning between grit changes was a game-changer. Dust and debris trapped in the abrasive layer can sabotage your best efforts, leading to dull patches or scratches that require extra work. Learning to embrace thorough cleaning routines is one of the simplest yet most overlooked secrets to perfection.
Tools and Resources That Elevated My Craft
For anyone serious about refinishing hardwood floors, I recommend investing in a top-tier vacuum like the full-spectrum vacuum that handles fine dust without scratching surfaces. Additionally, the hardwood floor care guide provided invaluable insights into maintaining that mirror shine over time. For technical reference, I’ve found the ultimate floor leveling guide essential for ensuring a flawlessly flat subfloor before starting. These resources collectively made my DIY project resemble a professional job and saved me hours of frustration.
Your Next Step Toward Flawless Floors
Achieving a beautiful finish on red oak flooring isn’t just about following steps—it’s about embracing the process and understanding the subtle nuances that turn good results into exceptional ones. I encourage you to approach your project with patience, invest in quality tools, and leverage the right resources. Remember, every careful stroke and meticulous check brings you closer to that stunning, mirror-like surface you envision.
Have you ever struggled with getting your hardwood floors to look their best? Share your experiences below and let’s learn from each other. For more tips on perfecting your flooring projects, check out innovative tile designs and stay inspired to elevate your space!
iegt