It was a moment I won’t forget. As I stepped onto my newly installed hardwood stairs, I noticed a tiny gap between the stair nose and the riser. At first, I thought it was negligible—just a minor flaw in the finish. But as days went by, that gap became more noticeable, and I felt a pang of frustration. I realized that if left unchecked, these gaps could lead to tripping hazards, accumulation of debris, and even potential damage to my beautiful floors.
Why Fixing Stair Nose Gaps Matters More Than You Think
Gaps between stair noses and the rest of your hardwood flooring aren’t just a cosmetic issue—they can compromise safety, durability, and the overall aesthetic of your home. Especially in 2026 projects, where homeowners are aiming for both style and longevity, addressing these gaps has become crucial. Missing or poorly fitted stair noses can lead to squeaks, looseness, and uneven wear, which may require costly repairs down the line.
Noticing and fixing these gaps promptly can prevent bigger problems later. Plus, a well-maintained staircase enhances your home’s value and appeal. From experience, I can tell you that ignoring small imperfections can snowball into significant headaches, turning a straightforward fix into a major renovation.
Interestingly, according to experts at [Tile Trend Shop](https://tiletrendshop.com/transform-your-living-area-with-elegant-tile-designs), paying attention to detail during installation ensures your floors last longer and look better. This holds true for stair noses as well.
Are you tired of uneven, gap-filled stairs that ruin the sleek look you’ve envisioned? Or worse, do these gaps cause squeaking or looseness that makes you hesitant to use your stairs confidently? If yes, you’re not alone. Many homeowners face this challenge, but the good news is, fixing stair nose gaps is manageable with the right tools and tips.
In the upcoming sections, I’ll walk you through practical steps to restore your staircase’s beauty and safety. Whether you’re a DIY enthusiast or just looking to understand the process better, you’ll find straightforward advice to get your stairs looking flawless again. Ready to delve into the solutions? Let’s begin.
Assessing the Gap and Preparing Tools
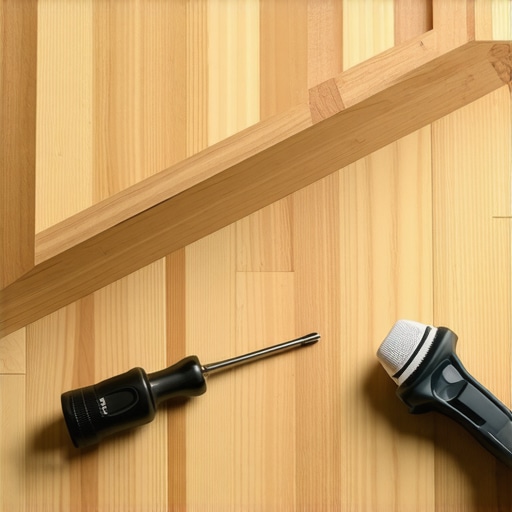
Start by examining the size and cause of the gap to determine the best repair method. Use a flashlight to inspect under the stair nose for debris or movement. Gather tools such as a chisel, putty knife, wood filler, clamps, a saw, and a hammer. Wearing safety glasses and a dust mask is essential. I recall the first time I undertook this; I underestimated the amount of dust and had to pause for cleanup, but preparation saved me time in the long run.
Removing and Adjusting the Stair Nose
If the gap is due to shifting or poor fitting, carefully loosen the stair nose with a pry bar or chisel. Think of this process like gently peeling apart two stuck tiles without cracking them. Tap gently to avoid damage, and remove the stair nose. When reattaching, ensure the stair nose fits snugly against the riser and tread. Use a level to confirm alignment, pulling or pushing the nose as needed while holding it in place.
Leveling Uneven Surfaces
In cases where gaps result from uneven subfloors, leveling is critical. Mix a high-quality floor leveler following the manufacturer’s instructions. Pour the leveler onto the subfloor, using a trowel to spread it evenly. Use a straight edge or a laser level to confirm surface flatness. I once used a long straight board to squeegee the leveling compound, reducing air pockets and ensuring consistency, which made reinstallation smoother.
Filling Gaps with Appropriate Materials
For small gaps, wood filler is effective. Choose a color matching your hardwood for an invisible repair. Apply the filler with a putty knife, pressing it into the gap. Smooth the surface and wipe away excess before it hardens. For larger gaps, consider flexible epoxy or specialized gap fillers designed for flooring. These materials accommodate slight movement and prevent cracking. Always let the filler cure fully before sanding or walking on the stairs.
Screwing or Nailing for Secure Fit
If the stair nose is loose, secure it using finishing nails or screws. Drill pilot holes through the nose into the riser or tread, avoiding existing nails or wiring. Use a nail set or a ratchet screwdriver for precise placement. Countersink the fasteners and fill the holes with matching wood putty for a seamless look. I remember balancing on a ladder, carefully pinning the nose, which prevented wobbling and squeaks afterward.
Sealing and Finishing Touches
Achieve a uniform appearance by sanding the filled areas gently with fine-grit sandpaper. Wipe away dust with a damp cloth. Apply a matching finish—stain or sealant—to blend repairs with existing flooring. This step preserves the aesthetic and protects against moisture and wear. For best results, consult detailed guides such as installing flooring tips that emphasize proper finishing techniques. Remember, patience during finishing ensures a professional look that lasts.
Many homeowners believe that following basic instructions guarantees perfect flooring, but in my experience, this oversimplification often leads to costly mistakes. One prevalent misconception is that all subfloors are equally prepared for tile or hardwood installation. In reality, subfloor conditions vary widely, and failing to assess moisture levels or flatness can cause long-term issues like buckling or cracking. Prioritizing thorough subfloor evaluation with proper moisture testing and levelness checks is essential—skipping these steps is a trap that many overlook, leading to preventable failures. Additionally, some assume that choosing high-quality materials offsets poor installation practices; however, even the best materials will fail prematurely if the foundation isn’t set correctly. An advanced issue is misunderstanding floor leveling techniques: many rely solely on self-leveling compounds without addressing underlying structural problems, which can trap moisture or create weak spots. This oversight can result in uneven surfaces that compromise the entire flooring system. As highlighted by flooring expert [Tile Trend Shop](https://tiletrendshop.com/the-ultimate-guide-to-floor-leveling-for-a-perfect-finish), proper subfloor prep and precise leveling are crucial for professional results. Have you ever fallen into this trap? Let me know in the comments.
What Are the Risks of Overlooking Detailed Subfloor Assessment?
Overlooking the nuance of subfloor conditions can seem harmless initially, but it often leads to uneven floors, squeaks, and even failure of your flooring over time. For example, undetected moisture pockets or slight dips can cause tiles to crack or hardwood to warp. Measuring tools like laser levels and moisture meters, which many skip, are invaluable for early detection. Moreover, many underestimate the importance of proper insulation and expansion gaps—details that prevent movement and reduce stress on joints. Skipping these considerations is a common mistake that costs more later, both financially and in effort. To avoid this, consult comprehensive guides such as [the ultimate guide to floor leveling](https://tiletrendshop.com/the-ultimate-guide-to-floor-leveling-for-a-perfect-finish), which emphasize meticulous preparation. Remember, the devil is in the details—taking the time for precise preparation pays off in flawless, durable flooring. For tailored advice, don’t hesitate to reach out via [contact us](https://tiletrendshop.com/contact-us).
Keeping Your Floors in Top Shape with the Right Tools
Maintaining the quality and longevity of your tile, flooring, or hardwood installation requires more than just care—it hinges on having the right equipment. Over the years, I’ve fine-tuned my toolkit to ensure precise, efficient, and durable results. One tool I swear by is the laser level; unlike traditional spirit levels, a laser level projects a continuous line across surfaces, making it easier to spot unevenness and achieve perfectly flat floors. I personally use the Bosch GLL30 because of its accuracy and user-friendly operation, which significantly reduces leveling errors and saves time during installation or repairs.
For assessing subfloor flatness, a dedicated floor leveler gauge or a 3-meter straightedge coupled with a high-precision feeler gauge allows me to detect dips or bumps as subtle as 1/16 inch. Ensuring subfloor uniformity is vital. If you’re working on large-format tiles or wide planks, small imperfections quickly become visible, and they can compromise the entire project. Following expert advice from this detailed guide, I always double-check the subfloor before proceeding, preventing future issues like cracking or hollow tiles.
In my toolbox, a powerful, dustless hardwood sander is indispensable. Not only does it make the refinishing process cleaner, but it also ensures a smooth, even surface fit for sealing and finishing. The Festool RTS 400 EQ has become a favorite due to its adjustable orbital movement and dust extraction system, which helps maintain a tidy workspace and prolongs equipment lifespan. Remember, neglecting proper prep leads to problems down the line; investing in quality tools pays off.
For quick and reliable repairs such as filling gaps or loose tiles, I recommend using a high-quality, fast-curing epoxy filler specifically designed for flooring. Unlike standard wood putty, epoxy resists movement and moisture, perpetually preserving the integrity of your floors. As highlighted in this expert resource, proper mixture ratios and application techniques are critical to prevent future peeling or cracking.
How do I maintain these tools over time?
Consistent maintenance involves regular cleaning, proper storage, and periodic calibration. For laser levels, keeping lenses free of dust and scratches is essential—use a soft cloth and avoid dropping the device. Sanders benefit from cleaning filters and replacing consumables like pads and brushes as recommended by manufacturers. Epoxy Filler and other adhesives should be stored in a cool, dry place to prevent curing issues or contamination. Following these practices ensures your tools stay accurate and effective for years to come. As the industry progresses, I predict smart, digital tools incorporating IoT connectivity will become standard, offering real-time diagnostics to optimize installation quality. Embracing advanced equipment today sets the foundation for seamless, durable flooring in the future. If you’re ready to elevate your flooring projects, start by upgrading your leveling and assessment tools—your floors will thank you.Throughout this journey of fixing my hardwood stairs, I discovered that even the smallest gaps can have lasting impacts on safety, aesthetics, and longevity. One of the most valuable lessons I learned was the importance of meticulous preparation—skipping steps like subfloor assessment or subfloor leveling can lead to frustration and costly repairs down the line. Embracing patience during sealing, finishing, and fine-tuning ensures a professional look that endures. Additionally, investing in quality tools and materials makes all the difference, turning a daunting project into a rewarding experience. My experience has shown me that attention to detail and a willingness to learn from minor mistakes are vital to achieving flawless, durable flooring—truths I wish I had grasped sooner.