Ever had that sinking feeling when you step onto your freshly installed tile floor, only to be greeted by a hollow, echoing sound beneath your feet? I remember the first time I encountered this issue—my excitement about a new kitchen renovation was quickly replaced by a nagging noise that just wouldn’t go away. It was as if the floor had a secret of its own, whispering doubts about my craftsmanship every time I walked across it.
Why Hollow Tile Sounds Are More Than Just Annoying
This experience taught me something valuable: squeaky, hollow tiles aren’t just an annoyance—they can indicate underlying problems with slab preparation and subfloor stability. Left unaddressed, these issues could lead to more serious damage and costly repairs down the line. It’s a common frustration among DIY enthusiasts and professionals alike, especially when tackling large projects in 2026, where new materials and installation techniques have added layers of complexity. According to experts, improper slab prep can significantly impact the longevity of your flooring, with some studies indicating that up to 30% of install failures are linked directly to subfloor preparation mistakes (more here).
What We’ll Cover Today
If you’re tired of the unsettling echo of hollow tiles or worried about your slab’s stability, you’re in the right place. I’ll share five proven hacks that I swear by for slab prep in 2026—techniques that transformed my installation process and saved me from future headaches. From leveling tricky floors to sealing cracks, these tips combine my personal experience with industry best practices. By the end, you’ll be ready to tackle your own project with confidence, ensuring your floor remains silent and solid for years to come.
Is Proper Slab Prep Overhyped?
Admittedly, I once underestimated the importance of meticulous slab prep. Early on, I thought a quick skim of leveling compound was enough—mistake number one! That oversight led to uneven tiles and that dreaded hollow sound. Believe me, taking the extra time for proper prep makes all the difference. If you’re skeptical, I encourage you to weigh the risks of shortcuts against the long-term benefits of thorough preparation. Curious to see how I improved? Check out these expert slab leveling strategies.
Assess the Subfloor Before Starting
First, evaluate whether your subfloor is level and stable. Use a long spirit level or laser level to spot high and low spots. In my experience, skipping this step often leads to uneven tiles and hollow sounds later. I once ignored the high spots in my basement, which resulted in tiles cracking prematurely. To correctly identify issues, mark problem areas with chalk for targeted fixes. For more detailed testing methods, visit these expert tools.
Prepare the Subfloor for a Flawless Finish
Clean and Dry the Surface
Thoroughly sweep and vacuum debris, dust, and loose material. Moisture can be a hidden enemy that causes adhesion problems, so ensure the surface is dry. In my own project, I used a moisture meter to confirm low humidity levels, preventing future failures. Moisture issues are common culprits behind hollow tiles and are documented in this assessment guide.
Level the Surface Precisely
If uneven, apply a high-quality self-leveling compound, following the manufacturer’s mixing instructions meticulously. Remember, the key is to pour gradually and work quickly before it sets. I once rushed a pour and ended up with air bubbles—similarly affecting tile adhesion. To enhance results, consider mixing your self-leveler with a colorant to monitor even distribution. For step-by-step mixing tips, check this detailed tutorial.
Address Subfloor Imperfections
Fill Cracks and Holes
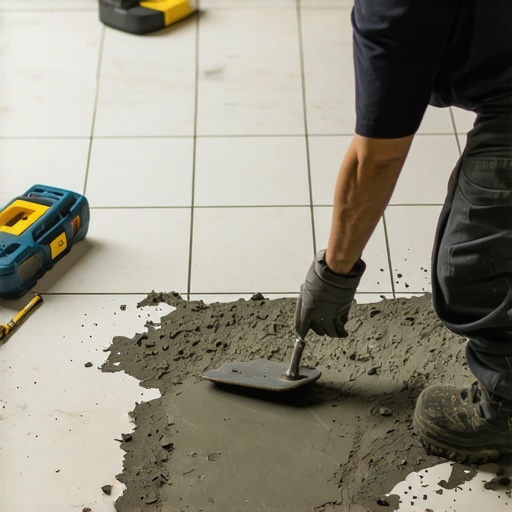
I always use a durable patching compound for cracks or gouges; in one instance, I sealed a long crack in the concrete slab that was causing tiles to loosen. Wait for the patch to cure before proceeding, as rushing this step compromises the entire installation. Use a trowel for precise application and feather the edges for seamless blends. Proper sealing prevents moisture intrusion and structural movement, which can lead to hollow tiles.
Stiffen Weak Areas
In weak or bouncy sections, install a reinforcing layer like oriented strand board (OSB) or cement backer board with fasteners. I recommend screwing down these layers in a crisscross pattern for maximum stability. Avoid over-tightening to prevent cracking. Strengthening the substrate here is analogous to giving a wobbly table a solid foundation—it prevents future movement and tile failure. For reinforcement options, see this expert advice.
Seal and Protect Your Prepared Surface
Apply a primer compatible with your tile adhesive before laying tiles. This step ensures better bonding, especially if moisture or dust levels are high. During my last project, using the right primer reduced hollow sounds and prevented future separations. Proper sealing also cushions the substrate, reducing stress points that cause tiles to lift or sound hollow over time. For recommended primers and application tips, visit this resource.
Final Tip: Double-Check Everything
Before you commit to tiling, re-verify flatness and moisture levels. Running a second check after your prep may reveal overlooked issues, saving you from costly fixes later. Trust me, a few extra minutes now can save weeks of headaches adapting to a flawed subfloor. For comprehensive floor leveling techniques, see this complete guide.
Many homeowners and even some professionals often fall prey to seemingly small errors that can compromise an entire flooring project. While the basics of tile and hardwood installation are well-known—like ensuring a flat subfloor and proper sealing—the devil is in the details. One widespread myth is that measuring and cutting accurately is enough; however, neglecting environmental factors such as humidity and temperature during installation can lead to long-term issues like cupping or cracking. For instance, failing to acclimate hardwood properly can cause it to expand or contract after installation, resulting in gaps or buckling, which many underestimate. According to industry experts, failing to consider the subfloor’s porosity and moisture content is a primary cause of tile lippage and hollow-sounding floors, despite what DIY guides often suggest. Additionally, many assume that employing the latest materials guarantees durability, but without understanding the nuanced interaction between adhesive types and subfloor conditions, even premium products can fail prematurely. An often-overlooked aspect is the importance of proper joint placement and expansion gaps, which are critical for accommodating natural material movement. Not planning for these can lead to structural stresses and aesthetic issues over time. This oversight can be costly, yet it’s surprisingly common among projects that rush through the planning stage. To avoid these pitfalls, investing time in comprehensive site assessment and adhering to best practices can make a substantial difference. For advanced insights, consulting detailed resources such as this comprehensive guide can provide the edge you need. Remember, the nuances hidden in subfloor prep, material acclimation, and environmental control are what separate a professional-looking, long-lasting floor from a project plagued with issues. Have you ever fallen into this trap? Let me know in the comments and share your experiences!
Achieving beautiful, durable floors doesn’t end with a flawless installation—proper maintenance and the right tools are key to keeping your tile and hardwood floors in top condition over time. In my experience, investing in specialized equipment and adopting routine care practices can significantly extend the lifespan of your flooring, saving you money and stress in the long run.
Reliable Tools I Swear By for Flooring upkeep
First, I always recommend a high-quality microfiber mop combined with a gentle pH-neutral cleaner, such as those available from professional-grade brands. This combo effectively lifts dust and debris without scratching the surface, which is crucial for hardwood and tile longevity. For more stubborn dirt, I turn to a grout brush with stiff bristles to thoroughly clean grout lines—neglecting these areas can lead to discoloration and mold buildup. Additionally, I keep a moisture meter on hand to detect hidden dampness beneath tiles or hardwood, as moisture is a silent killer that can cause warping or mold if left unchecked. Using these tools regularly ensures your floors stay pristine and structurally sound.
When it comes to floor leveling and ensuring consistent adhesion, I rely on a laser level to identify uneven sections that might lead to cracks or hollow sounds down the line. For surface preparation, an orbital sander with fine-grit sandpaper helps smooth out minor imperfections before refinishing hardwoods, preventing future issues like splintering. If you’re planning to seal or recoat the surface, a high-quality applicator pad or roller simplifies even distribution, providing a professional finish every time. Incorporating these tools into routine maintenance keeps the floors looking great and functional longer.
Future Trends in Floor Maintenance Technology
Looking ahead, I predict an increasing integration of smart sensors and IoT technology into flooring care. Imagine floor mats equipped with moisture sensors that alert you instantly to leaks or dampness, or self-cleaning surface coatings that actively repel dirt and stains. As the DIY market grows and the demand for sustainability rises, expect more eco-friendly, tech-driven solutions to become standard in long-term flooring management.
How do I maintain hardwood and tile floors as they age?
Consistent care is vital. Regularly dust and sweep to prevent grit from scratching surfaces. Use gentle cleaning products suitable for your specific flooring type and avoid excessive moisture, which can cause swelling or mold. Periodic buffing and refinishing will restore shine and smoothness, especially for hardwoods—check out these tips for expert advice. Additionally, consider applying protective pads on furniture legs and area rugs in high-traffic zones to minimize wear. Remember, a proactive maintenance routine not only preserves aesthetics but also maintains the structural integrity of your floors for years to come.
Don’t skip inspecting your floors periodically with a moisture meter or laser level—catching issues early makes repairs simpler and more effective. Try integrating a routine that includes these precise tools, and you’ll be amazed at how much longer your floors stay beautiful and functional. For detailed methods on floor leveling and refinishing, see these expert strategies.
Reflecting on my journey through countless flooring projects, I’ve realized that the most profound lessons come from unexpected challenges. One of the toughest hurdles was understanding why seemingly minor oversights in slab prep could spell disaster years down the line. These experiences taught me that mastering floor installation isn’t just about tools and materials—it’s about cultivating a meticulous mindset that values preparation, patience, and continuous learning.
What I Wish I Knew About Floor Layers That Could Save You Thousands
- It’s the subtle imperfections that cause big problems: A tiny crack or uneven patch in the slab can lead to tile lippage or hollow sounds later. Paying close attention to detail during assessment can prevent this.
- Moisture matters more than you think: Skipping moisture testing for concrete or wood subfloors can result in mold, warping, or delamination. Investing in a good moisture meter has saved me from costly repairs.
- Don’t underestimate environmental factors: Temperature and humidity fluctuations affect material stability. Allowing materials to acclimate properly can make or break your project’s longevity.
- Reinforce weak spots before tiling: Strengthening bouncy or fragile areas with additional supports ensures long-term durability, reducing the chance of fractures or hollow tiles.
- Precision over speed always pays off: Rushing the leveling process or neglecting joint placements may save time initially but lead to significant issues down the road. Prioritizing quality results fosters peace of mind and exceptional aesthetics.
Tools and Resources I Trust for Flooring Success
- Expert-level leveling tools: A laser level combined with a quality straightedge helps me achieve perfect flatness, which is foundational for a lasting installation. I rely on these precision tools for consistent results.
- Moisture testing devices: A reliable moisture meter is essential. It gives real-time data, ensuring your subfloor is adequately prepared. I recommend this dependable brand.
- Thorough surface preparation guides: Guidance from industry experts, like these instructional articles, helped me refine my techniques and avoid pitfalls.
- Reinforcement materials: Backer boards and quality patches are worth the investment, preventing future movement. For detailed reinforcement strategies, see these expert tips.
Embrace the Future: Elevate Your Flooring Skills
As technology advances, so do our opportunities to perfect home flooring projects. I foresee smarter moisture sensors and self-leveling systems becoming standard, making installation more forgiving and precise. Staying updated with evolving techniques and tools empowers you to create beautiful, enduring floors that stand the test of time and trends. Remember, the journey toward flawless floors is ongoing—every project is a chance to learn, adapt, and excel.
What’s Your Next Step? Your Floors Deserve the Best
Achieving excellence in tile and hardwood installation starts with the right knowledge and tools. With patience and attention to detail, you can transform your space into a stunning showcase of craftsmanship that endures. I encourage you to approach each project as an opportunity to learn something new—your future self will thank you for it!
Have you ever encountered a hidden issue during slab prep that surprised you? Share your stories below and let’s learn together!