Ever cracked open a tile package only to be met with that unsettling hollow sound when you walk across the surface? I remember the first time I experienced it—my heart sank. The noise was sharp, unsettling, and made me question the entire renovation process. At that moment, I realized that a seemingly minor oversight in prep could turn into a major headache later on. That was my lightbulb moment, and I’ve since learned just how critical proper slab preparation is to avoid these issues.
Why Fixing Hollow Tile Sounds Should Be Your Top Priority in 2026
That hollow sound isn’t just annoying; it hints at underlying problems with your subfloor or slab that can compromise your entire project. If left unaddressed, it can lead to cracking, shifting, and even increased noise over time. Think of it like building a house on shaky foundations—no matter how beautiful the tile, if the base isn’t solid, everything else is at risk. Ensuring your slab is properly prepped not only saves you from future repairs but also guarantees a longer-lasting, more satisfying finish.
Is Fixing Hollow Tile Sounds Actually Worth the Hype?
When I first started out, I’d tell myself, “It’ll be fine—the noise isn’t that bad,” and I’d ignore those telltale signs. Big mistake. I made the classic error of rushing through slab prep, thinking it was just a minor step. But that led to uneven tiles and the dreaded hollow sounds that plagued my space months later. Don’t fall into the same trap. Proper slab prep isn’t just another step; it’s the foundation of a flawless tile installation. Want to avoid the pitfalls I faced? We’ll dive into the top five hacks that will transform your slab prep game in 2026 and keep those hollow sounds at bay.
If you’re interested in preventing common pitfalls, be sure to check out [this guide on mastering floor leveling](https://tiletrendshop.com/the-ultimate-guide-to-floor-leveling-for-a-perfect-finish), which covers essential techniques to keep your subfloor flat and ready for tile. Ready to get hands-on? Let’s explore the first of our five slab prep hacks that will make all the difference.
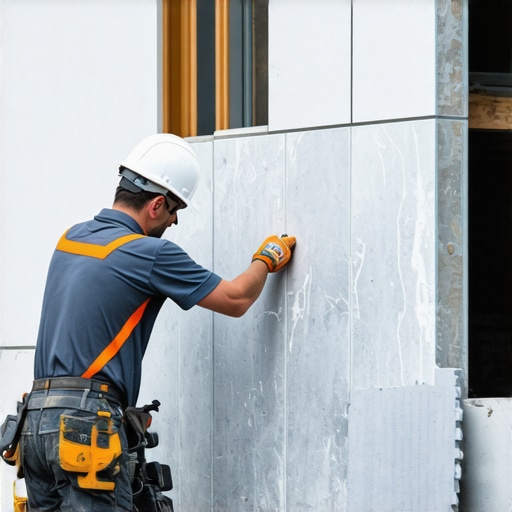
Assess the Subfloor Thoroughly
Before diving into fixes, inspect your subfloor meticulously. Use a straightedge or a long level to identify high and low spots, especially in areas where hollow sounds are prominent. I’ve personally laid out a long chalk line across my bathroom floor to visualize unevenness, which revealed a significant hump I hadn’t noticed before. Addressing these irregularities early prevents a domino effect of issues later on.
Utilize a Cost-Effective Leveling System
To tackle uneven slabs, employ a liquid self-leveling compound. Make sure the slab is moisture-free and clean. Mix the leveling compound as per manufacturer instructions, and pour it in low spots, spreading it with a gauge rake. For example, I poured a batch into a ½-inch low zone and gently guided it with a float, which smoothed out within minutes. This step ensures your surface is flat, reducing the risk of hollow tiles or cracks.
Prep the Surface Adequately
Proper surface prep is crucial. Remove any debris, grease, or old adhesive. If your subfloor is porous, apply a primer to improve adhesion of the leveling compound or new flooring. I used a concrete etcher to scrub away efflorescence, which, if overlooked, could cause future adhesion failures.
Secure Loose or Bouncy Sections
Loose subfloor sections can lead to hollow sounds and instability. Reinforce these areas by screwing down loose planks, using appropriate fasteners for your material. In my experience, placing screws every 8 inches across a bouncy plywood section stabilized the floor significantly, preventing future movement that causes tile cracking.
Implement Precise Floor Leveling Techniques
Employ professional-grade tools like laser levels or rotational lasers for pinpoint accuracy. These tools help detect subtle deviations that visual inspection might miss. I borrowed a laser from a neighbor and found a ¼-inch dip over a corner I had previously assumed was flat, allowing me to adjust the self-leveler more precisely.
Apply Targeted Subfloor Reinforcements
If the slab has deep dips or waves, consider adding dimensional lumber or metal shims underneath to support those zones. Installing a thin layer of underlayment with a built-in reinforcement mesh can also distribute loads evenly and eliminate bounce, especially beneficial under large-format tiles. I installed a fiber-reinforced cement board over my uneven sections, which provided a stable base for tile installation.
Verify and Confirm Flatness
After corrections, reassess with a long straightedge or laser level. Ensure no new high or low spots have developed. Conduct a test with a loose tile placed across the surface to listen for hollow sounds. If they persist, repeat the leveling steps before proceeding with setting the tiles.
Consistent surface preparation and precise leveling are the backbone of preventing hollow tiles and slab movement issues. Cutting corners during prep inevitably results in more headaches down the line. For more detailed techniques, check out this guide on precise floor leveling techniques, which expands on professional methods to perfect your slab surface.
Finalize the Surface
Once your slabs are thoroughly leveled, ensure the surface is dry and free of dust. Apply a primer if recommended, and proceed with your chosen flooring material, whether it’s tile, hardwood, or vinyl. Properly leveled and stabilized slabs will significantly reduce the chances of hollow sounds and tile failures, giving you long-lasting, beautiful results.
Many DIY enthusiasts and even some professionals operate under the illusion that floor leveling and installation are straightforward tasks primarily relying on simple tools and basic techniques. However, what most people overlook is the nuanced complexity involved in achieving a truly flawless finish. A prevalent myth is that using self-leveling compounds alone can fix any unevenness, but in reality, improper preparation, timing, and understanding of material properties can lead to future issues such as cracks or hollows. For instance, relying solely on self-levelers without assessing moisture levels or substrate stability is a common mistake that can compromise the entire project. Moreover, many assume that once the substrate appears visually flat, it’s adequately prepared, ignoring the fact that minor undetectable dips can cause long-term failures in tile or hardwood floors. The key is integrating thorough subfloor assessments with advanced techniques, like laser leveling, to ensure precision. Professional insights warn that neglecting these details often results in costly repairs down the line. For example, an administrator of an expert flooring forum explained that “the hidden subtleties of substrate moisture and structural integrity often escape casual inspection but are critical for lasting results.” This underscores the importance of understanding the intricate factors at play during installation. Don’t fall into the trap of oversimplification; instead, master the art of meticulous prep. If you’re curious about how to elevate your flooring projects, explore this guide on *[precise floor leveling techniques](https://tiletrendshop.com/precise-floor-leveling-techniques-to-achieve-flawless-surfaces)*, which offers advanced tips for perfection. Remember, patience and attention to detail are your best allies in preventing future headaches. Have you ever fallen into this trap? Let me know in the comments.
Invest in Quality Tools for Perfect Results
When it comes to maintaining your floors and ensuring long-lasting durability, high-quality tools are indispensable. Personally, I rely on a professional-grade laser level to detect subtle irregularities during slab prep, which has dramatically reduced tile hollow sounds and cracks over time. A reliable laser level, like the DeWalt DW089LG, offers precise, easy-to-read measurements that help maintain flatness across large areas, saving time and reducing guesswork. Additionally, a digital moisture meter is vital for assessing substrate dryness, preventing adhesion failures, especially in hardwood and vinyl installations. I use the MoisturePro for its quick readings and reliability. Combining these tools with a quality straightedge ensures you catch subtle dips and bumps early, making your flooring project smoother and more durable.
Adopt Routine Maintenance to Extend Floor Life
Long-term results depend heavily on ongoing care. Regularly sweeping and damp-mopping your floors removes debris that can cause scratches or abrasive wear, especially for hardwood and luxury vinyl. I recommend using pH-neutral cleaners specifically designed for your flooring type. For hardwood, applying a protective finish every few years with a quality sealant, like the UV-resistant finish, preserves the appearance and prevents UV damage and staining.
Plan for Future Scaling and Repairs
As your space evolves, flooring maintenance should adapt. For instance, if you plan to renovate or expand, modular flooring systems or extra material stocks ensure seamless repairs. Installing extra underlayment or adding a reinforcement layer beneath hardwood or tile can facilitate future upgrades without tearing up existing installations. I personally keep a small batch of matching grout and supplies for quick touch-ups, which can dramatically improve the longevity and appearance of your floors over time. Staying proactive with maintenance and repairs prevents minor issues from escalating into costly fixes, maintaining your aesthetic and structural integrity.
What’s the Best Way to Keep Your Floors Looking New Over the Years?
Adopting a proactive maintenance routine, investing in advanced tools, and planning ahead for scaling are crucial. Regular inspections, like checking for loose tiles or creaky hardwood, help catch problems early. Incorporate preventive measures such as area rugs in high-traffic zones and felt pads on furniture legs to minimize wear. Staying consistent with this approach will ensure your floors remain stunning and functional for years, reducing the need for major renovations. For in-depth guidance on long-term floor care, check out these hardwood floor care secrets and start applying one or two tips today to see immediate benefits.
Feeling confident with your maintenance routine? Try setting up a digital moisture meter session before your next hardwood refinishing project. It’s an advanced step that guarantees optimal adhesion and finish quality, ultimately extending your floors’ lifespan.
Lessons Hidden in the Drywall Dust and Self-Leveler Misses
- I once underestimated the power of a simple moisture test, believing my slab was dry enough. That oversight led to a costly laminate peel and an eye-opening realization about moisture’s sneaky role in flooring success.
- During a rushed job, I skipped thorough surface assessment. The hollow tile sounds that followed taught me that patience in inspection prevents headaches that can last years.
- Relying solely on DIY fixes to correct slab unevenness is seductive but often futile. Walking the line between effort and overconfidence was a pivotal maturing moment in my flooring journey.
- I learned that investing in laser leveling tools didn’t just make my job easier; it transformed my confidence into precision, saving me time and money on corrections later.
- The most invaluable lesson? Good enough is never enough when it comes to slab prep. The small extra step ensures the longevity and beauty of your flooring investment.
Tools and Resources That Changed My Flooring Game
- DeWalt DW089LG Laser Level: This professional-grade laser gave me unparalleled accuracy, allowing me to spot even the tiniest dips and curves, which is critical for flawless tile and hardwood installs. Learn more about floor leveling tools.
- Moisture Pro Meter: Ensuring the slab’s dryness avoided future buckling and peeling issues. My go-to for quick, reliable readings that give peace of mind.
- Professional Tutorials on Precision Leveling Techniques: They opened my eyes to advanced methods that dramatically improve outcomes. I recommend this comprehensive guide.
- Reliable Primer and Self-Leveler Brands: Choosing quality products made a visible difference in adhesion and surface flatness, saving me from future repair calls.
Your Next Step Starts Here
If you’ve experienced the frustration of hollow tiles or uneven surfaces, remember that the key to durable, beautiful floors is meticulous slab preparation. Every step you take now—investing in the right tools, thorough inspections, and patience—sets the foundation for lasting success. Don’t let shortcuts undermine your project’s potential. Start applying these insights today, and turn your flooring ambitions into lasting achievements!
What’s been your biggest challenge with slab prep or flooring installation? Share your story below, and let’s learn from each other’s experiences!