Ever had your beautifully refinished hardwood floor develop ugly discoloration after just a couple of years? I sure have. I spent hours choosing what I thought was the perfect finish—only to find it fading or yellowing prematurely, especially in rooms exposed to sunlight. That lightbulb moment made me realize that not all finishes are created equal, especially when it comes to UV resistance. It’s a common mistake many DIY enthusiasts and professionals make: overlooking the importance of UV-resistant finishes, which can mean the difference between a stunning, long-lasting floor and one that looks tired in no time.
Why UV Resistance Is the Secret Ingredient for Your Hardwood Durability
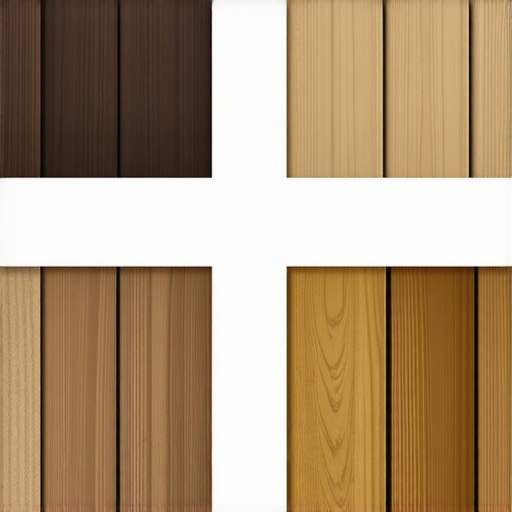
Sunlight is relentless. It creeps through windows and slowly wears down even the most robust finishes. Without proper UV protection, UV rays can cause discoloration, fading, and degradation of the finish, leading to costly refinishing jobs much sooner than expected. As I delved deeper into the topic, I discovered that in 2026, UV-resistant finishes are not just recommended—they’re essential for maintaining the beauty and integrity of hardwood floors in sun-exposed areas.
Did you know that according to a study published in the Journal of Architectural Coatings, UV radiation is one of the primary causes of finish degradation, accounting for over 60% of finish failures in exposed areas? This statistic reinforced my belief that choosing the right finish should be strategic, especially for busy households or homes with lots of natural light.
Are you worried that UV-resistant finishes might be overhyped or that they won’t match your desired look? Well, trust me, I made that mistake early on—assuming all finishes provide equal protection and looking past their UV behavior. That led to an expensive lesson in premature wear and overly frequent refinishing.
In the sections ahead, I’ll walk you through the top 4 UV-resistant finishes for 2026 hardwood projects, sharing my insights, tips, and what to look for when selecting a finish that can truly withstand the test of time. Ready to give your floors the armor they deserve? Let’s start by exploring the first finish on our list.
Prepare Your Subfloor for Success
Start by thoroughly inspecting your subfloor for flatness and moisture. Use a long straightedge to identify dips or humps—similar to checking a wobbly table before laying down a new surface. I once skipped this step, and the resulting tiles cracked within months. To prevent this, apply a moisture meter and a floor leveler where needed, ensuring a solid, level foundation. For detailed techniques, consult this comprehensive guide.
Set a Clear Elevation Plan
Decide the final height of your flooring relative to door frames and transitions. Imagine stacking layers like Lego bricks, where each layer’s height influences the next. I remember measuring multiple times and marking contour lines on the subfloor with chalk—this visual cue kept me on track and prevented unevenness. Use a laser level for precision and double-check measurements periodically, especially at transitions to other rooms.
Accurately Measure and Acclimate Materials
Measure your hardwood or tile to avoid waste and misfit. It’s crucial to let materials acclimate in the environment they’ll be installed in for at least 72 hours. Think of it as letting a new pair of shoes mold to your feet—skipping this step can cause post-installation expansion or contraction. Store materials flat, in the room where they’ll be laid, and keep doors and windows open to balance humidity levels, referencing best practices for acclimation.
Use Proper Tools and Techniques for Installation
Equip yourself with a high-quality Trowel for adhesive, a calibrated spacer system, and a rubber mallet for tiles. When installing, press firmly and evenly—think of stamping dough with a rolling pin—to ensure the adhesive bonds completely and the tiles sit flush. For hardwood, use a flooring nailer and a tapping block to avoid damaging planks. I once used too much adhesive on a corner, causing bubbles; learning to apply only as much as needed saved me hours of correction work. For advanced tips, see this expert tutorial.
Implement Seamless Transitions and Finishing Touches
Ensure joints are tight and consistent with spacers and pulling techniques. Trim excess material carefully, leaving expansion gaps where necessary—think of them as buffer zones for movement, much like joints in a bridge. Seal gaps with matching grout or sealant, avoiding mismatched color or texture that can detract from the overall look. I once left a gap unsealed, which collected dirt and compromised the finish; sealing it promptly prevented future issues. It’s essential to do a final clean and inspect for any uneven spots or loose tiles, then follow up with a proper coating or finish, referencing care tips to preserve your work.
While many believe they grasp the basics of flooring installation, several nuanced misconceptions can lead to costly mistakes. One prevalent myth is that a perfectly leveled subfloor guarantees flawless flooring, but in reality, even small variances can cause issues like tile cracking or hardwood squeaks if not addressed with proper leveling techniques. Failing to recognize the importance of moisture testing before laying floors is another common oversight; overly humid conditions can lead to warping or buckling over time. Advanced installers emphasize the significance of understanding floor expansion gaps—many beginners underestimate these allowances, resulting in buckling or gaps as the material naturally expands and contracts. Moreover, there’s a misconception that all finishes are equally UV resistant; however, some high-gloss finishes are more prone to yellowing under sunlight, emphasizing the importance of choosing the right product for sun-exposed areas. Doing your due diligence by consulting comprehensive guides, like the ultimate guide to installation mistakes, can save you from these pitfalls. An advanced mistake often overlooked is neglecting proper acclimation of hardwood before installation, which can lead to unintended movement and gaps later. For professionals, mastering precise floor leveling is crucial—using laser levels and self-leveling compounds appropriately—and avoiding shortcuts in preparation can make the difference between a sturdy, beautiful floor and one plagued with issues. Remember, understanding these nuances isn’t just for pros; informed DIYers can leverage this knowledge to achieve lasting results. Have you ever fallen into this trap? Let me know in the comments or contact us through our contact page to discuss your project challenges.Maintaining your flooring’s integrity over time requires the right tools, consistent upkeep, and an understanding of long-term care techniques. One of my favorite tools is the laser level, which I use constantly during installation and periodic checks—it’s precise, quick to set up, and essential for ensuring floors stay perfectly flat, preventing issues like tile cracking or squeaky hardwoods. Additionally, a high-quality moisture meter is indispensable; it helps monitor subfloor conditions regularly, especially before refilling or replacing sections, because unseen moisture can lead to warping and buckling later on. I rely on professional-grade self-leveling compounds to address minor unevenness—these products have improved dramatically, featuring faster curing times and better bonding, making repair work more straightforward and less disruptive. To keep floors looking great and functioning well, I follow a routine: periodically clean with pH-neutral solutions, inspect for wear or damage, and reapply protective finishes as recommended. Looking ahead, I predict smart tools like connected moisture sensors and IoT-enabled surface monitors will become standard in flooring maintenance, providing real-time data and alerts to prevent costly mistakes. Regularly calibrating your equipment—using manufacturer guidelines—ensures accurate readings and effective maintenance.
How do I maintain hardwood and tile over time?
Adopting a disciplined maintenance routine that includes cleaning with gentle, approved products, checking for signs of wear, and promptly repairing minor damages extends the lifespan of your floors. For instance, investing in a durable, adjustable flooring roller can help re-seal loose tiles or soft spots without costly professional intervention. Remember, proactive care beats reactive fixes; the time and money saved are well worth the effort. For detailed guidance, I recommend reviewing these expert tips on hardwood and tile maintenance. Ready to elevate your upkeep game? Incorporate a monthly inspection routine and try using an infrared thermometer to spot temperature shifts that hint at underlying moisture issues—this is a game-changer for avoiding long-term damage and ensuring a pristine finish for years to come.
Lessons I Wish I Had Known From the Start
One of the biggest surprises in my flooring projects was realizing that even small mistakes—like neglecting moisture testing or skipping proper acclimation—could lead to costly repairs later. The importance of meticulous preparation became clear only after experiencing the frustration of uneven surfaces and cracks. I learned that investing time in detailed subfloor inspections and understanding the nuances of finish selection, especially regarding UV resistance, can make all the difference in achieving long-lasting beauty.
Another lightbulb moment was discovering how critical proper tool use and technique are. Using a laser level or self-leveling compounds might seem optional at first, but they ensure flawless results and save time. It’s tempting to cut corners, but I found that patience and precision truly pay off, especially when working with large tiles or wide-plank hardwoods susceptible to expansion and contraction.
Finally, I realized that ongoing maintenance and monitoring are part of the installation process itself. Regularly checking humidity levels and caring for finishes with gentle cleaning methods can extend your flooring’s lifespan far beyond initial expectations. Embracing these lessons has helped me transform DIY projects into durable, stunning floors that stand the test of time.
Tools and Resources That Give Me Confidence
My go-to toolkit includes a high-quality laser level, which guarantees flatness during installation and helps spot issues immediately. I also rely on a reputable moisture meter to detect even the slightest presence of moisture that could jeopardize the project. For learning and troubleshooting, I trust this comprehensive guide to floor leveling, which offers step-by-step strategies for achieving perfect surfaces.
When it comes to selecting finishes, I lean on expert tips on hardwood and tile care to maintain elegance and durability over time. These resources have proven invaluable for both DIYers and professionals aiming for results that truly last—especially in sunlit areas where UV resistance is paramount.
For inspiration and ideas, I turn to homeowners and pros sharing their success stories. Learning from others’ experiences can help you avoid common pitfalls and refine your technique, making the entire process more enjoyable and rewarding.
The Momentum to Elevate Your Floors Begins Now
No matter where you are in your flooring adventure, remember that mastery comes with curiosity and persistence. By integrating these insights—focusing on preparation, proper tools, and ongoing maintenance—you set yourself up for exceptional results. Your floors are more than just surfaces; they’re the foundation of your home’s beauty and comfort. Embark on your next project with confidence, knowing you have the knowledge to learn, adapt, and succeed.