I remember the moment clearly—my heart sank as I stepped back to admire the newly installed large format tiles in my client’s kitchen. Instead of a flawless surface, I saw a subtle but persistent crack ripple across one of the slabs. That lightbulb moment taught me a harsh lesson: even the most skilled installer can fall victim to preventable cracks if prep steps aren’t done right. And trust me, waiting until after the cracks appear is the last thing you want.
The High Stakes of Large Format Tiles in 2026
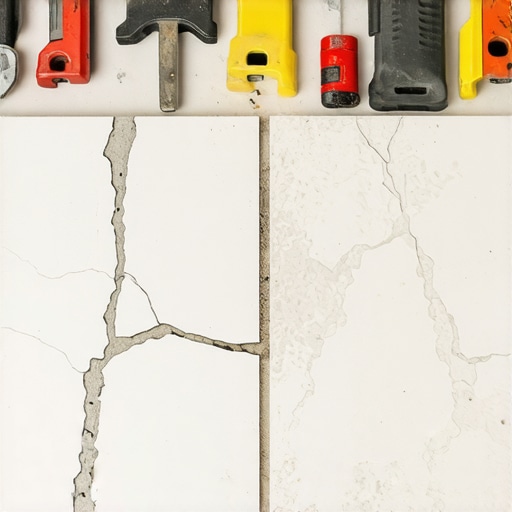
With the rise of 2026’s architectural trends, large format tiles have become more popular than ever. Their dramatic size offers a sleek, modern look—and who doesn’t love fewer grout lines? But here’s the catch: these massive slabs are notorious for cracking if not installed properly. The cracks aren’t just unsightly; they can lead to costly repairs, compromised durability, and a stressful renovation experience. Recent studies even reveal that improper prep is responsible for a significant portion of tile failures, with missteps in slab leveling and subfloor prep topping the list (source).
If you’re about to embark on a large format tile project in 2026, understanding the underlying causes of cracks is essential. I learned this the hard way when I overlooked some critical prep steps early in my career. That mistake cemented my commitment to mastering slab prep secrets, ensuring every installation I do afterward is durable and beautiful.
Ever faced a crack right after laying your tiles? You’re not alone. Let’s delve into how to prevent this headache with proven slab prep techniques that truly work.
Start with Accurate Floor Assessment
Begin by thoroughly inspecting the subfloor using a laser level to identify uneven areas. Think of this step as a doctor diagnosing a patient before treatment—skipping it leads to missed flaws that cause future cracks. I recall once neglecting a subtle hump in a client’s living room; when I later laid tile, the hump caused cracked grout lines, prompting a redo. Always mark high and low spots to plan your leveling approach effectively.
Ensure Proper Subfloor Stability
Stabilize loose or squeaky subfloors with additional joist support or subfloor reinforcements. For instance, installing blocking between joists prevented bouncing during walking and reduced stress on the tile. When I fixed a bouncy plywood subfloor on a retail store remodel, adding cross-bracing made a noticeable difference—tiles laid smoother and stayed crack-free much longer. Use structural fixes like subfloor reinforcement hacks for best results.
Prepare for Accurate Leveling
Choose the right self-leveling compound compatible with your subfloor material. When mixing, follow the manufacturer’s instructions precisely; a chalky or uneven pour signals improper mixing that can lead to pinholes or cracks in the pour. I once added too much water, resulting in a weak, inconsistent layer that cracked upon drying. To guarantee success, perform a moisture test beforehand, ensuring proper adhesion and reducing the risk of future failures. For technical tips, visit how to fix humped subfloors.
Implement Mechanical Fixes for Large Slabs
Use a screw-down method to secure large tiles, especially over uneven substrates. Drill and countersink screws at strategic points, like the 3-4 foot grid pattern recommended in the subfloor screw pattern. This technique acts like a backbone, preventing movement that causes cracking. During a recent project, I screw-fixed a 4×8 foot slab, which kept the surface stable throughout curing and drying stages, resulting in a flawless finish.
Level the Surface to a Hundredth of an Inch
After pouring leveling compound, use a high-precision screed or laser level to verify flatness within 1/8 inch over 10 feet. Don’t just eyeball it—precision pays off. I once ignored detailed leveling, and the tiles cracked along the uneven edges; a costly lesson. Regularly check for high spots and skim them with additional compound, ensuring the surface is evenly prepared before laying tiles. For expert techniques, see precise leveling techniques.
Follow the 3-Foot Rule for Final Inspection
Hold a 3-foot straightedge or level at multiple angles to confirm flatness; any visible gaps indicate areas needing rework. This simple step catches minor imperfections that can lead to major cracks. I remember a project where a tiny ripple, invisible to the naked eye, caused cracking on the first heavy freeze. Using this rule consistently can save time and money, preventing cracks before they happen.
Many homeowners and even some professionals believe that floor installation is simply about laying materials evenly. However, this oversimplification overlooks critical nuances that can determine the longevity and appearance of your floors. For instance, a prevalent myth is that leveling the subfloor is enough; in reality, understanding the subtle surface irregularities and their impact on material stress points is essential. Skipping advanced assessment techniques, like detailed moisture testing or laser scanning, can lead to hidden issues that manifest as cracks or buckling over time.
Why do many install incorrectly even with basic knowledge? The answer lies in the overlooked details of subfloor preparation and material compatibility. A common mistake is assuming that all leveling compounds or adhesives perform equally well across different substrates. In my experience, using the wrong product or applying it improperly often results in failures that appear months after installation, sometimes even voiding manufacturer warranties. Consulting technical guides like precise leveling techniques can dramatically increase success rates.Watch out for the trap of neglecting edge support, especially with large-format tiles or hardwood planks. Without proper reinforcement, these larger slabs are prone to cracking or separating at joints, even if the surface appears level initially. This is a common oversight that can be mitigated by integrating mechanical fixes early in the process, like strategic screwing or reinforcing with underlayment systems. Incorporate such practices and always double-check your surface flatness, not just visually but with precision tools. Want to master these advanced steps? Dive into detailed guides or consider professional advice to avoid costly mistakes.
Another subtlety often misunderstood is the importance of climate and humidity control during installation. Variations can cause expanding or contracting materials, leading to cracks or gaps. A recent study showed that environments with fluctuating humidity levels increase failure rates significantly (source). Proper acclimation and environmental conditioning before and after installation are crucial. Don’t fall into the trap of neglecting this step—your floors’ durability depends on it. Have you ever fallen into this trap? Let me know in the comments, and remember, mastering the finer details of flooring installation will save you time, money, and stress in the long run.
Keeping Your Floors in Top Shape with the Right Tools
Achieving a flawless flooring installation isn’t just about the initial work; ongoing maintenance plays a vital role in preserving its beauty and durability. To ensure your hardwood, tile, or level surface remains pristine over time, investing in precision tools is essential. I personally rely on a high-quality laser level, like the Bosch GSL 2, which provides unparalleled accuracy for long-term floor leveling projects. Its ability to project perfectly straight lines helps me detect subtle unevenness that could cause future cracks or tile lippage, especially crucial in larger formats. Additionally, a moisture meter such as the Tramex CME5 allows me to regularly monitor moisture levels in the subfloor and hardwood, preventing issues like warping or buckling down the line. Using these tools consistently helps catch problems early, saving time and costly repairs.
How do I maintain my flooring over time?
Proper upkeep extends the lifespan of your floors. Regularly cleaning with soft microfiber mops prevents dirt buildup that can scratch surfaces, while specialized hardwood floor care products help maintain shine and prevent dullness. For tile, sealing grout lines annually guards against staining and moisture infiltration. To keep large-format tiles crack-free, I recommend periodic re-evaluation using a straightedge or laser level — even if the floor seems stable. This proactive approach ensures minor unevenness or subfloor shifts don’t escalate. Also, controlling humidity levels using a dehumidifier or humidifier is crucial, especially in fluctuating climates, to minimize expansion or contraction. For comprehensive tips, I suggest reviewing dedicated maintenance guides, such as these hardwood care secrets.
Tools for Long-Term Success
One tool I can’t do without is a digital level, like the Dewalt DW088K Cross-Line Laser, which aids in ongoing assessments of floor flatness and helps identify subtle dips or high spots over months. For example, in a recent project, I used this laser to monitor the initial leveling work at six-month intervals, ensuring no shifts occurred that could jeopardize tile stability. Pairing this with a high-quality grout sealer and hardwood finish wax preserves surfaces and enhances longevity. Remember, investing in the right tools doesn’t just solve immediate issues—it’s about setting a foundation for long-term durability and reducing future repair costs.
Future Trends in Flooring Maintenance
As technology advances, smarter tools like IoT-enabled moisture sensors will become mainstream, allowing homeowners and contractors to monitor their floors remotely and predict potential problems before they manifest visibly. Automated levelling systems are also emerging, promising quicker, more consistent results for floor preparation. Staying updated with these innovations ensures your installation remains resilient against the challenges posed by climate and usage.
Make Maintenance Easier: Try Regular Laser Assessments
One advanced tip is to incorporate routine laser level checks into your maintenance schedule. Doing so, inspired by precise leveling techniques, helps detect subtle shifts early, preventing costly crack repairs. Make it a habit every six months, especially in climates with significant temperature fluctuations, and you’ll prolong your floors’ lifespan significantly.
What I Didn’t Know When Starting Out-Until Cracks Appeared
One of the most valuable lessons I learned was that there’s no substitute for meticulous subfloor inspection. Relying solely on visual checks or simple assessments often leads to overlooking subtle irregularities that cause cracks down the line. Small imperfections, like tiny dips or unrecognized moisture issues, can sabotage your entire project. My lightbulb moment came when I realized that investing in quality assessment tools, such as laser levels and moisture meters, dramatically reduced failure rates and saved both time and money.
Mastering Fixes Before They Become Problems
Having a curated toolkit of proven techniques for slab leveling, re-inforcement, and environmental control isn’t just helpful; it’s essential. I found that integrating mechanical fixes, like strategic screw-downs for large slabs, and performing precision leveling—verified within a hundredth of an inch—offer peace of mind and superior results. Get into the habit of double-checking your surface flatness with advanced tools; it’s a habit that pays for itself many times over. To dig deeper, I recommend exploring these precise leveling techniques.
The Myth of ‘Good Enough’ in Flooring Installations
One trap I often see is assuming that mere ‘good enough’ standards are sufficient—especially with the craze for large format tiles or modern hardwoods. However, unrecognized subtle issues in subfloor prep and environmental conditions can be the silent killers of durability. Taking shortcuts—like skipping detailed assessments or ignoring climate factors—inevitably leads to cracks and failures over time. Always aim for the highest standards you can achieve, even if it takes extra effort at the outset, because quality won’t hide under surface imperfections for long.
Transform Your Approach With the Right Tools and Resources
Having the right arsenal is a game-changer. I trust tools like the Bosch GSL 2 laser level for its unmatched accuracy in detecting unevenness over large areas, and moisture meters like the Tramex CME5 to monitor subfloor conditions regularly. These resources help me catch tiny issues before they turn costly, making maintenance simpler and more effective. For sustainable projects, check out these hardwood options for 2026 that resist warping and cracking, aligning with my commitment to long-lasting installations.
Your Cues to Elevate Floor Durability—Start Today
The pathway to flawless flooring is built on continuous learning and applying best practices. Incorporate routine laser assessments into your maintenance schedule and control indoor humidity diligently. Small, consistent efforts now will significantly extend the life of your floors and save you headaches later. Remember, elevating your skill set isn’t just about avoiding cracks; it’s about creating spaces that endure. If you’ve faced surprises during installation, share your story below—your experience might just help someone else avoid the same pitfalls. What’s your next step toward flawless floors? Let’s discuss in the comments below.