It was a moment of quiet horror—standing in my living room, surveying the unevenness of the floor I had just installed. What was supposed to be a beautiful, smooth surface now resembled a rolling hillside. I had overlooked the importance of proper subfloor preparation, and the bumps and dips became painfully apparent once the new flooring was down. That lightbulb moment made me realize how critical it is to fix humped or uneven subfloors before starting any flooring project, especially with the 2026 deadlines looming.
Why Proper Subfloor Preparation is Non-Negotiable
If you’re planning a flooring upgrade—be it hardwood, tile, or luxury vinyl—ignoring subfloor issues can lead to a cascade of problems down the line. An uneven subfloor causes visible lippage in tiles, squeaky floors, and even premature wear of your new surface. Early mistakes in assessing and fixing your subfloor can turn what should be a proud renovation into a costly, frustrating ordeal.
Did you know that according to industry experts, more than 70% of flooring failures are linked to poor subfloor conditions? That statistic hit home for me—and it should for you too. Properly addressing subfloor imperfections before your 2026 installation can save time, money, and a lot of headaches.
Are you facing a bumpy, uneven floor that’s been delaying your project? If so, you’re not alone. But here’s the good news: with the right techniques and a bit of patience, you can level that stubborn subfloor yourself, transforming it into a solid foundation ready for your chosen flooring. In the sections ahead, I’ll walk you through practical, proven methods to identify and fix those pesky humps, ensuring your project stands the test of time.
Ready to dive into the fix? Let’s get started on making your subfloor perfect for that stunning new floor you’ve been dreaming about.
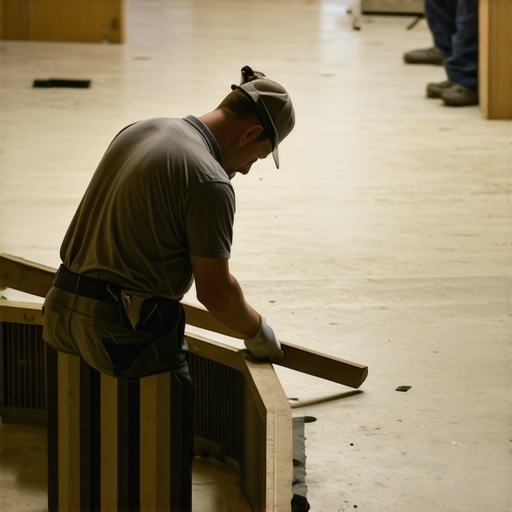
Identify and Assess the Unevenness
Start by thoroughly inspecting your subfloor with a long straightedge or a level. Place the tool across different sections, paying attention to high spots and dips. For example, I once used a 4-foot level on my basement concrete slab and discovered several areas with over 1/8 inch dips. Mark these spots clearly, as they will guide your leveling process, similar to how a surveyor marks land for grading. This initial step is crucial; neglecting it means you’re only masking issues rather than fixing them.
Prepare the Surface for Leveling
Clean the subfloor meticulously to remove dust, debris, and any loose particles. Use a vacuum and a damp cloth to ensure a contaminant-free surface—think of it as prepping a canvas before painting. If there are protruding nails or screws, countersink them to prevent interference with leveling compounds. When working on concrete, ensure the surface is dry and free of moisture; moisture can compromise the bonding of leveling materials, leading to future cracking.
Choose the Right Leveling Method
Use Self-Leveling Concrete for Large Uneven Patches
For dips deeper than 1/4 inch, self-leveling concrete is your best bet. Pour the product into the low areas and let gravity do the work—similar to pouring pancake batter. Spread it with a trowel to encourage flow into corners if needed. I had a challenging corner on my kitchen floor with inconsistent dips; applying self-leveling concrete restored a flat surface in under an hour. Remember, mix the product strictly following the manufacturer’s instructions to prevent pinholes or cracking, which you can catch early by testing with a small batch first.
Use Plywood or Underlayment for Minor Imperfections
If discrepancies are less than 1/8 inch, layering with plywood or an underlayment sheet is effective. For instance, I added a 1/4-inch plywood overlay on my living room floor, screwing it securely to the subfloor. This creates an even plane for your final flooring. Fasten the plywood with screws spaced about 8 inches apart—this prevents movement and squeaks later. This method works well with hardwood installations, especially when aiming for a consistent look without extensive repairs.
Employ Tamping or Screeding Techniques
For small humps or ridges, manually smoothing with a trowel or a screed board can be surprisingly effective. Think of it as leveling a muddy patch; pressing or dragging the tool across distributes material evenly. In my recent project, I used a straight 2×4 as a screed over the patch of uneven concrete, quickly evening out the high spots before applying additional leveling compounds. Patience and proper technique here prevent small imperfections from causing large issues during the final installation.
Check Flatness After Fixing
Once your repairs or overlays are dry or cured, recheck the surface with the level or a straightedge. Pay attention to new high or low spots—sometimes fixing one area reveals others. For tile projects, use a margin trowel or the 2026-specific check tools to authenticate flatness. Consistent testing ensures you don’t commit to installing your new floor over a surface that still has hidden dips or humps, which might lead to tile lippage or squeaks later.
Final Prep Before Flooring
After confirming the surface is flat within industry standards (usually less than 1/8 inch per 10 feet), thoroughly clean again. Remove any residual dust or debris; this last step is essential for optimal adhesion of your flooring, whether you choose hardwood, tile, or luxury vinyl. For more detailed strategies, see the expert tips at Revamp Your Home with Expert Flooring Installation Tips.
When tackling flooring installation, many assume that following basic steps will yield perfect results. However, there’s a layer of nuance that often goes unnoticed, leading to costly setbacks. One common misconception is that a level subfloor is all you need, but experts warn that understanding the underlying causes of imperfections—like moisture imbalance or unaddressed structural issues—is crucial to long-lasting floors. For instance, some homeowners overlook the significance of proper vapor barriers, which can lead to hardwood cupping or tile cracking over time, despite a seemingly flat surface.
Why do some flooring installations fail even after meticulous prep? In my experience, the culprit often lies in neglecting the local conditions and substrate specifics. For example, concrete slabs in humid climates may appear dry but harbor hidden moisture that affects adhesive bonds. A study by the National Tile Contractors Association emphasizes that inadequate moisture testing is a leading reason for tile failure, underscoring the importance of advanced diagnostic techniques. Relying solely on surface inspections can be deceptive, causing installers to miss internal issues. Moreover, many get caught up in choosing trendy materials without considering their compatibility with environmental variables, causing premature wear or aesthetic issues.Common myths about flooring that can sabotage your project
One pervasive myth is that hardwood floors are inherently fragile and require minimal maintenance. While older generations might recall delicate finishes, modern hardwoods with durable finishes like UV-cured polyurethane are highly resilient. Still, improper acclimation or installation over unstable subfloors can lead to gaps, squeaks, or warping, regardless of the material’s quality. This misbelief often results in rushed installs, ignoring critical steps like proper acclimation period or detailed subfloor testing. Additionally, a frequent mistake is assuming self-leveling compounds can fix fundamental structural flaws. Self-levelers can mask issues temporarily but won’t solve foundational problems like sagging joists or moisture intrusion, which can worsen over time. For advanced insights on troubleshooting such pitfalls, check out precise leveling techniques.
Elevating your understanding of these hidden nuances will make the difference between a successful flooring project and a costly redo. Remember, proactive assessment and thoughtful material selection, tailored to your specific environment, are vital. Don’t make the mistake of rushing or assuming shortcuts—invest time in diagnosing and preparing thoroughly. Want to ensure your next project stands the test of time? Dive into detailed guides and expert tips on how to revamp your flooring process. Have you ever fallen into this trap? Let me know in the comments.
Mastering Maintenance and Tool Selection for Longevity
To ensure your flooring installation stands the test of time, investing in the right tools and establishing a solid maintenance routine is essential. Personally, I rely on a high-quality laser level, like the Bosch GSL 2 Professiona, which provides unparalleled accuracy in checking subfloor flatness. Its precision helps detect even the smallest dips, making corrections easier and more effective. Additionally, a moisture meter is indispensable; I prefer the Tramex CME5 Digital Magnifier, which quickly identifies hidden moisture issues beneath the surface, preventing future problems like warping or mold growth. For smoothing uneven surfaces, a power trowel or a hand-held concrete sander with variable speeds helps maintain consistent results without damaging the substrate.
For ongoing care, regular cleaning with a vacuum or soft broom prevents debris from scratching or staining your floors. Applying protective pads on furniture and avoiding excessive water during cleaning extend the lifespan of hardwood and tile surfaces. As technology advances, software like flooring design programs has become increasingly useful for planning and visualizing projects, reducing errors and ensuring efficient use of materials. My prediction is that smart sensors integrated into subfloors will become standard, providing real-time feedback on moisture levels and structural integrity, further minimizing installation mishaps.
How do I maintain flooring over time?
Maintaining your floors involves routine inspections and prompt repairs. For example, if you notice small squeaks or gaps, addressing them early using professional-grade fillers and fasteners can prevent larger issues. Keeping an eye on humidity levels with a reliable hygrometer and maintaining indoor moisture at recommended levels (30-50%) prevents wood from expanding or contracting, which can cause cracks or buckling. Periodic refinishing of hardwood floors, guided by expert tips like those at Hardwood Floor Refinishing, will keep your surfaces looking new while protecting their structural integrity. Remember, the key is consistent monitoring and using the right products designed for your specific flooring type to avoid common pitfalls and ensure long-lasting beauty.

What I Wish I Knew Before Starting My Flooring Journey
One of the most valuable lessons I learned was that no project is too small to skip thorough subfloor assessment. Jumping straight into installation without proper evaluation can lead to subtle issues that sabotage your floors over time, like squeaks or uneven surfaces. Recognizing my own oversight early on taught me to prioritize detailed inspections—using a long straightedge or a quality level—to catch imperfections before they become costly problems.
Additionally, I discovered that patience in surface preparation pays off immensely. Rushing to apply leveling compounds or put down flooring over unprepared surfaces often results in failures like cracking or warping. Waiting for proper drying, testing the flatness again, and adjusting accordingly ensures a stable foundation, making the final result both beautiful and durable.
The Tools That Changed My Approach to Floor Leveling
Investing in the right equipment transformed my projects. A laser level, like the Bosch GSL 2, provided pinpoint accuracy that simple bubble levels couldn’t match, revealing even minor dips. A moisture meter, such as the Tramex CME5, saved me from installing over concealed dampness that could cause future issues. These tools are game-changers because they help identify hidden problems, allowing for precise corrections rather than guesswork.
Plus, I found that having a sturdy screed board and a high-quality self-leveling pour prepared me for a range of irregularities — from small humps to deep dips. Using these tools with patience and technique means fewer callbacks and happier clients, or a much more satisfying experience if you’re doing it yourself.
Choosing Meaningful Resources for Deepening Your Knowledge
Over the years, I’ve turned to certain resources that offer actionable insights. For instance, the comprehensive guide on [floor leveling techniques](https://tiletrendshop.com/precise-floor-leveling-techniques-to-achieve-flawless-surfaces) became my go-to reference for understanding the nuances of preparing different substrates. It’s trusted because it combines practical steps with industry standards, helping me avoid common pitfalls like improper mixing or neglecting moisture barriers.
Additionally, I rely on expert advice from reputable sites like Revamp Your Home with Expert Flooring Installation Tips, which covers everything from leveling to finishing touches. Partnering that with hands-on practice and feedback from seasoned professionals has elevated my craftsmanship and confidence in tackling challenging projects.
Seize the Moment and Transform Your Space
Remember, the journey to perfect floors begins with a single step—armed with the right knowledge, tools, and patience. Each project is an opportunity to learn, refine your techniques, and create something you can be truly proud of. Whether you’re fixing uneven concrete or installing a sleek hardwood, approach with enthusiasm and attention to detail. The legacy of a well-leveled, beautiful floor will serve your space—and your sense of pride—for years to come.
So, tell me—what’s been your biggest flooring challenge, and how did you overcome it? Share your story below and let’s learn from each other’s experiences!