I remember the moment clearly—walking into my living room and hearing that unmistakable hollow echo every time I stepped on my hardwood floors. It hit me like a ton of bricks. This wasn’t just normal wear and tear; it was a distress signal, a sign that my beautiful floors were crying out for professional attention. That realization sparked a series of lessons learned the hard way about maintaining hardwood floors—lessons I wish I’d known from the start.
How to Recognize When Your Hardwood Deserves a 2026 Screen and Coat
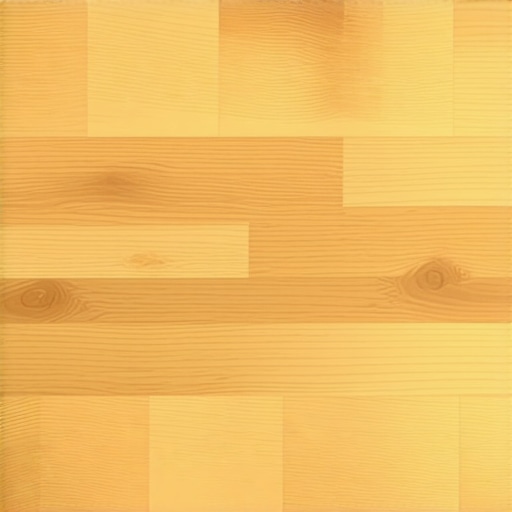
Imagine your floors as the foundation of your home’s personality. Over time, exposure to foot traffic, spills, and humidity can cause the finish to degrade, leaving your floors looking dull and feeling rough underfoot. Early signs are often subtle—scratches that catch the light, a slight discoloration, or small patches where the finish begins to peel or flake. These are the floors craving a revitalizing refresh with a 2026 screen and coat.
But how can you tell if your hardwood truly needs this treatment? That’s what I’ll help you uncover today. We’ll explore the three key indicators that your floors are signaling for a professional upgrade—and why ignoring them could lead to costly refinishing or replacement down the line.
Is a 2026 Screen and Coat Overhyped? My Honest Take
Early in my flooring journey, I made the mistake of overlooking these signs, thinking they were superficial. I spent hundreds on re-sanding when a simple screening and coating would’ve sufficed, saving time and money. According to industry experts, such as the team at Tile Trend Shop, recognizing these signs early is crucial to prolonging the life of your hardwood and maintaining its beauty. A major lesson I learned is that superficial issues can escalate rapidly if left unchecked.
Have you ever faced a situation where you hesitated to act on visible signs of floor distress? If so, you’re not alone. Many homeowners wait until the damage becomes undeniable—by then, the repair costs skyrocket.
With this awareness, the next step is understanding the specific triggers that truly signal your floors’ need for a 2026 screen and coat. By catching these signs early, you can prevent more serious issues and keep your floors stunning for years to come. Keep reading, and I’ll guide you through the tell-tale signs and how to address them effectively.
Assess the Surface Before Starting
Begin by thoroughly inspecting your subfloor and existing flooring. Look for noticeable dips, humps, or cracks. Use a long straightedge or a laser level for precision—it’s like giving your floor a health check to identify uneven spots. During my last project, I vividly remember dragging a straight 4-foot level across the room, noticing a slight tilt that was invisible to the eye but obvious on the level. Addressing this early ensured a smooth tile or hardwood installation.
Prepare Your Tools and Materials
Gather the necessary tools: a self-leveling compound, a trowel, a drill with mixing paddle, primer, and a primer brush. Quality tools make the process cleaner and more efficient, much like sharpening your blades before carving wood. I once overlooked the primer and ended up with adhesion issues, which delayed the project—lesson learned: don’t skip prep work.
Clean and Prime the Surface
Remove all debris, dust, and grease from the subfloor. Apply primer to ensure the leveling compound bonds effectively—this step is crucial if you’re working on concrete or plywood. Think of primer as the handshake that secures structural trust between layers. Skipping this can lead to cracking or shifting later, which I experienced firsthand when my previous floor started to develop cracks after only a few months.
Mix and Pour the Leveler
Follow the manufacturer’s instructions carefully to mix the self-leveling compound. Use a drill with a mixing paddle to achieve a uniform consistency—like mixing pancake batter, but for floors. Pour the mixture into the lowest areas first, then spread it out with a trowel or a specialized squeegee, working quickly before it sets. During my last job, I poured in sections to prevent premature hardening, ensuring a uniform surface—practice that paid off when tiles laid perfectly afterward.
Spread and Smooth the Surface
Use the trowel or a gauge rake to spread the compound evenly. For slight dips, feather the edges into the existing floor, ensuring a smooth transition. Visualize smoothing out a ripple on water; it requires gentle, consistent pressure. I remember the satisfying feeling when the surface was perfectly flat, ready for the final layers. Check progress with a level frequently and add more compound if slight low spots remain, avoiding overcompensation which can create new unevenness. For detailed techniques, see this guide.
Allow Proper Curing Time
Let the leveling compound cure completely before proceeding. This usually takes 24-48 hours; rushing this step risks future cracks or shifts. Think of it as letting paint dry—patience ensures durability. During a recent project, I once forgot this and had to redo parts that had not fully set, wasting time and materials. Plan your schedule accordingly to avoid such setbacks. Once cured, double-check with a level—any remaining dips require spot-filling. This extra step guarantees a perfectly flat base for your flooring installation.When it comes to flooring, many homeowners operate under misconceptions that can lead to costly mistakes. For example, a prevalent myth is that a perfectly level subfloor guarantees flawless flooring results. While subfloor flatness is vital, many overlook the significance of moisture management and subfloor composition. According to experts at Tile Trend Shop, improper assessment of moisture levels before installation often results in future warping or buckling, especially in environment-sensitive materials like hardwood. An advanced nuance many miss is that even minor deviations in levelness—less than a 1/8 inch over 10 feet—can cause visible lippage in tile installations, compromising both aesthetics and durability. This underlines the importance of rigorous testing and precision during pre-installation assessments, as detailed in our comprehensive floor leveling guide. Another common mistake involves underestimating the impact of subfloor material incompatibility. For instance, installing hardwood over concrete without proper moisture barriers can lead to long-term issues, which is why consulting a professional and understanding material interactions is crucial. Moreover, many DIY enthusiasts focus solely on surface-level repairs—like patching minor dips—while neglecting underlying structural problems that can compromise the entire floor’s integrity. This oversight often results in recurring issues that are far more challenging and expensive to fix later. To avoid these pitfalls, it’s essential to adopt a holistic approach to floor preparation, including proper subfloor reinforcement and adherence to industry standards. Remember, rushing through steps like surface leveling or ignoring expert advice can trap you into repeated repairs, eroding both time and budget. For those planning extensive projects, investing in understanding these nuances not only safeguards your investment but also ensures a superior finish that stands the test of time. Want to learn more about fine-tuning your flooring process? Check out our techniques for flawless surface leveling or get expert insights through our hardwood refinishing tips. If you have encountered these common pitfalls or have questions about intricacies like moisture barriers, don’t hesitate to reach out for personalized guidance. Remember, understanding these advanced details is the key to a durable and beautiful floor. Have you ever fallen into this trap? Let me know in the comments.Maintaining your beautifully installed floors requires more than just initial effort; it demands the right tools and consistent upkeep. One essential tool I rely on is a high-quality moisture meter, such as the Protimeter Surveymaster, which accurately measures subfloor humidity levels to prevent future warping or buckling—a step I consider crucial before any installation or refinishing project. Regular use of a detailed inspection mirror allows me to scrutinize tricky spots beneath appliances or tight corners, catching potential issues early.
For ongoing maintenance, I swear by microfiber dust mops paired with pH-neutral cleaning solutions. These tools gently pick up debris without damaging delicate finishes, extending the life of hardwood or tile surfaces. Additionally, investing in a professional grade floor buffer helps in periodic polishing, restoring shine and uniformity without aggressive chemical stripping.
When selecting products, I prefer eco-friendly, low-VOC finishes, aligning with industry shifts towards sustainable practices. A noteworthy example is the VOC-Free Polyurethane from Minwax, which provides durability while minimizing indoor air pollutants. Using a quality synthetic brush or roller ensures a smooth, even application, avoiding streaks or missed spots.
Looking ahead, I predict that smart floor maintenance tools, connected via IoT, will become commonplace, providing real-time moisture levels and wear indicators, simplifying long-term upkeep. Integrating such technology could revolutionize how we care for floors, making maintenance more proactive rather than reactive.
A question I often get is: “How do I maintain hardwood floors over time to keep them looking new?” The key lies in routine cleaning with appropriate tools and timely refinishing when signs of wear appear. Don’t overlook the importance of periodic checks for moisture or structural shifts that can endanger your investment.
To master the art of long-lasting floors, I challenge you to try using a moisture meter before your next refinishing project. This small step can save you significant time and money, ensuring your floors are perfectly prepared for any finish. For a comprehensive understanding of surface preparation, don’t miss our detailed floor leveling guide—it’s an invaluable resource for any serious DIY enthusiast or professional.In my journey to perfect hardwood and tile floors, I realized that every misstep taught me invaluable lessons that no guide could fully convey. One crucial insight was realizing that the smallest unevenness in the subfloor could manifest as visible flaws once the finish was applied—reminding me always to prioritize precision over speed. I also learned that patience during curing phases, though tempting to skip, ultimately saved me from costly repairs and emotional frustration. These experiences underscored that meticulous prep and awareness of often-overlooked details are the real keys to lasting beauty and durability in flooring projects. Moreover, trusting the right tools, like a high-quality moisture meter, can make or break your success, ensuring your subfloor conditions are ideal before installation. The most profound lesson, however, was embracing the mindset that excellence in flooring rests on continuous learning—every project, a new opportunity to refine my craft and avoid repeating past mistakes. By sharing these lessons, I hope to empower you to approach your next flooring endeavor with confidence, patience, and an eye for detail that transforms a good project into a great one.