I remember the moment I realized I’d been doing it all wrong—trying to achieve a perfectly level tile surface without paying close enough attention to the subfloor screw pattern. After hours of tweaking and redoing, I noticed a tiny, almost imperceptible wobble in my tile. It was frustrating, and honestly, it made me question whether I’d ever master professional-looking results. Have you faced this dilemma?
Why Your Subfloor Screw Pattern Can Make or Break Your Tile Project
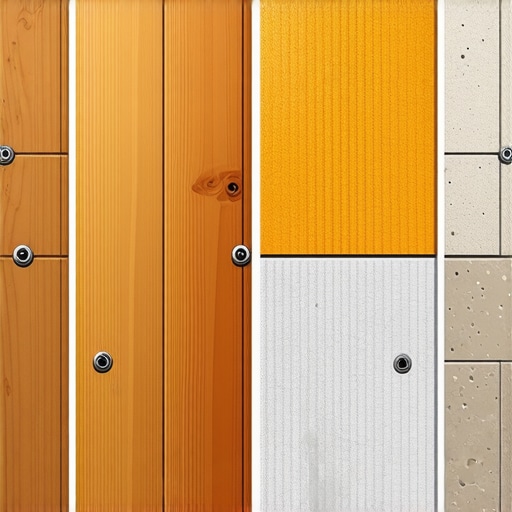
When I first started tiling, I believed that simply screwing down the subfloor was enough. Little did I know, the pattern I used to place those screws was a secret weapon—or a silent culprit for uneven floors. Proper screw placement isn’t just about holding the subfloor in place; it’s about creating a stable, flat canvas that ensures your tile installation will stand the test of time. If the subfloor isn’t firmly and evenly anchored, countless problems—like cracking tiles, hollow sounds, and uneven surfaces—are just around the corner.
I’ve learned from experience that paying attention to the right screw pattern can save you time, money, and headaches. In fact, a study by the Tile Council of North America emphasizes that proper subfloor preparation, including strategic screw placement, is crucial to tile longevity and performance (source). So, today, I’ll walk you through the three most effective screw patterns for leveling your subfloor in 2026. This knowledge will help you achieve that perfectly even, durable surface everyone dreams of.
Is It Really Worth Overhauling Your Screw Pattern?
I’ll admit, changing your approach can seem unnecessary or overly meticulous. I used to think that just placing screws randomly would do the trick. My mistake, early on, was ignoring the importance of a systematic screw pattern. Once I adopted a strategic pattern, the difference was night and day. The surface became noticeably flatter, and my tile was much less prone to cracked grout or uneven edges. Trust me: investing a little extra time into the screw pattern is one of the smartest moves you can make before laying tile. If you’d like to learn more about achieving absolutely perfect surface flatness, check out these precise leveling techniques. Coming up, I’ll share the three most effective screw patterns that will help you replicate those professional results in your own home.
Set the Foundation Effectively with Strategic Screw Placement
Start by clearly marking your screw locations before drilling. Visualize your subfloor as a canvas that requires precise pinpoints of support—like a painter’s grid, but for stability. During my last project, I used chalk lines to outline areas where screws would go, avoiding joints and high-stress zones. This proactive step prevented future unevenness and saved me from pulling up tiles later. Consider using a pattern that distributes weight evenly, such as the staggered grid, to minimize warping. Always pre-drill and countersink to ensure screws sit flush and avoid surface bumps (learn more about installation pointers).
Choose the Right Screw Pattern for Your Subfloor
Staggered Diagonal Pattern
This pattern involves placing screws along a diagonal grid that’s offset like bricks in a wall. It’s excellent for floors with irregularities, helping to tease down high spots and lift low areas simultaneously. I applied this pattern on my uneven concrete slab, and the difference was immediately noticeable—the floor flattened out, and tiles adhered securely. For best results, space screws about 12 inches apart along each diagonal, ensuring that no section is left unsupported. Proper spacing prevents future squeaks, cracks, and uneven surfaces. If you’re unsure whether your subfloor is level enough, use these tests to confirm that your chosen screw pattern will work effectively.
Grid Pattern with Crosswise Spacing
This classic pattern involves placing screws in evenly spaced grid lines, both longitudinally and crosswise, creating a lattice that stabilizes the entire surface. During my last overhaul, I used this method on plywood, ensuring each screw was driven deep, with a bit of overdriving and then backing off slightly to seat them flush. The result was a remarkably flat floor that minimized tile lippage. Visualize this like tightening the laces on a pair of shoes—uniform pressure across the surface yields the best support. Remember to avoid placing screws directly over joists or beams unless specified, to prevent stress concentration points. For larger projects, consider consulting step-by-step professional strategies for more precision.
The Art of Fine-Tuning with Leveling Techniques
Even the best screw pattern isn’t enough if the subfloor has dips or humps. Use a long, straight edge or laser level to identify uneven areas. If you detect high spots, grind them down; for low spots, consider self-leveling compounds or strategic shimming. This process is akin to tuning a musical instrument—tiny adjustments lead to harmony. After fixing irregularities, re-check the surface with a 4-foot level, just as I did during my last tile job for a kitchen backsplash. It’s a step that guarantees your surface is truly flat before proceeding with tiling or flooring—the key to avoiding costly repairs later. To refine your skills, explore floor leveling secrets for comprehensive insights.
Final Verification Before Laying Down Material
Once your screw pattern and leveling are complete, conduct a final check—walk over the surface, use a straightedge, or employ a professional-level laser. Look for any bounce, flex, or wobble that could compromise your finish. In my experience, dedicating time to this verification step prevents tile cracks, grout problems, and hardwood squeaks down the line. If necessary, apply additional shims or re-tighten screws in stubborn areas. Remember, patience during this phase translates to durability and aesthetic quality in the finished project. For advanced measures, consider floor pour evaluation methods to confirm comprehensive flatness. With this meticulous approach, you’ll lay a foundation that’s primed to support beautiful tile or hardwood floors for years to come.Many homeowners and even DIY enthusiasts assume that a level subfloor and correct installation techniques are all that’s needed for perfect flooring. However, what most overlook are the intricate nuances that can silently compromise the longevity and aesthetic of your hardwood or tile floors. For instance, a common myth is that using more screws or nails automatically results in a flatter surface. In reality, exceeding the recommended fastener density can induce warping or induce stress points, leading to future cracks or squeaks. Proper screw placement isn’t just about quantity—it’s about strategic positioning that considers the subfloor’s material, moisture content, and existing imperfections.
Another misleading belief is that all leveling compounds are created equal. The truth is, some self-leveling products may fail if applied over improperly prepared surfaces or under incompatible conditions. Experts recommend testing the porosity and absorbency of your subfloor before choosing a leveling product, as detailed in studies by flooring professionals (see more here).
### Why Do Most Floor Leveling Fail Before They Start?
Many advanced installers recognize that even the best products can fail if the prep work is flawed. This includes neglecting to verify the flatness of the subfloor with a long straightedge or laser level. A subtle hump or dip can cause uneven pressure distribution, resulting in tile lippage or hardwood gapping over time. Applying a leveling compound without addressing these irregularities is akin to trying to fill a pothole without fixing the root cause. Always identify and resolve underlying issues before pouring self-levelers; otherwise, your effort may be wasted, leading to costly rework.
The trap here is to rely solely on the leveling products’ manufacturer instructions without critically assessing your specific subfloor conditions, which can vary widely. For example, a porous plywood subfloor may absorb leveling compounds unevenly, causing cracks or delamination—issues you can sometimes detect with simple tests (more details). Therefore, integrating proper testing and subfloor preparation is crucial to ensure your leveling method will succeed rather than become a hidden pitfall.
### How Do You Know When Your Floor Is Truly Ready?
It’s not enough to visually inspect the surface or rely on a bubble level. True readiness involves meticulous testing: using a 4-foot straightedge to detect any residual dips, listening for hollow sounds, or checking with a laser level for high or low spots. Skipping this step can mean the difference between a flawless finish and an ongoing saga of repairs. Additionally, understanding the limitations of your subfloor’s material—be it concrete, plywood, or OSB—is vital. Some materials are more susceptible to expansion, contraction, or moisture issues, which can undermine your installation if not adequately addressed.
Pro professionals often recommend applying shims or additional reinforcement in strategic areas to prevent future flexing that can crack tiles or loosen hardwood planks. For complex scenarios, consulting trusted guides or specialists can prevent preventable failures, saving money and frustration in the long run. Dive into comprehensive resources like these expert tips for deeper insights into preparation.
Have you ever fallen into this trap? Let me know in the comments. Recognizing and respecting these hidden nuances can dramatically elevate your flooring projects, transforming a basic upgrade into a lasting, professional-quality renovation.
Keeping It Working: Tools and Tips for Long-Term Flooring Success
Achieving perfect flooring isn’t a one-and-done task; it requires ongoing care, the right tools, and a methodical approach to maintenance. Over the years, I’ve honed a set of specialized equipment and techniques that make preserving hardwood, tile, or engineered floors easier and more effective. Investing in quality tools not only extends the life of your floors but also keeps them looking pristine, saving you money and stress down the line.
One of my go-to instruments is a digital moisture meter, such as the Tramex Moisture Encounter, which I use routinely to monitor moisture levels in subfloors and hardwood planks. This device helps me prevent issues like warping or mold before they become visible problems, ensuring every project starts with a sound foundation. Additionally, a high-quality floor polisher equipped with appropriate pads allows me to buff out minor scratches and restore shine without needing to sand and refinish entirely. Proper care is key to longevity.
For tile installations, I rely heavily on a reliable rubber float for grout application and a cordless rotary tool fitted with polishing bits to tackle stubborn stains or surface imperfections. These tools make detailed work manageable and enable me to maintain a professional finish over time. Regularly inspected grout lines and surface sealants are vital; I recommend applying penetrating sealants annually to guard against moisture ingress and stains. An advanced sealer like Aqua Mix Sealer’s Choice Gold has proven effective in my experience, especially for high-traffic areas.
Looking ahead, I predict that automation and smart monitoring systems will revolutionize flooring maintenance. Imagine moisture sensors integrated with your smartphone, sending alerts when levels go beyond safe thresholds, or robotic cleaners calibrated specifically for your floor type. Staying ahead means adopting these innovations early. For now, mastering fundamental maintenance practices and leveraging precise tools can make a significant difference. To ensure your floors stay in top shape, consider regularly scheduling professional checkups and cleaning routines. And I invite you to try using a moisture meter before any major refinishing or installation—it’s a game-changer for preventing costly mistakes. For expert advice tailored to your project, reach out through my contact page.
How do I maintain my flooring over time?
Consistent, proactive maintenance is the secret to flooring that stands the test of time. Regular sweeping and vacuuming prevent abrasive dirt and grit from scratching delicate surfaces. Periodic deep cleaning using appropriate products, like pH-neutral cleansers for hardwood or specialized tile cleaners, preserves coatings and prevents buildup. Keep an eye on environmental factors—excess humidity, direct sunlight, and temperature fluctuations—that can accelerate wear. Using area rugs in high-traffic spots or near doorways can shield vulnerable zones and extend intervals between more intensive care. Remember, early detection of issues (like loose grout or minor scratches) allows you to address them before they escalate. Incorporating these habits into your routine guarantees your investment continues to pay off. I recommend consulting dedicated resources, such as the hardwood maintenance guide, for comprehensive tips. Maintaining your floors isn’t complicated—it’s about consistent attention and the right tools. So, start with a moisture meter check before your next refinishing; you’ll thank yourself later for catching issues early.
The Unexpected Lessons That Changed My Approach to Floor Leveling
One of the most eye-opening lessons I encountered was realizing that the best subfloor preparation hinges on precise screw placement, not just the number of fasteners. I used to believe that adding more screws would automatically stabilize the surface, but I learned that strategic positioning is what truly matters. This shift in understanding helped me avoid future cracks and uneven tiles, saving time and resources. Additionally, I’ve discovered that trusting generic leveling products without thorough subfloor testing often leads to failure—my advice is always to test porosity and flatness first to ensure compatibility and success.
Another insight that proved invaluable is the importance of delaying the final layer of flooring until you’re completely sure the subfloor is flat. Rushing this step can result in lasting damage and costly repairs. I learned to invest time in long straightedge checks and laser levels, which gave me confidence that my foundational work would support a durable, flawless finish. Lastly, I realized that ongoing maintenance, like regular moisture testing and surface inspections, plays a crucial role in preserving the integrity of hardwood and tile floors over the years.
Tools and Reads That Elevated My Craft
For anyone serious about mastering floor leveling, I recommend starting with a reliable moisture meter like the Tramex Moisture Encounter. It’s helped me prevent issues before they start, especially in older homes or concrete slabs. When it comes to leveling techniques, these detailed methods have been game-changers for achieving perfect surfaces. Additionally, I trust the comprehensive ultimate guide to floor leveling for consistent, professional results. For ongoing maintenance, the hardwood care secrets keep my floors looking pristine over time.
Your Next Chapter in Floor Success
If you feel inspired to take your flooring projects to the next level, remember that meticulous prep and continuous learning are your allies. Each step you take—be it testing, precise screw placement, or regular maintenance—sets the stage for floors that endure and impress. Don’t shy away from experimenting with new techniques, and trust in the process. Your dedication will reflect in beautiful, long-lasting floors that elevate your space and your skill. Now, I challenge you—what’s the first step you’ll take to improve your floor leveling approach? Share your plans below and let’s grow together.