Ever stood in your living room, gazing down at the floor, and suddenly notice that unsettling waviness? It’s a sinking feeling, especially after investing so much time, effort, and hard-earned cash into flooring. I remember the exact moment I realized my newly installed floor had a wave pattern—what a disappointment! That lightbulb moment made me dive deep into understanding why this happens and how to fix it once and for all.
Stop the Waviness Before It Gets Worse
If your 2026 floor leveler is wavier than a roller coaster track, don’t worry. Today, I’ll share three tried-and-true feathering fixes that restore that flawless flatness and keep your floors looking pristine. These strategies worked wonders in my own experience, saving me from a complete redo, and I bet they can do the same for you.
Is Floor Waviness Actually Worth the Hype?
Now, I know what you might be thinking: “Is fixing waviness really necessary?” Well, early on, I made the mistake of dismissing minor dips as “not that bad”—until those imperfections started affecting my tile adhesion and grout sealing. It’s crucial to recognize that waviness isn’t just about aesthetics; it impacts durability and safety too. An improper leveling job can lead to cracked tiles or uneven hardwood planks, resulting in costly repairs down the line. To avoid my mistake, I suggest reading about floor leveling techniques early on to understand what a professional approach looks like.
Has your flooring project faced issues like these? If so, stay tuned. We’re about to tackle the root causes of waviness and walk through the feathering fixes that will make your floors perfect, durable, and gorgeous. Trust me, it’s well worth the effort to get it right from the start—your future self will thank you.
.
Assess the Extent of Waviness
Start by walking across your floor with a straightedge or a long level. Use a measuring tape or a laser level for accuracy. I once used a 6-foot level on my living room tiles, shifting it across the surface to identify high and low spots. If you notice dips greater than 1/8 inch, it’s time to act. This initial assessment helps determine whether simple feathering or full-leveling is needed, similar to diagnosing a car’s suspension issues before repairs.
Prepare Your Tools and Surface
Gather your supplies: self-leveling compound, trowels, mixing buckets, primer, and safety gear. Clean the surface thoroughly, removing dust, debris, and grease, because contaminants can prevent adhesion. I learned this lesson after applying the compound over a greasy patch, which resulted in uneven settling—the compromise was obvious. Proper surface prep ensures the leveling material bonds well and cures evenly, akin to priming skin before applying a smooth coat of paint.
Apply a Primer for Better Adhesion
Apply a recommended primer suited for your floor type, following manufacturer instructions. This step is like applying a base coat before painting—your foundation for success. I usually use a roller for large areas, then back-brush edges to prevent peeling later. Waiting the prescribed time for drying is crucial; rushing this step leads to bonding failure and a wavy finish. Think of it as letting glue cure fully before attaching parts to prevent future warping.
Mix and Pour the Leveling Compound Carefully
Mix the compound thoroughly to achieve a smooth, pourable consistency. Use a paddle mixer, avoiding clumps or air bubbles, which can cause weak spots. As I poured my first batch, I noticed how the liquid surged into low areas, similar to a lava flow filling cracks. Pour the compound in a circular pattern from the middle outward, working swiftly to avoid uneven setting. This method ensures a uniform thickness and prevents new dips from forming.
Spread and Feather the Surface
Use a trowel or squeegee to guide the compound, feathering edges toward existing surfaces. I recommend working in sections, making sure the compound flows smoothly without pooling. If necessary, perform back-rolling with a spiked roller—like popping bubbles in wallpaper—to eliminate air pockets and ensure air can escape. This step minimizes lines and ridges, resulting in a flat, durable surface.
Address Persistent High or Low Spots
If you notice residual waviness after curing, identify those zones and apply additional compound. Use a straightedge to check progress, and feather the edges to blend seamlessly. Patience is key: curing times vary, but rushing can cause weak spots. My mistake was moving too quickly, which led to an uneven floor. Allow adequate drying time—usually 24 hours—before proceeding to tile or hardwood installation.
Finish with Proper Floor Installation Practices
Once the surface is level, proceed with your flooring installation, following best practices. For instance, use spacers and adhesive techniques to prevent future unevenness. Regularly check for flatness during the process, and make corrections if needed. Remember, a flat base not only looks better but also prolongs the life of your floors, much like a well-laid foundation supports a sturdy building.
 Many homeowners assume that following basic instructions guarantees a perfect finish, but in reality, there are subtle nuances that can make or break your flooring project. For instance, a common myth is that self-leveling compounds automatically ensure a flawless surface. While they are powerful tools, their effectiveness heavily depends on meticulous surface preparation, precise mixing, and proper curing, as emphasized in precise leveling techniques. Overlooking these details can lead to residual waviness, cracks, or uneven tiles, which many underestimate until it’s too late. \n
Furthermore, many think hardwood floors are universally suitable for all environments, but certain species are more resistant to humidity fluctuations, reducing warping risks. For example, white oak outperforms red oak in humidity-rich settings, a nuance that can dramatically affect longevity. Discover these expert insights at choosing the right hardwood.\n
A trap I often warn about involves underestimating subfloor conditions. Thick concrete or uneven wooden substructures can sabotage installation efforts. This is where thorough assessment and level testing become invaluable, as detailed in subfloor testing strategies. If neglected, the result could be tiles that crack or hardwood that squeaks—costly mistakes no one wants.\n
So, how can you avoid these pitfalls? It’s all about understanding the nuances—properly preparing surfaces, selecting appropriate materials, and assessing subfloor conditions with care. Don’t underestimate the importance of detailed planning; doing so is the difference between a durable, beautiful floor and a recurring headache. If you’re interested in advanced leveling techniques, check out advanced level surface tips.\n
Are you confident that your current project accounts for these subtle but critical factors? Let me know in the comments. Remember, mastery in flooring starts with understanding its hidden complexities.
Investing in the Right Equipment for Long-Term Durability
Maintaining a pristine floor after installation requires more than just good materials; it demands the right tools and consistent upkeep. Personally, I swear by high-quality vibration dampers when sanding hardwood floors, as they significantly reduce airborne dust and vibrations, resulting in a smoother finish and less wear on my equipment. An ultrasonic moisture meter is another essential to monitor subfloor moisture levels over time, helping prevent issues like warping or buckling, especially in humid climates. Using precision tools ensures your floors stay level, beautiful, and functional for years.
Implementing Routine Check-ups and Preventive Measures
Regular inspections are vital. I recommend periodically checking your floors with a long straightedge, especially after seasonal changes, to catch any settle or shifts early. Using a laser level allows for precise detection of unevenness before it becomes noticeable. If you notice low spots developing, applying a quick patch with self-leveling compound can save you costly repairs later on. Maintaining an optimal environment—controlling humidity with dehumidifiers or humidifiers—also preserves the integrity of hardwood and tile installations. Investing in these proactive steps translates into long-term savings and satisfaction.
Future Trends: Smarter Tools for Flooring Maintenance
As technology advances, I anticipate a growing availability of IoT-connected sensors that monitor subfloor conditions remotely, alerting homeowners or contractors to potential problems before they escalate. These innovations will integrate with smartphone apps, providing real-time data on moisture, temperature, and surface flatness. Embracing these tools now can give you an edge, ensuring your investment remains protected and your floors stay stunning long after installation. For more insights, check out precise floor leveling techniques.
How do I maintain my floors over time?
Maintaining your floors is an ongoing process. Regular cleaning with gentle, non-abrasive solutions combined with protective pads on furniture minimizes scratches and scuffs. Scheduling annual professional inspections ensures any minor issues are addressed promptly, preventing larger problems. Additionally, educating yourself on proper cleaning methods—such as avoiding excessive water—and using recommended furniture protectors helps preserve the finish and structural stability. Remember, dedicated maintenance preserves your investment and keeps your floors looking brand-new for years.

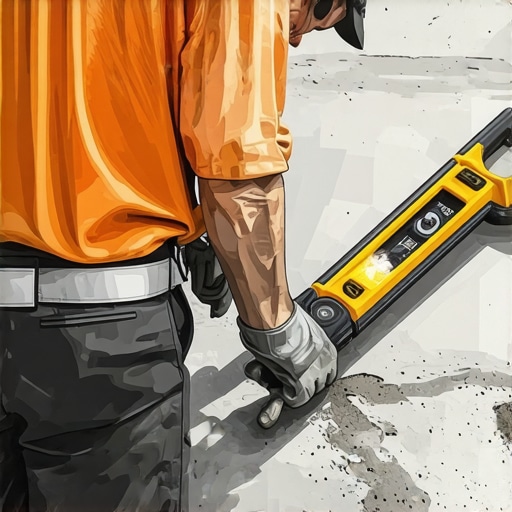
Image description: A homeowner using a laser level and moisture meter to inspect hardwood flooring, emphasizing the importance of regular maintenance tools for long-term flooring health.
Lessons the Hard Way That Transformed My Flooring Approach
One of the most valuable lessons I learned was the importance of patience and meticulous surface prep. Rushing through the primer application or skipping subfloor assessments led to waviness and costly repairs. I realized that understanding the subtle nuances of material curing times and subfloor conditions could make or break the entire project, saving me frustration and money in the long run.
Another insight was that even minor dips, less than 1/8 inch, require active correction. Ignoring small imperfections only set the stage for bigger issues like tile cracking or uneven hardwood planks. Addressing these early with proper leveling ensures a durable and stunning finish that truly stands the test of time.
Lastly, I discovered that investing in the right tools—like a high-quality laser level and moisture meter—empowers you to detect problems before they escalate. These tools provide peace of mind and allow for precision adjustments, elevating the quality of your flooring project beyond the basics.
Tools and Resources That Changed My Flooring Game
For anyone serious about achieving professional-level results, I recommend starting with precise floor leveling techniques. They offer detailed guidance on surface preparation and leveling that can prevent many common pitfalls. A reliable laser level, like the DeWalt DW089LG, has been invaluable in ensuring consistent flatness across large areas, giving me confidence that my floors are truly level. Additionally, using a moisture meter helps monitor environmental conditions, particularly important for hardwood floors in variable climates.
Supplement your toolkit with educational resources like expert installation tips to refine your skills and stay updated on best practices. These tools and tips collectively build a solid foundation for successful flooring projects that last.
Seize the Moment and Elevate Your Flooring Skills
The journey to perfectly flat floors is as much about continuous learning as it is about technique. Every project teaches us something unique, and embracing these lessons empowers us to create beautiful, durable spaces. Don’t let initial setbacks discourage you—instead, see them as stepping stones towards mastery. With the right mindset, tools, and approach, your future floors will not only impress but also withstand the test of time. Ready to tackle your next flooring challenge? Dive deeper into resources like expert strategies for lasting beauty and take your skills to new heights. Your perfect, level floor is just a careful step away.