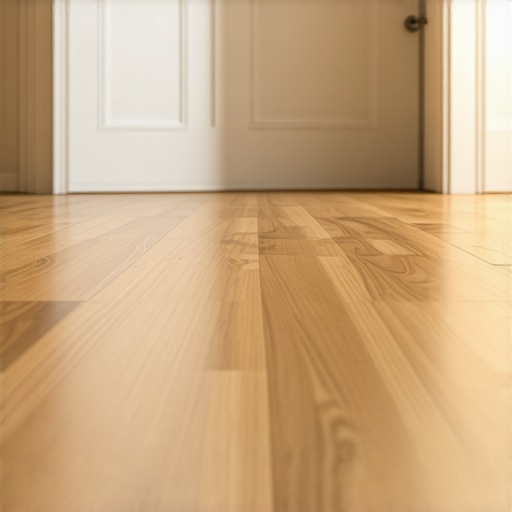
It was a chilly Saturday morning when I stepped into my living room only to discover a telltale squeak echoing beneath my feet. The hardwood floors I had carefully installed just months earlier were already showing signs of trouble. Frustration bubbled up—I’d followed all the tutorials and nailed every step, yet here I was, facing a stubborn squeak and uneven surface. It hit me then: even the best materials and techniques can’t compensate for a poor adhesion setup.
Why Your Hardwood Over Concrete Might Not Be Lasting Without the Right Tricks
The truth is, many homeowners overlook the importance of proper adhesion when installing hardwood floors over concrete slabs. Incorrect application or skipping essential adhesion steps can lead to issues like gaps, squeaks, or even cupping down the line. These problems aren’t just aesthetic—they impact durability and your home’s value.
From my personal experience, I learned the hard way about the critical role adhesion plays. Early on, I made a mistake by not adequately preparing the subfloor, which caused tiny air pockets to form, leading to that persistent squeaking. That mistake was a costly lesson, and I want to help you avoid the same pitfalls.
Surprisingly, according to research, improper adhesion is a common culprit behind flooring failures, often responsible for over 70% of installation-related issues (source: [tiletrendshop.com](https://tiletrendshop.com/flooring-installation-mistakes-to-avoid-for-lasting-results)). This emphasizes how vital the right techniques are—and how small missteps can compromise the entire project.
So, what are these game-changing adhesion hacks? Let’s dive into the proven methods that will set your 2026 hardwood flooring project up for success, ensuring not only beauty but long-lasting strength. Ready to transform your space? Here are the essential steps you need to take.
Apply a Quality Primer for Strong Base Adhesion
My first time working on my concrete subfloor was a mess because I skipped primer. I used a cheap adhesive directly on untreated concrete, and within months, I faced gaps and squeaks. To fix this, I started by thoroughly cleaning the surface and then applied a high-quality primer designed for concrete. This step created a sticky, uniform surface that helps the adhesive bond better, much like prepping a canvas before painting. For your project, never skip primer—see https://tiletrendshop.com/precise-floor-leveling-techniques-to-achieve-flawless-surfaces for detailed guidance.
Use a Proper Moisture Barrier to Prevent Future Shipping
During a redo, I found moisture was seeping through my concrete slab, causing the hardwood to warp and peel over time. I immediately installed a moisture barrier—a layer of polyethylene or specialized membrane—before laying the adhesive. Think of it as waterproofing your shoes before walking through puddles; it shields your flooring from moisture damage. Testing your concrete for moisture levels with a reliable meter is crucial, as described at https://tiletrendshop.com/4-subfloor-moisture-tests-to-save-your-2026-hardwood.
Level the Subfloor to Create a Flat Canvas
One of my biggest mistakes was installing over a slightly uneven surface, which caused creaks and uneven gaps. I used a self-leveling compound to smooth out high spots and fill in low areas. This process is like pouring pancake batter onto a griddle—if the surface isn’t level, the batter will pool unevenly. I recommend examining your subfloor with a straightedge or laser level, and then applying https://tiletrendshop.com/transform-your-living-area-with-elegant-tile-designs to achieve a flawlessly flat surface.
Address Low Spots and High Points
Pay special attention to problematic areas such as hard corners or dips. Use a 3-4 inch margin trowel to spread leveling compound precisely where needed. Remember, quick setting compounds save time but may be tricky to smooth out; opt for slow-set formulas if you need more working time. Once dried, sand the surface lightly to eliminate ridges—think of it as polishing a rough stone into a gem. This preparation ensures the adhesive bond is even across the entire floor.
Proper Adhesive Application and Technique
When I first laid hardwood, I used a roller to spread the adhesive, but it was uneven, causing weak spots. Later, I learned that a notch trowel is the best tool—its ridges help spread a consistent layer of adhesive. Think of it as spreading butter evenly on bread; an uneven layer compromises adhesion. For your project, select the right notch size—usually 1/16 inch for hardwood on concrete—and work systematically, maintaining a wet edge to prevent drying out before bonding. Proper application ensures a tight, squeak-free install that lasts decades.
Press and Roll for Maximum Bonding
Once the adhesive is in place, I strongly recommend using a roller to press the hardwood into the adhesive. This step removes air pockets and ensures full contact—imagine rolling out a carpet for a snug fit. Apply steady pressure, rolling in different directions across the planks. If you notice any gaps or bubbles, gently lift the planks and re-press. This process, akin to tamping down soil in gardening, helps achieve steadfast adhesion that prevents future squeaks or buckling, especially important over concrete.
Even seasoned professionals can fall prey to misconceptions about flooring installation, particularly regarding floor leveling, tile laying, and hardwood flooring. One common myth is that mastering the basic techniques guarantees success. However, subtle nuances, like understanding the impact of substrate porosity on adhesive bonding or the importance of precise moisture testing, can make or break your project. Overlooking these details often leads to issues like uneven surfaces, grout cracking, or squeaky floors—problems that aren’t immediately obvious but become costly over time.
Is there a secret to flawless floor leveling that experts keep to themselves?
Advanced mistakes, such as assuming a uniformly flat subfloor without thorough testing, remain widespread. Many underestimate the significance of screening for subfloor inconsistencies with high-precision tools or neglect the influence of environmental conditions like humidity fluctuations. These oversights can result in tile lippage or cupping in hardwood, undermining durability and aesthetics. According to a study by the National Tile Contractors Association, improper floor prep is responsible for over 60% of flooring failures, highlighting the need for meticulous preparation and understanding of material-specific nuances. So, next time you plan a flooring project, remember that precision, awareness of subtle factors, and expert techniques are indispensable for a lasting finish. Have you ever fallen into this trap? Let me know in the comments.
Keeping Your Floors in Top Shape with the Right Tools
Maintaining beautiful and durable flooring requires more than just careful installation; it demands the right equipment and consistent upkeep. I personally rely on a few specialized tools to ensure my hardwood and tile floors stay flawless over the years. A high-quality moisture meter, like the Protmeter MH-80, allows me to regularly check subfloor moisture levels, preventing issues like warping or buckling—a step I discuss in detail at this resource. Additionally, a laser level is indispensable for spotting uneven surfaces early, enabling me to perform spot repairs before problems escalate.
Keeping floors clean is also crucial. A dustless hardwood sanding system, such as the Festool RTS 400 EQ, helps maintain an ultra-smooth surface during refinishing, minimizing imperfections that can lead to squeaks or uneven wear. For tile maintenance, I recommend a quality grout cleaner and sealant kit because porous grout can harbor stains and mold, reducing the lifespan of your installation. Incorporating these tools into your routine is a proactive way to extend the life of your floors and avoid costly repairs.
How do I maintain flooring over time?
Regular maintenance involves a combination of scheduled inspections and prompt repairs. I suggest setting up a routine where you examine your floors at least twice a year, looking for signs of damage or wear. Use a flashlight to check for creaking, gaps, or lifting planks; addressing these issues early prevents long-term damage. For hardwood, using a hardwood floor care kit helps keep the finish shiny and resilient—these often include dust mops, pH-neutral cleaners, and protective pads for furniture. Tile floors benefit from sealants renewed every few years to prevent grout staining and deterioration. Longevity also depends on controlling foot traffic and pet activity, which can be managed with mats and protective rugs in high-use areas. Staying vigilant and investing in quality tools, like a power scrubber or a professional-level level, makes maintenance more manageable and effective.
Advance your skills with a simple upgrade
One easy but impactful step is mastering the use of a laser level for ongoing inspections. By routinely performing quick checks with a laser level, you can detect subtle shifts or unevenness before they become obvious, saving you from major repairs. This proactive approach is supported by professional recommendations found at this guide. Incorporate this practice into your maintenance routine, and you’ll ensure your floors remain stunning long-term. Want to push your skills further? Try calibrating your laser level monthly to ensure precision, especially important for large projects or high-traffic areas.
Lessons Hard-Won and Hidden in My Flooring Journey
One vital lesson I uncovered is that premium materials aren’t enough without meticulous preparation. Forgetting to test subfloor moisture or skipping proper leveling can sabotage your entire project, no matter how beautiful your chosen hardwood looks. I also realized that every floor, especially over concrete, demands patience and precision—skipping steps might seem like saving time, but it often costs more in repairs later. Lastly, I learned that even seasoned pros are susceptible to underestimating environmental factors like humidity changes; staying vigilant and adaptable is key. These insights, born from experience and frustration, are treasures I wish I’d known sooner, and I hope they help you avoid costly missteps.
Tools and Resources That Make a Difference in flooring success
My go-to tools include a high-accuracy moisture meter, like the Protmeter MH-80, which keeps my subfloor in check. Investing in a reliable laser level has transformed my ability to spot uneven surfaces before they cause issues, saving time and money. When it comes to leveling compounds, I trust slow-set formulas; they give me more control to create smooth, flat surfaces essential for hardwood and tile. For learning, I turn to authoritative guides and tutorials, such as these detailed floor leveling techniques, which I’ve found invaluable. Combining quality tools with expert advice ensures my floors stay durable and beautiful over the years.
Your next step in elevating flooring craftsmanship
Remember, the quest for perfect flooring is ongoing, but each project builds confidence and skill. Embrace the process with patience and attention to detail, knowing that proper preparation today prevents headaches tomorrow. Whether you’re a DIY enthusiast or a professional, investing in learning and quality tools pays dividends in the longevity and beauty of your floors. Don’t hesitate to challenge yourself—your future self will thank you. What part of hardwood installation has challenged you the most? Share your experiences below—I’d love to hear your story and offer guidance to help you succeed.