
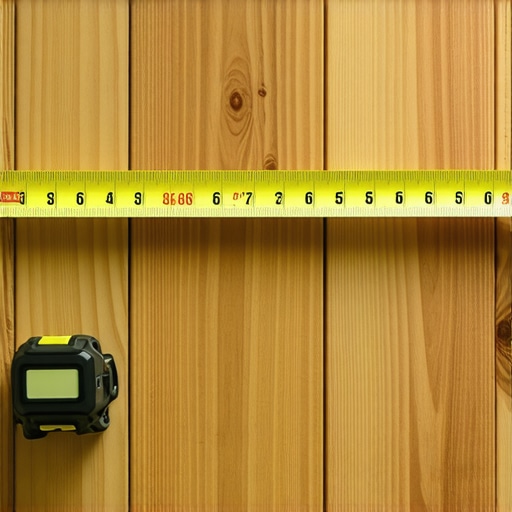
I will never forget the sinking feeling in my chest on a cool Saturday morning back in 2012. I had just rented a heavy, roaring drum sander from the local hardware store, ready to breathe new life into my 1920s bungalow. Two passes into the hallway, a high-pitched scream came from the machine. I stopped, lifted the drum, and stared down in horror. I had sanded completely through the wear layer of the oak planks, exposing the raw tongue-and-groove joints underneath. It was an expensive, heartbreaking mistake that forced me to rip up the entire hallway. If I had known mastering hardwood floor refinishing required checking the wood thickness first, I would have saved thousands of dollars and weeks of backbreaking labor. Today, I want to make sure you never have to experience that devastating moment. We are going to look at exactly how to measure your remaining wood so you can confidently decide whether to sand or leave it be.
Stop Before You Rent That Heavy Drum Sander
It is incredibly easy to get swept up in the excitement of a home makeover. You see those beautiful, rich grain patterns hiding beneath yellowed, scratched polyurethane, and you want to strip it all away immediately. But residential solid hardwood is not an infinite resource. Each aggressive sanding session strips away roughly 1/32 to 1/16 of an inch of wood. According to the National Wood Flooring Association, a typical solid wood plank can only withstand four to six sandings over its entire lifetime before the structure is permanently compromised. If your home has some history, or if previous owners loved DIY projects a little too much, you might be standing on the absolute limit of your floor’s lifespan. Before you even think about applying fresh coatings, you need to understand the current state of your boards to avoid a total floor failure.
Is this floor actually worth the sanding risk?
You might be wondering if you should just bypass the stress altogether and lay down something new, or if your old wood still has some fight left in it. It is a completely valid fear. Sanding a floor that is already too thin will ruin the planks, leaving you with splintering wood that cannot hold nails or structural weight. If you find your wood is indeed too thin for another deep sand, you are not completely out of luck; you might want to look into choosing the best tile for your hardwood floor upgrade to bring a fresh look to the space. But if we can save that gorgeous old timber, we absolutely should. Have you ever looked closely at your floor vents or threshold gaps and wondered if there is enough wood left to risk a refinishing project? Let me know in the comments below, because today we are going to grab our tape measures and find out once and for all.
Step-by-Step Guide to Inspecting Your Wear Layer
To avoid a disastrous breakthrough like mine, you need to measure the wood above the tongue and groove—this is your wear layer. Think of it like the tread on a tire; once it is worn down to the steel belts, the tire is useless. Your hardwood floor behaves the exact same way. If you have less than 1/16 of an inch of wood above the tongue, any aggressive drum sanding will destroy the structural integrity of your floor. When you are standing on a floor that is already too thin, you run the risk of structural failure, forcing you to look at solutions like choosing the best tile for your hardwood floor upgrade instead of saving the wood. Let us walk through the absolute best physical inspection spots to find out exactly what you are working with.
Find an Exposed Edge to Inspect
Your absolute best starting point is looking at an exposed cross-section of your flooring. You do not need to pry up boards to do this. Simply head to your floor vents. Remove a metal or wood register cover and look directly at the cut edge of the hardwood. If you have a transition where the wood meets another room, look at the threshold. I once spent three hours trying to measure a floor in an old craftsman dining room before I realized the hallway transition threshold was completely loose. When I lifted it, the entire profile of the floor plank was staring right back at me, saving me from renting a drum sander that would have ruined the remaining 1/32-inch wear layer. Grab a high-precision metal ruler or a pair of digital calipers and measure from the top surface of the wood down to the top of the horizontal tongue. If you see less than 2/32 of an inch, put the heavy sander away.
The Knife and Gap Inspection Trick
What happens if you do not have floor vents, or if all your transitions are tightly sealed? You can use a thin, stiff putty knife or a business card to feel the depth of the gaps between the planks. This is a highly tactile method that works wonders in older homes where the wood has naturally shrunk, leaving small gaps. Insert the corner of the knife gently into a gap until it rests on top of the tongue. Mark the depth on the knife blade with a fine-point pencil or a piece of tape, slide it out, and measure that distance. If you are dealing with severely uneven surfaces or settling subfloors, you might also want to look into flooring installation fundamentals leveling for a seamless look before making your final decision. 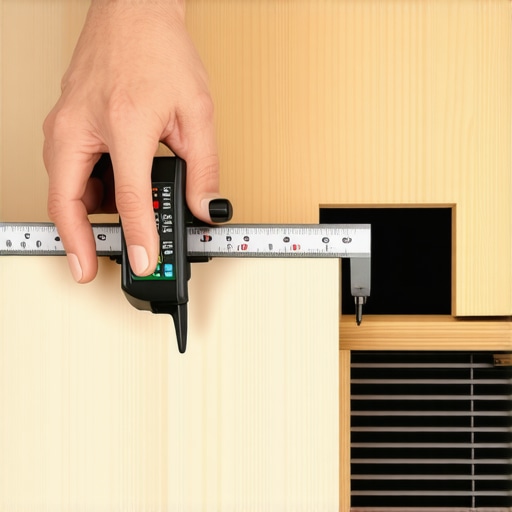
Remove a Baseboard for a Hidden View
If the vent and gap tricks do not work, you can get a perfect view by removing a small piece of baseboard trim along an exterior wall. Most hardwood floors are installed with an expansion gap of about 1/2 inch next to the drywall. By carefully prying back the baseboard with a trim puller, you can look straight down into the expansion gap to see the side profile of the outermost board. This edge will clearly show you the thickness of the wood above the tongue. When I used this method on a residential project last summer, I discovered that the previous homeowner had deeply sanded the center of the room but left the edges thick. It is incredibly important to check multiple spots across the room, as wear is rarely uniform.
Why You Cannot Trust a Level Floor
Everyone in the home improvement space tells you to buy a level, place it on the floor, and make sure the bubble sits dead center. But in my years of restoring old homes, I have learned that a level floor is actually a dangerous myth. You can have a floor that is perfectly level across the horizon, but if it has subtle waves, dips, or crowns, your new flooring is doomed to fail. What you actually need to measure is flatness, not levelness. When laying heavy materials like stone or porcelain, ignoring this distinction is the fastest path to cracked tiles and popping joints.
If you ignore the tiny valleys in your subfloor, the tile will bridge over those empty spaces. The moment a heavy foot steps on that spot, the tile bends into the void and snaps. To prevent this, you must master how to measure subfloor flatness before you start installing. A flat subfloor ensures 100% mortar contact, which is the real secret to a lifetime of crack-free surfaces.
Why is your self-leveler failing despite following the instructions?
Many advanced DIYers and even seasoned contractors jump straight to self-leveling underlayment to fix these subfloor dips, thinking it solves everything. They open the bag, mix it with water, and pour. But there is a massive trap here: wood subfloors are incredibly thirsty. If you do not seal the plywood first, the wood will instantly suck the water right out of your wet leveler. This causes the mixture to cure way too fast, crack, and pull away from the wood. It is absolutely crucial to apply the best primer for installing leveler over plywood before pouring a single drop. According to a study by the National Tile Contractors Association, improper subfloor priming accounts for over 60% of self-leveling compound failures in residential remodeling.
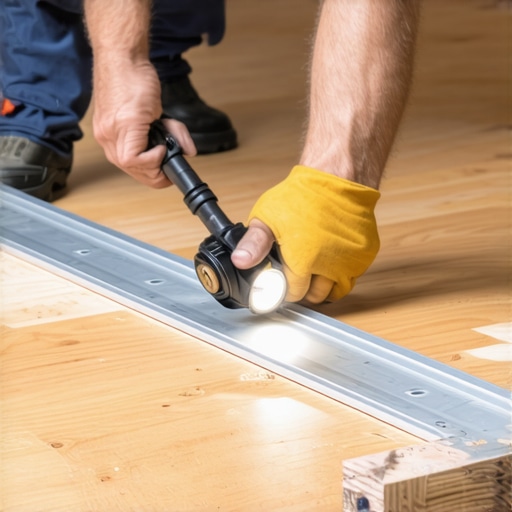
Another common mistake is ignoring how the room’s structural framing behaves under stress. People assume that once the floor is flat, they are good to go. However, if your floor joists have too much deflection (bounce), even the flatest floor will eventually ruin your tile work. You can check for this bounce by having someone jump in the center of the room while you watch a glass of water on the floor. If you notice a bouncy subfloor, you should learn the shim trick for fixing a bouncy plywood subfloor before committing to a rigid tile installation. Have you ever fallen into this trap and watched your brand-new floor start cracking or creaking? Let me know in the comments below, and let’s troubleshoot your projects together!
How Do I Maintain These Demanding Floors Over Time?
Once you have conquered the physical installation, your battle shifts from construction to preservation. The secret to making sure your hard work lasts for decades comes down to controlling the environmental elements. When I finished my first major restoration, I thought my job was done. It wasn’t. Wood and subfloors are dynamic, breathing elements that react constantly to moisture and dry air. To protect your hard work, you absolutely must learn how to keep your hardwood floors from gapping in the winter. Wood naturally contracts when indoor heating strips the air of humidity, and if you did not account for this movement during your planning phase, you will end up with unsightly, dust-collecting gaps between your planks.
My Go-To Maintenance Kit and Diagnostic Tools
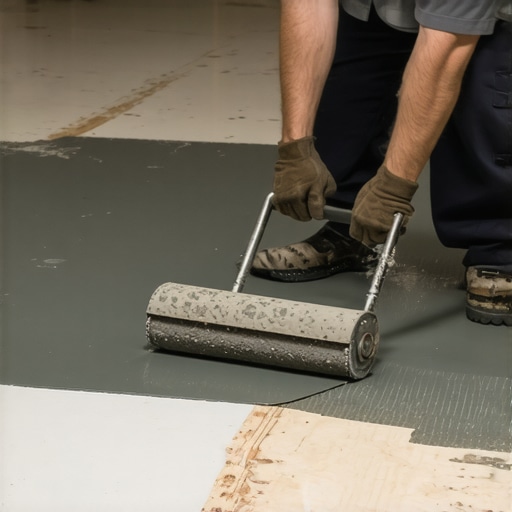
I do not rely on guesswork anymore. After years of trial and error, there are two tools that never leave my work truck. The first is a pinless wood moisture meter, specifically the Wagner Meters Orion 950. I use it to scan my wood before, during, and after installation. If you install wood over a subfloor that is holding hidden moisture, you are inviting cupping and structural buckling. The second tool is a heavy-duty, commercial-grade spiked roller. When pouring underlayments, using this specific tool is the only way to eliminate trapped bubbles and guarantee a glass-smooth finish. If you want to achieve professional results, you must understand how to use a spiked roller for the perfect leveling pour. It ensures that the compound knits together perfectly without weak spots.
As we look toward the future of home renovation, I predict a massive shift toward smart flooring systems. We are already starting to see smart sensors embedded directly into subfloor underlayments. These sensors connect to your home Wi-Fi and alert your smartphone the second they detect a hidden pipe leak or a spike in concrete moisture levels before any visible damage occurs on your expensive hardwood or tile surfaces. Keeping your floors healthy is all about proactive monitoring rather than reactive fixing.
Stop Damaging Your Surfaces with Toxic Cleaners
Another major long-term issue is the improper use of cleaning agents. Homeowners love the idea of sanitizing, but they unknowingly strip the protective layers off their floors. For example, using harsh, acidic mixtures on premium floor tiles will slowly eat away at the stone. It is highly critical that you know why you should never use acid-based cleaners on natural stone if you want to preserve their natural luster. For my projects, I always recommend sticking to pH-neutral, specialty stone soaps or gentle micro-fiber systems that lift dirt without degrading the sealers. I encourage you to try one advanced tip today: grab a dedicated digital hygrometer, place it in your main living space, and monitor your home’s relative humidity for a week. Keeping it between 35% and 55% will single-handedly double the lifespan of your hardwood floors.
3 Myths About Hardwood Refinishing and Subfloors That Held Me Back
Over the years, I have seen and made plenty of mistakes that completely changed how I look at home renovation. Here are three hard-earned revelations that will save you time, money, and heartache:
- Sanding resolves everything: For years, I believed a drum sander could erase any defect. In reality, sanding past the wear layer is an irreversible mistake. If your planks are too thin, you must pivot. At that point, you are better off looking into choosing the best tile for your hardwood floor upgrade.
- Visual levelness equals structural readiness: A floor that looks perfectly level can still have hidden valleys that ruin your hard work. You must check for deflection and bounce, or your new surface will fail. Knowing the shim trick for fixing a bouncy plywood subfloor is essential to stabilize your foundation before laying down rigid materials.
- All primers are created equal: Skipping or rushing the priming stage before pouring self-leveler is the easiest way to cause a total floor failure. Wood is porous and thirsty; without a proper barrier, it will ruin your pour. Always apply the best primer for installing leveler over plywood to ensure a strong, reliable bond.
My Essential Toolkit for Perfect Floor Prep
I do not step onto a job site without these specific, trusted tools and diagnostic assets. If you want professional results, these are non-negotiable:
- Wagner Meters Orion 950 Pinless Moisture Meter: This tool is critical because installing wood over a damp subfloor leads to cupping. I also use it to check my concrete slabs to avoid moisture-related failures.
- Commercial-Grade Spiked Roller: When working with self-leveling compounds, this tool is the only way to release trapped air bubbles. Learning how to use a spiked roller for the perfect leveling pour is key to getting a glass-smooth surface.
- Digital Hygrometer: To maintain your floors long-term, you must manage indoor humidity. Keep your home between 35% and 55% relative humidity to single-handedly prevent wood shrinkage. Knowing how to keep your hardwood floors from gapping in the winter will keep your planks tight and beautiful year-round.
Your Turn to Tackle Your Flooring Project with Confidence
Every gorgeous home transformation starts with patient preparation. Whether you are carefully measuring your remaining wood wear layer, priming a thirsty plywood subfloor, or prepping for a complete tile upgrade, taking your time during the inspection phase guarantees a gorgeous finish. You now have the exact blueprint and professional techniques to avoid my costly 2012 mistake. Get out there, measure your surfaces, and build a floor that will last for generations.
Have you ever run into unexpected trouble with an uneven subfloor or sanded a bit too deep? Let me know your experiences and questions in the comments below!