
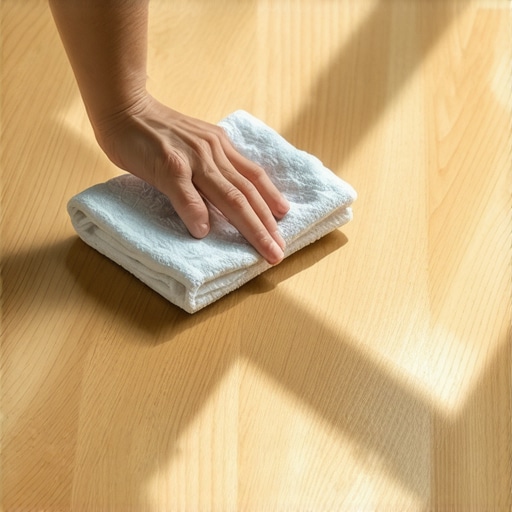
I stood there in my kitchen, socks sliding across what should have been the crowning glory of my renovation, feeling a pit in my stomach. The light hit the boards just right—or just wrong—and revealed a streaky, dull film that made my brand-new investment look twenty years old. I’d spent weeks researching how to choose the right hardwood floors, only to feel like I’d failed at the finish line. I tried buffing. I tried praying. I even tried a heavy-duty degreaser that I deeply regretted later. That’s the thing about new wood; sometimes it comes with a “factory secret” you never asked for.
Stop Fighting the Factory Haze and Start Seeing the Shine
It’s incredibly frustrating. You shell out the big bucks for a premium product, but the boards arrive coated in a stubborn, waxy residue designed to protect them during shipping. If you don’t handle it right, you end up with a floor that stays perpetually “smudgy.” Early on, I made the classic rookie mistake of thinking more chemicals meant more clean. I grabbed a bottle of floor stripper, and within minutes, my hardwood floor turned cloudy and looked like it had been through a sandstorm. It was a heart-stopping moment of realization: you can’t brute-force your way to a clean floor. You need a strategy that respects the wood’s integrity while slicing through that paraffin barrier. This isn’t just about aesthetics; it’s about hardwood floor care secrets that ensure your investment lasts for decades. Today, I’m going to share the dead-simple method I discovered—mostly by accident and a bit of desperate trial and error—that lifts that wax without a single scratch.
Will this actually damage my expensive new finish?
It’s a fair question. When you’ve just invested thousands, the last thing you want to do is start “hacking” the surface. According to the National Wood Flooring Association (NWFA), improper cleaning is the leading cause of premature finish failure on residential wood floors. I was terrified of this too. I worried that anything strong enough to cut wax would also eat through the polyurethane. But here’s the secret: the hack I’m talking about is gentler than most “official” floor cleaners you’ll find at the big-box stores. We aren’t using harsh abrasives or industrial solvents. We are using physics and a very specific, common household item to lift the wax away. Have you ever looked at your floor after a professional installation and felt like it just wasn’t “popping” the way it did in the showroom? You aren’t crazy, and you haven’t been cheated. You’re just dealing with a protective layer that’s overstayed its welcome. Whether you are mastering floor refinishing in 2025 or just trying to live in a house that doesn’t show every footprint, this fix is a game-changer. Let’s get into the “why” behind the wax so you can understand exactly what we’re stripping away.
Identify the Haze Before You Scrub
Think of that factory wax as the static-cling plastic on a new TV. It’s there so the installers don’t scratch the finish while they are wrestling with precise floor leveling techniques or dragging tools across the room. To see if you’re dealing with wax or a permanent finish issue, do the “buff test.” Take a clean, dry microfiber cloth and rub a small area vigorously for 30 seconds. If it gets shiny and the cloth looks slightly grey or waxy, you’ve found your culprit. If it stays dull, you might be looking at a situation where the wood was sanded against the grain or has a deeper finish failure. Knowing the difference saves you hours of wasted elbow grease.
The Microfiber and Alcohol Magic Trick
I remember the first time I tried this on my sunroom floors. I was terrified. I had a bottle of 70% isopropyl alcohol in one hand and a stack of microfiber pads in the other. I sprayed a light mist—not a puddle—onto the pad and wiped a single board. The pad came up looking like I’d just cleaned a chimney. That “haze” wasn’t just dust; it was a sticky paraffin layer that was trapping every bit of debris. By using alcohol, you’re using a solvent that evaporates almost instantly, which is the gold standard for hardwood floor care secrets. It breaks the bond of the wax without soaking into the wood fibers.#IMAGE_PLACE_HOLDER_B#
Why Saturating Your Wood is a Disaster Waiting to Happen
The biggest trap people fall into is thinking they need a “wet mop” to get the job done. This is one of those flooring installation mistakes that can ruin a $10,000 floor in a single afternoon. When you use too much liquid, you risk the damp mop mistake where moisture seeps into the joints and causes the wood to swell or cup. Instead, work in small sections—about 3 feet by 3 feet. Mist the cloth, not the floor. If the floor stays wet for more than 15 seconds, you are using too much. You want the alcohol to “flash off” (evaporate) almost as soon as you wipe. This ensures you’re stripping the haze, not the structural integrity of your boards.
Dealing with Stubborn Spots Without Sanding
Sometimes, a simple wipe won’t cut it. In my kitchen, near the heavy-traffic zones where we’d been walking before I realized the floor was coated, the wax had been ground in deep. I had to use a bit more pressure and a “double-pass” method. First pass to loosen the wax, second pass with a fresh, dry cloth to lift it. If you find your floor is still looking streaky, it’s usually because your cloth is saturated with the wax you just removed. Swap your pads often. I went through twelve pads for a single room, but the result was a floor that finally looked like the showroom sample. This level of detail is what separates a DIY job from a professional-grade result, much like how mastering floor leveling makes or breaks a tile installation.Most people assume that once the floor is down, the hard part is over. They follow the manufacturer’s instructions to a T, buying the specific branded cleaners recommended in the glossy brochure. But here is the contrarian truth: many of those cleaners are too weak to remove the shipping paraffin, yet over time, they leave their own microscopic buildup that traps dust. It’s a cycle of dullness. I’ve found that sticking strictly to the safe routine often masks a deeper problem. If you’re noticing that your haze won’t budge even after the alcohol trick, you might be facing a fundamental installation error. One of the biggest oops moments I see is skipping the subfloor check. You can have the most expensive planks in the world, but if your subfloor isn’t flat, the finish will catch light at weird angles, making it look dirty even when it is sterile. I’ve learned that precise floor leveling techniques are just as important for wood as they are for tile. If the board is slightly bowed because the floor underneath is uneven, the finish reflects light inconsistently, creating a ghost haze that no chemical can fix.
Can a hidden moisture issue mimic a surface haze?
Absolutely, and this is where we get into the advanced stuff. According to a report by the National Wood Flooring Association, nearly 75% of post-installation finish complaints are actually moisture-related. If your subfloor was still damp when you laid the boards, that moisture is trying to escape through the finish. It gets trapped, creating a milky appearance known as blushing. This isn’t a surface wax; it’s a structural cry for help. This is why you must how to use a moisture meter before you lay wood floors—it’s the only way to be 100% sure your investment is safe. If you see this milky white tint, stop cleaning and start measuring. This kind of nuance is what keeps hardwood floor care secrets actually effective.#IMAGE_PLACE_HOLDER_C#
Avoid the Over-Buffing Disaster
Another common trap is the over-buffing disaster. People see a dull spot and think they need to polish it into submission. If you use a high-speed buffer on a new factory-finished floor, you risk burning the topcoat. Modern finishes are often UV-cured at the factory; they aren’t like the old-school wax-and-buff floors of your grandmother’s era. If you try to polish them like a car, you’ll end up with the sanding mistake that leaves swirl marks on your wood, even if you never touched a piece of sandpaper. When you’re choosing the right hardwood floors for your home, look beyond the color and ask about the finish type. A high-gloss finish will show every micro-scratch and every bit of leftover factory wax, whereas a matte or wire-brushed finish is much more forgiving. If you’re also planning a tile selection for elegant hardwood floors in 2025, remember that the transition between materials is often where the haze looks worst because of the lighting contrast. Make sure you’re mastering floor leveling so the height difference doesn’t create a lip that collects dust and wax. I’ve seen so many DIYers get frustrated and give up, thinking they bought a bad floor. Usually, it’s just a combination of leftover factory coating and a subfloor that wasn’t quite ready for primetime. Have you ever fallen into this trap where you cleaned your floors until your arms hurt, only to have them look worse the next day? Let me know in the comments.
Stop Using the Wrong Vacuum on Your Expensive Boards
I used to think any vacuum with a ‘hard floor’ setting was safe. I was wrong. Most standard vacuums have hard plastic wheels or stiff bristles that eventually micro-scratch the finish, dulling it faster than actual foot traffic. I finally switched to a canister vacuum with a dedicated felt-bottom floor brush, and it was a revelation. If you are still cleaning up after a project, you absolutely need the vacuum attachment that actually picks up fine sawdust rather than just swirling it into the air. This isn’t just about cleanliness; it’s about preventing that abrasive grit from acting like sandpaper every time you walk across the room. Keeping your floor pristine requires a commitment to the right gear, especially after you’ve put in the work on a step-by-step guide to flooring installation and leveling success.
How do I maintain my flooring finish over time?
The key is consistency and climate control. According to the NWFA Technical Manual (Section IV), maintaining a consistent relative humidity between 30% and 50% is the single most important thing you can do for wood longevity. I keep a hygrometer in my hallway now. If the air gets too dry in the winter, the boards shrink; if it’s too humid, they swell. This environmental stability protects your hardwood floor care secrets to longevity and shine more than any polish ever could. For those of you managing transitions between rooms, remember that how to achieve flawless floor leveling before tile laying ensures that your maintenance routine—like robotic vacuums—doesn’t get hung up on uneven lips or edges. #IMAGE_PLACE_HOLDER_D#
Predicting the Next Decade of Floor Tech
I’m seeing a massive shift toward ‘smart’ subfloors. We are already seeing the integration of moisture sensors that can alert your phone if a pipe leaks under your expensive planks. In the coming years, expect to see more of this. If you are currently mastering hardwood floor refinishing expert tips for 2025, consider how these technologies might integrate with your current subfloor prep. Even a simple tile installation pointers that save time and money approach will soon include digital leveling verification. I personally recommend starting with one high-quality hygrometer this week. It’s a $15 tool that can save a $15,000 floor. Try placing it in your most high-traffic room and see how much your humidity swings over 48 hours; you might be surprised at what your wood is actually ‘breathing’ every day.
The Hard Truth About My Shiny New Floor Disaster
Reflecting on that first week with my new floors, I realized that I was treating the finish like a permanent shield rather than a living surface. The biggest ‘lightbulb’ moment for me was accepting that more product doesn’t equal more clean. In fact, most of my early struggles came from trying to ‘fix’ a problem with more chemicals rather than simply removing what shouldn’t have been there in the first place—that stubborn factory paraffin.
Another lesson? Don’t ignore the environment. If you want to learn how to stop hardwood floors from gapping in the hallway, you have to realize that moisture and temperature control are your best friends. I also learned the hard way that if the wood was sanded against the grain during production, no amount of alcohol will fix that specific texture; you have to know when a surface issue is actually a structural one.
The Minimalist Kit for Pristine Planks
You don’t need an entire aisle of products to keep your home looking like a magazine cover. I’ve narrowed my cleaning arsenal down to three essentials that I trust implicitly. First, 70% Isopropyl alcohol is my secret weapon for cutting through factory wax without leaving a residue. Second, a stack of high-density microfiber pads; I never use the same side twice when tackling a hazy area to avoid redepositing wax. Third, a reliable digital hygrometer is non-negotiable. It’s the only way to track the climate and ensure your hardwood floor care secrets to longevity and shine actually work. Finally, a canister vacuum with a dedicated felt brush is the only way to avoid those micro-scratches that eventually lead to a dull, cloudy mess.
Take Back Your Home’s Natural Glow
It’s easy to feel defeated when your massive investment looks mediocre, but remember that most ‘ruined’ floors are just buried under a temporary layer of protection or poor maintenance habits. You have the tools and the knowledge now to reveal the floor you actually paid for. Whether you are just finishing a step-by-step guide to flooring installation and leveling success or you’re trying to save a five-year-old finish, the solution is often simpler than it looks. Your hardwood floors are meant to be lived on, enjoyed, and admired, not fought with every weekend. Go grab that alcohol and a fresh cloth, and start with just one corner. You’ll be amazed at what’s waiting underneath.
Have you ever noticed a weird film on your new planks that just wouldn’t budge no matter how much you mopped? Let me know your experience in the comments below!