
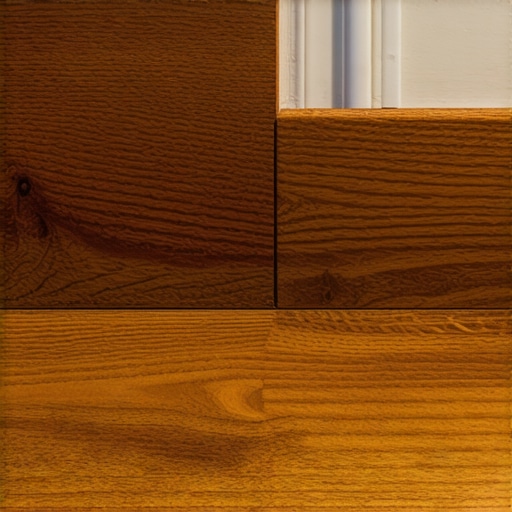
I spent three days on my hands and knees, convinced I was finally mastering the art of the perfect finish. The middle of the room was a masterpiece of golden oak, but as I pulled the stain rag toward the baseboards, my heart sank. The corners weren’t just dark; they looked like I’d spilled a cup of espresso on them while the rest of the floor sipped on light honey. It felt like a betrayal of all that hard work. I realized right then that the edges of a room are a completely different beast than the wide-open spaces. If you’ve ever stood back to admire your work only to see those “black holes” in every corner, you aren’t failing—you’re just dealing with a very specific quirk of wood physics that most DIY guides completely ignore.
The Frustrating Reality of Corner Discoloration
Today, we’re going to stop the guessing game. I’m going to show you exactly why your stain is behaving like a sponge in the corners and, more importantly, how to get that seamless, professional look across the entire floor. Whether you are [mastering hardwood floor refinishing](https://tiletrendshop.com/mastering-hardwood-floor-refinishing-expert-tips-for-2025) for the first time or you’re a seasoned pro who hit a snag, we’re fixing this together.
Is your floor just naturally thirsty in the corners?
You might be worried that your wood is defective or that you bought a bad batch of stain. I used to think the same thing. I even tried to “sand it out” more aggressively, which—spoiler alert—actually made the problem worse because I was [sanding against the grain](https://tiletrendshop.com/how-to-fix-a-wood-floor-that-was-sanded-against-the-grain) without even realizing it. The truth is, it’s rarely the wood’s fault. It’s usually about the “scratch” we leave behind. Have you ever noticed your corners looking dramatically darker than the rest of the room, or is it just a subtle shadow that’s driving you crazy?
The Science of Why Corners Soak Up More Pigment
The most common culprit is something called “burnishing.” When we use big drum sanders for the main floor, we’re often using a different pressure and motion than when we’re tucked into a corner with a palm sander or a piece of folded sandpaper. According to research on wood cell structure, wood is essentially a bundle of straws; if those straws are “crushed” or sanded with a finer grit than the rest of the floor, they won’t take stain the same way. Surprisingly, a study by the National Wood Flooring Association notes that even a slight variation in sanding grit—say, using 100-grit on the edges but 80-grit in the corners—can cause a visible shift in color density because the coarser scratch creates more surface area for pigment to hide. [IMAGE_PLACEHOLDER] When I first started, I made the classic mistake of thinking I could skip a grit sequence in the corners just to save time. I paid for it with blotchy, dark edges that took twice as long to fix. Learning [hardwood floor care secrets](https://tiletrendshop.com/hardwood-floor-care-secrets-to-longevity-and-shine) taught me that consistency is king. If the “profile” of the wood isn’t identical from the center to the wall, the stain will never look uniform. We need to talk about how to prep those tight spots so they play nice with the rest of your beautiful planks.
Stop Treating Your Corners Like the Rest of the Floor
I once spent an entire Saturday morning sanding a living room with a heavy-duty drum sander, then switched to a random orbital sander for the edges. I thought I was being thorough, but when the stain hit the wood, the edges looked like a dark, muddy picture frame around a beautiful light painting. The mistake wasn’t in my effort; it was in my equipment. The mechanical action of big machines “polishes” the wood fibers flat, while a hand-held sander in a corner tends to leave the wood “open” and thirsty. To get a professional result, you have to bridge that gap. If you find your subfloor has dips near the walls that make sanding difficult, mastering floor leveling is often the first step to ensure your tools can actually reach the surface evenly.
Why Hand-Sanding is Your Best Friend
The secret to a uniform finish is “hand-blocking” the corners. After you finish with your power tools, take a manual sanding block and the exact same final grit paper you used on the main floor. Go into every corner and sand by hand, following the direction of the grain. This ensures the scratch pattern—the tiny microscopic valleys that hold the pigment—is identical across the entire surface. If you are mastering hardwood floor refinishing expert tips for 2025, you know that even a 20-grit difference can ruin a room. I once used a 60-grit piece of paper by hand to “really get the old finish out” in a dark corner, and the stain turned almost black because the wood was too rough. I ended up having to fix a wood floor that was sanded against the grain because my localized hand-sanding was too aggressive.
How to Apply Stain in Tight Quarters Without the Blotches
Once your sanding is consistent, you need to manage how the wood drinks the stain. If the corners are naturally more porous, use the water popping technique. This involves lightly misting the wood with distilled water to raise the grain uniformly. Think of it like pre-soaking a dry sponge so it doesn’t just suck up the first drop of liquid in one concentrated spot. It’s a technique I frequently rely on when I need to match the wood grain when patching a hole in oak. It levels the playing field between the machine-sanded center and the hand-sanded edges. 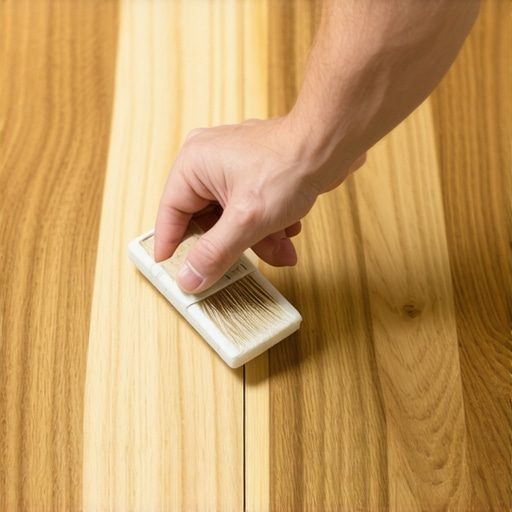
Use a Foam Brush for Surgical Precision
Don’t just slop a rag into the corner and hope for the best. For the most control, use a high-quality foam brush to “cut in” the corners just like you would with paint. This allows you to apply a specific amount of pigment into the tightest 90-degree angles. The most critical part is the timing. If you let the stain sit in the corners for five minutes but wipe the main floor after two, the corners will be darker. Use a stopwatch if you have to. This attention to detail is just as vital as tile installation pointers that save time and money, because once that pigment deep-dives into the grain, your only option is to sand it all back down and start over. Work in small sections, blending the wet edge of your corner work into the main floor area while both are still damp to avoid “lap marks.”
People often assume that if a corner looks dark or blotchy after staining, they simply didn’t sand deep enough. In my experience, the opposite is usually true: you’ve likely ‘burnished’ the wood. When you over-sand a specific spot with a high-speed orbital sander or a fine-grit hand-block, you are essentially melting the lignin in the wood fibers, creating a glass-like surface. This prevents the stain from penetrating evenly until it hits a microscopic scratch, where it then dives in all at once. This is a classic ‘Oops’ factor that catches even seasoned DIYers off guard. If you keep sanding a dark spot thinking it will get lighter, you are actually making the surface less receptive to pigment.
Don’t fall for the ‘over-sanding’ trap
This localized over-polishing creates what pros call the ‘halo’ effect. This is where flooring installation mistakes to avoid for lasting results often begin. If the scratch pattern in the corners doesn’t perfectly match the scratch pattern from the large drum sander used in the center of the room, light will reflect off the floor differently, making the edges appear like a dark frame around the room. I’ve found that using the sanding secret for restoring greyed-out teak floors—which involves a final, slow-speed hand-buffing with a medium grit—can bridge the gap between machine-sanded and hand-sanded areas.
Why does your stain look like a ‘halo’ around the baseboards?
This advanced frustration typically stems from a ‘grit mismatch’ or velocity difference between your tools. Research from the Forest Products Laboratory indicates that wood cells are incredibly sensitive to compression; an edger spinning at high RPMs compresses the wood differently than a drum sander. To avoid this, you must ensure your final sanding pass in the corners is done with the exact same grit and pressure as the rest of the floor. If you ignore this, you’re essentially setting yourself up for a two-tone floor. 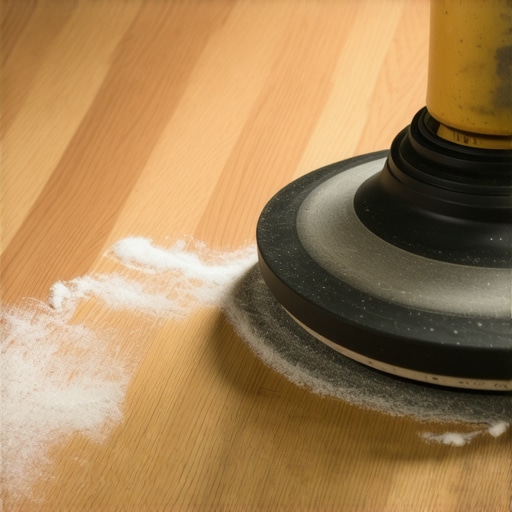
The moisture mystery hiding in your exterior walls
One nuanced detail many homeowners ignore is the moisture content specifically near exterior walls. Before you even open a can of stain, you should learn how to use a moisture meter before you lay wood floors or refinish them. If your subfloor or walls are holding humidity, the wood at the edges will be ‘fatter’ and its pores will be more open than the wood in the climate-controlled center of the room. This makes the edges drink significantly more stain. If this moisture isn’t addressed, you might eventually see why your hardwood floor is crowning and how to dry it out as a much more expensive problem down the road.
Finally, avoid the common mistake of using a damp rag to ‘tack’ the floor edges right before staining. If that rag is even slightly too wet, you are water-popping only the corners, leading to those dreaded black holes. Consistency in every prep step, from hardwood floor care secrets to longevity and shine to the final vacuuming, is what separates a DIY job from a professional masterpiece. Getting a floor to look uniform is less about brute force and more about managing the porosity of the wood. Have you ever fallen into this trap? Let me know in the comments.
The tool that finally ended my corner nightmares
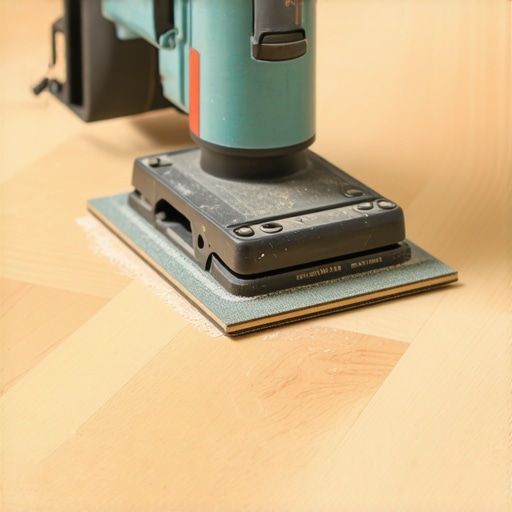
For the longest time, I resisted spending the extra money on specialized equipment. I thought a standard block and some elbow grease were all a ‘real’ woodworker needed. I was wrong. The game-changer for me was the Festool RO 90 DX. This isn’t just a sander; it’s a surgical instrument for corners. Because it can switch from a circular motion to a specialized delta (triangular) head, it reaches the absolute deepest part of the 90-degree angle without leaving the cross-grain scratches that haunt my dreams. When you are mastering hardwood floor refinishing expert tips for 2025, you start to realize that the right gear doesn’t just save time—it saves the entire aesthetic of the room. If you’re still fighting with a standard vibrating palm sander in the corners, you’re essentially bringing a butter knife to a sword fight. I’ve seen people try to compensate for poor tools by pressing harder, which leads directly to those flooring installation mistakes to avoid for lasting results, like deep circular gouges that only show up after the first coat of poly is dry.
How do I keep this finish looking fresh for a decade?
Maintenance isn’t just about sweeping; it’s about climate control. Wood is a living, breathing material. According to the NWFA’s Technical Publication No. C200, maintaining a consistent relative humidity between 30% and 50% is the single most important factor in preventing your floors from shrinking or gapping. I personally keep a digital hygrometer in my hallway right next to the thermostat. If I see the humidity drop in the winter, the humidifier goes on immediately. This prevents the edges of my planks from pulling away from the baseboards and exposing those raw, uncolored edges we worked so hard to hide. You should also check the moisture levels periodically; learning how to use a moisture meter before you lay wood floors or refinish them is a skill that pays dividends every season. For daily cleaning, stay far away from anything that ‘adds shine.’ Those waxes build up and turn cloudy, eventually forcing you to use the sanding secret for restoring greyed-out teak floors much sooner than you’d like. Stick to a microfiber mop and a pH-neutral cleaner specifically formulated for hardwood.
AI and sensors are the next frontier for your living room
Looking ahead, I predict we are going to see a massive shift toward ‘smart floors.’ We’re already seeing the first wave of underlayments embedded with moisture sensors that can alert your smartphone if a pipe leaks under your hardwood before you ever see a puddle. This kind of tech is going to revolutionize hardwood floor care secrets to longevity and shine, moving us from reactive repairs to proactive preservation. We might even see stain formulations that use UV-reactive pigments to prevent fading in sunny rooms. For now, the best thing you can do is focus on the fundamentals we’ve covered. I want you to try one thing this weekend: take a small scrap piece of your flooring and perform a ‘water pop’ test. Mist half of it with distilled water, let it dry, and then apply your stain across the whole piece. Seeing that side-by-side difference in how the wood drinks the pigment will change the way you look at your floors forever.
I spent three days on my hands and knees, convinced I was finally mastering the art of the perfect finish. The middle of the room was a masterpiece of golden oak, but as I pulled the stain rag toward the baseboards, my heart sank. The corners weren’t just dark; they looked like I’d spilled a cup of espresso on them while the rest of the floor sipped on light honey. It felt like a betrayal of all that hard work. I realized right then that the edges of a room are a completely different beast than the wide-open spaces. If you’ve ever stood back to admire your work only to see those “black holes” in every corner, you aren’t failing—you’re just dealing with a very specific quirk of wood physics that most DIY guides completely ignore.
The Frustrating Reality of Corner Discoloration
Today, we’re going to stop the guessing game. I’m going to show you exactly why your stain is behaving like a sponge in the corners and, more importantly, how to get that seamless, professional look across the entire floor. Whether you are mastering hardwood floor refinishing for the first time or you’re a seasoned pro who hit a snag, we’re fixing this together.
Is your floor just naturally thirsty in the corners?
You might be worried that your wood is defective or that you bought a bad batch of stain. I used to think the same thing. I even tried to “sand it out” more aggressively, which—spoiler alert—actually made the problem worse because I was sanding against the grain without even realizing it. The truth is, it’s rarely the wood’s fault. It’s usually about the “scratch” we leave behind. Have you ever noticed your corners looking dramatically darker than the rest of the room, or is it just a subtle shadow that’s driving you crazy?
The Science of Why Corners Soak Up More Pigment
The most common culprit is something called “burnishing.” When we use big drum sanders for the main floor, we’re often using a different pressure and motion than when we’re tucked into a corner with a palm sander or a piece of folded sandpaper. According to research on wood cell structure, wood is essentially a bundle of straws; if those straws are “crushed” or sanded with a finer grit than the rest of the floor, they won’t take stain the same way. Surprisingly, a study by the National Wood Flooring Association notes that even a slight variation in sanding grit—say, using 100-grit on the edges but 80-grit in the corners—can cause a visible shift in color density because the coarser scratch creates more surface area for pigment to hide. [IMAGE_PLACEHOLDER] When I first started, I made the classic mistake of thinking I could skip a grit sequence in the corners just to save time. I paid for it with blotchy, dark edges that took twice as long to fix. Learning hardwood floor care secrets taught me that consistency is king. If the “profile” of the wood isn’t identical from the center to the wall, the stain will never look uniform. We need to talk about how to prep those tight spots so they play nice with the rest of your beautiful planks.
Stop Treating Your Corners Like the Rest of the Floor
I once spent an entire Saturday morning sanding a living room with a heavy-duty drum sander, then switched to a random orbital sander for the edges. I thought I was being thorough, but when the stain hit the wood, the edges looked like a dark, muddy picture frame around a beautiful light painting. The mistake wasn’t in my effort; it was in my equipment. The mechanical action of big machines “polishes” the wood fibers flat, while a hand-held sander in a corner tends to leave the wood “open” and thirsty. To get a professional result, you have to bridge that gap. If you find your subfloor has dips near the walls that make sanding difficult, mastering floor leveling is often the first step to ensure your tools can actually reach the surface evenly.
Why Hand-Sanding is Your Best Friend
The secret to a uniform finish is “hand-blocking” the corners. After you finish with your power tools, take a manual sanding block and the exact same final grit paper you used on the main floor. Go into every corner and sand by hand, following the direction of the grain. This ensures the scratch pattern—the tiny microscopic valleys that hold the pigment—is identical across the entire surface. If you are mastering hardwood floor refinishing expert tips for 2025, you know that even a 20-grit difference can ruin a room. I once used a 60-grit piece of paper by hand to “really get the old finish out” in a dark corner, and the stain turned almost black because the wood was too rough. I ended up having to fix a wood floor that was sanded against the grain because my localized hand-sanding was too aggressive.
How to Apply Stain in Tight Quarters Without the Blotches
Once your sanding is consistent, you need to manage how the wood drinks the stain. If the corners are naturally more porous, use the water popping technique. This involves lightly misting the wood with distilled water to raise the grain uniformly. Think of it like pre-soaking a dry sponge so it doesn’t just suck up the first drop of liquid in one concentrated spot. It’s a technique I frequently rely on when I need to match the wood grain when patching a hole in oak. It levels the playing field between the machine-sanded center and the hand-sanded edges.
Use a Foam Brush for Surgical Precision
Don’t just slop a rag into the corner and hope for the best. For the most control, use a high-quality foam brush to “cut in” the corners just like you would with paint. This allows you to apply a specific amount of pigment into the tightest 90-degree angles. The most critical part is the timing. If you let the stain sit in the corners for five minutes but wipe the main floor after two, the corners will be darker. Use a stopwatch if you have to. This attention to detail is just as vital as tile installation pointers that save time and money, because once that pigment deep-dives into the grain, your only option is to sand it all back down and start over. Work in small sections, blending the wet edge of your corner work into the main floor area while both are still damp to avoid “lap marks.”
People often assume that if a corner looks dark or blotchy after staining, they simply didn’t sand deep enough. In my experience, the opposite is usually true: you’ve likely ‘burnished’ the wood. When you over-sand a specific spot with a high-speed orbital sander or a fine-grit hand-block, you are essentially melting the lignin in the wood fibers, creating a glass-like surface. This prevents the stain from penetrating evenly until it hits a microscopic scratch, where it then dives in all at once. This is a classic ‘Oops’ factor that catches even seasoned DIYers off guard. If you keep sanding a dark spot thinking it will get lighter, you are actually making the surface less receptive to pigment.
Don’t fall for the ‘over-sanding’ trap
This localized over-polishing creates what pros call the ‘halo’ effect. This is where flooring installation mistakes to avoid for lasting results often begin. If the scratch pattern in the corners doesn’t perfectly match the scratch pattern from the large drum sander used in the center of the room, light will reflect off the floor differently, making the edges appear like a dark frame around the room. I’ve found that using the sanding secret for restoring greyed-out teak floors—which involves a final, slow-speed hand-buffing with a medium grit—can bridge the gap between machine-sanded and hand-sanded areas.
Why does your stain look like a ‘halo’ around the baseboards?
This advanced frustration typically stems from a ‘grit mismatch’ or velocity difference between your tools. Research from the Forest Products Laboratory indicates that wood cells are incredibly sensitive to compression; an edger spinning at high RPMs compresses the wood differently than a drum sander. To avoid this, you must ensure your final sanding pass in the corners is done with the exact same grit and pressure as the rest of the floor. If you ignore this, you’re essentially setting yourself up for a two-tone floor.
The moisture mystery hiding in your exterior walls
One nuanced detail many homeowners ignore is the moisture content specifically near exterior walls. Before you even open a can of stain, you should learn how to use a moisture meter before you lay wood floors or refinish them. If your subfloor or walls are holding humidity, the wood at the edges will be ‘fatter’ and its pores will be more open than the wood in the climate-controlled center of the room. This makes the edges drink significantly more stain. If this moisture isn’t addressed, you might eventually see why your hardwood floor is crowning and how to dry it out as a much more expensive problem down the road.
Finally, avoid the common mistake of using a damp rag to ‘tack’ the floor edges right before staining. If that rag is even slightly too wet, you are water-popping only the corners, leading to those dreaded black holes. Consistency in every prep step, from hardwood floor care secrets to longevity and shine to the final vacuuming, is what separates a DIY job from a professional masterpiece. Getting a floor to look uniform is less about brute force and more about managing the porosity of the wood. Have you ever fallen into this trap? Let me know in the comments.
The tool that finally ended my corner nightmares
For the longest time, I resisted spending the extra money on specialized equipment. I thought a standard block and some elbow grease were all a ‘real’ woodworker needed. I was wrong. The game-changer for me was the Festool RO 90 DX. This isn’t just a sander; it’s a surgical instrument for corners. Because it can switch from a circular motion to a specialized delta (triangular) head, it reaches the absolute deepest part of the 90-degree angle without leaving the cross-grain scratches that haunt my dreams. When you are mastering hardwood floor refinishing expert tips for 2025, you start to realize that the right gear doesn’t just save time—it saves the entire aesthetic of the room. If you’re still fighting with a standard vibrating palm sander in the corners, you’re essentially bringing a butter knife to a sword fight. I’ve seen people try to compensate for poor tools by pressing harder, which leads directly to those flooring installation mistakes to avoid for lasting results, like deep circular gouges that only show up after the first coat of poly is dry.
How do I keep this finish looking fresh for a decade?
Maintenance isn’t just about sweeping; it’s about climate control. Wood is a living, breathing material. According to the NWFA’s Technical Publication No. C200, maintaining a consistent relative humidity between 30% and 50% is the single most important factor in preventing your floors from shrinking or gapping. I personally keep a digital hygrometer in my hallway right next to the thermostat. If I see the humidity drop in the winter, the humidifier goes on immediately. This prevents the edges of my planks from pulling away from the baseboards and exposing those raw, uncolored edges we worked so hard to hide. You should also check the moisture levels periodically; learning how to use a moisture meter before you lay wood floors or refinish them is a skill that pays dividends every season. For daily cleaning, stay far away from anything that ‘adds shine.’ Those waxes build up and turn cloudy, eventually forcing you to use the sanding secret for restoring greyed-out teak floors much sooner than you’d like. Stick to a microfiber mop and a pH-neutral cleaner specifically formulated for hardwood.
AI and sensors are the next frontier for your living room
Looking ahead, I predict we are going to see a massive shift toward ‘smart floors.’ We’re already seeing the first wave of underlayments embedded with moisture sensors that can alert your smartphone if a pipe leaks under your hardwood before you ever see a puddle. This kind of tech is going to revolutionize hardwood floor care secrets to longevity and shine, moving us from reactive repairs to proactive preservation. We might even see stain formulations that use UV-reactive pigments to prevent fading in sunny rooms. For now, the best thing you can do is focus on the fundamentals we’ve covered. I want you to try one thing this weekend: take a small scrap piece of your flooring and perform a ‘water pop’ test. Mist half of it with distilled water, let it dry, and then apply your stain across the whole piece. Seeing that side-by-side difference in how the wood drinks the pigment will change the way you look at your floors forever.
The Hardest Lesson I Learned While Chasing a Perfect Finish
The biggest epiphany I had wasn’t about the stain brand; it was about the physics of friction. I realized that hand-sanding in corners is often more aggressive than machine-sanding in the center, which creates more microscopic “teeth” for the pigment to cling to. Now, I use a feather-light touch and let the paper do the work. It is one of those flooring installation mistakes to avoid for lasting results that you only learn after seeing a blotchy corner ruin a whole day’s work. Another lightbulb moment was using a low-angle LED light to cast shadows across the grain; it reveals every swirl mark before the stain ever touches the wood. If you are mastering hardwood floor refinishing expert tips for 2025, you have to treat prep work like a science, not a chore.
The Toolkit That Saves My Sanity on Every Job
If you want a professional result, you need a professional arsenal. I never start a project without my Wagner Orion moisture meter because knowing the wood’s thirst level is non-negotiable. You can learn more about how to use a moisture meter before you lay wood floors to prevent the edges from drinking too much pigment. I also swear by the NWFA technical manuals—they are the industry “Bible” for troubleshooting grain behavior. Lastly, a simple set of quality tack cloths and a specialized detail sander like the RO 90 are essential for reaching those tight angles without leaving cross-grain scars. These tools ensure your hardwood floors look as good in the corners as they do in the center.
Take the Leap and Transform Your Space
Refinishing your own floors is one of the most rewarding home improvements you can undertake. It is hard work, but the moment you see that uniform, golden glow stretching from wall to wall, the sore knees and dusty hair won’t matter. Don’t be intimidated by the corners; see them as the detail work that proves your craftsmanship. With the right hardwood floor care secrets to longevity and shine, you are ready to create a masterpiece that will last for generations. Have you ever struggled with those frustrating dark corners while staining? Let me know below!