
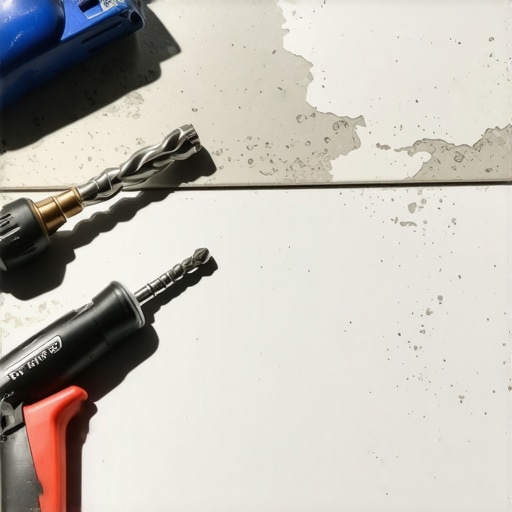
The tile was twelve dollars a square foot, and I was on my very last piece. It was a stunning porcelain slab for a master bath remodel, and everything was going perfectly until I reached the shower valve. I thought I could just nibble my way to a circle with a pair of pliers and a prayer. Crack. That sickening sound echoed through the bathroom, and my afternoon was officially ruined. If you have ever felt that gut-punch of breaking a tile right at the finish line, you are in the right place. Today, I am going to show you exactly how to stop the carnage and start cutting holes that look like they were done by a laser.
Why Your Plumbing Holes Always Look Like a Jagged Mess
Porcelain is a fickle beast because it is incredibly dense and brittle. Unlike standard ceramic, which is relatively soft inside, porcelain is the same tough material all the way through. This is why why your porcelain tile is cracking if you treat it like a piece of wood or soft stone. My biggest blunder when I first started was trying to force a standard masonry bit through the surface without any cooling. The heat builds up instantly, the tile expands at the point of contact, and boom—fracture. By following installing tiles like a pro techniques, you realize that patience and the right RPMs are your best friends.
Is a diamond hole saw actually worth the investment?
You might be tempted to use a grinder for everything, but for a true plumbing circle, a diamond hole saw is non-negotiable. I used to think I could skip the specialty tools, but after wasting three boxes of tile on one guest bathroom, I realized that pointers that save time and money usually involve buying the right gear upfront. According to the Tile Council of North America (TCNA), porcelain requires specific diamond-grit tools to manage thermal shock, as the material has a water absorption rate of less than 0.5 percent, making it much harder than typical wall tile. Have you ever snapped a tile just as you were finishing the cut? Drop a comment below and let me know your biggest tiling frustration.
The Right Tools Make You Look Like a Pro
To get a clean edge, you need to master the wet-cutting technique or use a high-quality dry-core bit with a cooling wax center. The secret isn’t just the bit; it’s the angle of entry. If you try to push a hole saw flat against the tile, it will skate across that beautiful finish and leave a permanent scar. I’ll walk you through the 45-degree start method that creates a pilot groove without the need for a bulky guide template.
Start Your Cut at an Angle to Prevent Skidding
The biggest mistake people make is treating a diamond bit like a standard wood drill. If you press that spinning bit flat against the glazed surface, it’s going to dance across the tile like a hockey puck on fresh ice. I learned this the hard way during a kitchen backsplash project where I ended up leaving a four-inch swirl mark right above a countertop. To avoid this, you need to tilt your drill to a 45-degree angle. Start by resting the bottom edge of the hole saw on your mark and gently pull the trigger. You aren’t trying to drill through yet; you are just trying to ‘nick’ the surface to create a crescent-shaped groove. Once that groove is deep enough to act as a cradle, you can slowly pivot the drill upright until it is perpendicular to the tile.
Master the Rocking Motion for Better Dust Clearance
Once the bit is seated and you’ve moved to a 90-degree angle, don’t just push straight down. Think of the bit like a spoon stirring a thick stew. You want to oscillate the drill slightly in a circular motion. This movement allows the diamond grit to work more efficiently and helps the slurry or dust escape the hole. If the dust stays trapped, it acts as an insulator, turning your bit into a soldering iron that will eventually lead to why your porcelain tile is cracking because of the sheer thermal stress. I remember a specific job in a tight shower stall where I was too lazy to grab a sponge; within thirty seconds, the tile smelled like burnt hair and a hairline fracture raced across the face. Now, I always keep a wet sponge nearby to drip water into the cut.#IMAGE_PLACE_HOLDER_B#
Why Water is Your Best Friend During the Cut
Whether you are using a dry-core bit or a standard wet bit, moisture is the secret to longevity. Even if the packaging says ‘dry use,’ a little water goes a long way in preserving those expensive diamonds. You don’t need a pressurized hose; a simple spray bottle or a soaked sponge squeezed over the bit works wonders. This is just as critical as how to achieve flawless floor leveling before tile laying—it’s all about the preparation and the environment you create for the material. If you see smoke, you’re already too late. The heat causes the porcelain to expand at a different rate than the cooler surrounding area, and that’s when the ‘pop’ happens. I’ve found that high-speed drilling is actually counterproductive. Keep your RPMs moderate; let the diamonds do the grinding rather than trying to melt your way through the slab.
Don’t Push Too Hard on the Finish Line
The most dangerous part of the process is the last 10 percent. As you get close to punching through the back of the tile, your instinct is to push harder to get it over with. Resist that urge. Too much pressure at the end will blow out the back of the tile, potentially sending a crack through to the front. It’s similar to how flooring installation mistakes to avoid often involve rushing the final details. Ease off the pressure and let the drill’s weight do the work. If you are working on a piece of tile that isn’t installed yet, make sure it is lying on a flat, sacrificial surface like a piece of scrap plywood. Drilling into mid-air is a guaranteed way to snap your work in half. When I was first starting out, I tried to drill a hole while holding the tile in my lap—yes, I was that guy—and not only did I ruin the tile, but I nearly ended up in the emergency room. Support is everything.Once you have mastered the art of drilling through porcelain without cracking it, you might think you are ready to lay that floor. But wait—if your subfloor is not dead flat, all that precision tile work is going to look like a series of speed bumps. This brings us to a hard truth that many DIYers and even some pros refuse to accept: self-leveling compound is a total misnomer. Everyone says you just pour it out and it finds its own level like water, but in my experience, that is exactly how you end up with a floor that looks like a topographical map of the Ozarks. It requires a lot more manual help than the bag suggests.
Self-Leveling Compounds Are Not Magic Juice
The most common misconception is that gravity does all the work for you. In reality, surface tension and the thickness of the product often prevent it from flowing into every low spot on its own. If you treat it like a passive process, you will end up with ridges where the pours met. I have found that you have to aggressively move the material with a gauge rake to ensure it truly fills the voids. By mastering floor leveling pro secrets, you learn that you are the one in control, not the liquid.
Don’t Let High-Speed Mixing Ruin Your Finish
The biggest oops factor I see involves the drill you use to mix the bag. Most people grab their heavy-duty drill and a paddle and whip that compound into a frenzy. That is a massive mistake. Using a high RPM is the mixing paddle speed that ruins your leveling compound because it introduces millions of tiny air bubbles into the mix. Once those bubbles rise to the surface of your wet pour, they pop and leave a million tiny craters that will haunt your tile installation. Instead, you need a slow, deliberate mix and the spiky roller secret for a mirror smooth pour to release any trapped air before the product sets up. #IMAGE_PLACE_HOLDER_C#
Can you really skip the mechanical etching on old slabs?
Many installers believe a quick sweep and some primer is enough to bond new leveler to an old concrete slab. However, according to ASTM F710—the standard practice for preparing concrete floors—surfaces must be free of all bond-inhibiting materials like wax, oil, or existing sealers. This often means you need to perform the concrete etching step you shouldnt skip before leveling to create a mechanical profile. If you are dealing with a slab that was once finished or painted, your leveler might peel off like a bad sunburn later. This is exactly why most floor levelers fail on top of painted concrete; the bond is only as strong as the paint’s grip on the concrete, not the leveler’s grip on the floor. When I was first starting out, I tried to take a shortcut by pouring over an old garage floor that had not been properly etched. Two weeks later, as I was walking over the newly laid tile, I heard a hollow crunch. The entire section of leveler had delaminated from the slab below, and I had to rip everything out. It was a five-thousand-dollar lesson in surface prep. Before you start, make sure you know how to choose a floor leveler that wont crack based on the specific substrate and climate of your project. Have you ever poured a leveler that turned into a disaster? Let me know your horror stories in the comments—I have probably made the same mistake twice!
I have spent years chasing the perfect finish, and if there is one thing I have learned, it is that your hands are only as good as the steel they are holding. When I am prepping a room, I do not just pour and pray. I reach for my spiked shoes and a specialized roller. I tell everyone that the spiky roller secret for a mirror smooth pour is the only way to avoid the dreaded ‘moon craters’ caused by outgassing. It is a simple tool, but it makes the difference between a floor that is truly flat and one that is just ‘flat enough.’ If you are still using a basic trowel to move your compound, you are working too hard and getting worse results. I personally switched to the roller selection that prevents air bubbles in leveler because I tired of seeing pinholes ruin my prime surface.
Why moisture meters are your insurance policy
Before any wood or tile touches the floor, I pull out my moisture meter. This is not optional. According to the National Wood Flooring Association (NWFA) Technical Manual, the moisture content of a wood floor should typically be within 4 percent of the subfloor for strip flooring. If you ignore this, you are begging for cupping and gaps. I have learned how to use a moisture meter before you lay wood floors to save myself from five-figure insurance claims. A slab might look dry on the surface, but deep down, it could still be holding onto a lake of water. This tool is the single most important piece of gear in my kit for long-term success.
#IMAGE_PLACE_HOLDER_D#
How do I keep my floor from failing over the years?
Maintenance is the part most homeowners get wrong immediately. They spend thousands on a gorgeous install and then ruin it with a steam mop or harsh chemicals. For hardwood, you need to follow hardwood floor care secrets to longevity and shine, which starts with ditching the wet-mop. For tile, it is all about the grout. If you do not seal your grout or if you use the wrong cleaner, you will see it degrade within twenty-four months. I tell my clients that a floor is a living part of the house; it moves, it breathes, and it needs the right climate. Keep your humidity stable, or you will see those boards start to protest.
Expect even bigger tiles in 2025
The industry is moving toward ‘slabs’ rather than tiles. We are seeing porcelain sheets that are five feet by ten feet. This trend means that the secret to getting a flat floor for large format tiles is becoming the most valuable skill a pro can have. You cannot hide a dip in the floor with a bit of extra thinset anymore; the tile is too big and too unforgiving. Precision is no longer a luxury—it is a requirement. If you want to stay ahead of the curve, my advice is simple: buy a high-quality moisture meter today and stop guessing. Your reputation is worth more than the cost of a good tool.
The tile was twelve dollars a square foot, and I was on my very last piece. It was a stunning porcelain slab for a master bath remodel, and everything was going perfectly until I reached the shower valve. I thought I could just nibble my way to a circle with a pair of pliers and a prayer. Crack. That sickening sound echoed through the bathroom, and my afternoon was officially ruined. If you have ever felt that gut-punch of breaking a tile right at the finish line, you are in the right place. Today, I am going to show you exactly how to stop the carnage and start cutting holes that look like they were done by a laser.
Why Your Plumbing Holes Always Look Like a Jagged Mess
Porcelain is a fickle beast because it is incredibly dense and brittle. Unlike standard ceramic, which is relatively soft inside, porcelain is the same tough material all the way through. This is why why your porcelain tile is cracking if you treat it like a piece of wood or soft stone. My biggest blunder when I first started was trying to force a standard masonry bit through the surface without any cooling. The heat builds up instantly, the tile expands at the point of contact, and boom—fracture. By following installing tiles like a pro techniques, you realize that patience and the right RPMs are your best friends.
Is a diamond hole saw actually worth the investment?
You might be tempted to use a grinder for everything, but for a true plumbing circle, a diamond hole saw is non-negotiable. I used to think I could skip the specialty tools, but after wasting three boxes of tile on one guest bathroom, I realized that pointers that save time and money usually involve buying the right gear upfront. According to the Tile Council of North America (TCNA), porcelain requires specific diamond-grit tools to manage thermal shock, as the material has a water absorption rate of less than 0.5 percent, making it much harder than typical wall tile. Have you ever snapped a tile just as you were finishing the cut? Drop a comment below and let me know your biggest tiling frustration.
The Right Tools Make You Look Like a Pro
To get a clean edge, you need to master the wet-cutting technique or use a high-quality dry-core bit with a cooling wax center. The secret isn’t just the bit; it’s the angle of entry. If you try to push a hole saw flat against the tile, it will skate across that beautiful finish and leave a permanent scar. I’ll walk you through the 45-degree start method that creates a pilot groove without the need for a bulky guide template.
Start Your Cut at an Angle to Prevent Skidding
The biggest mistake people make is treating a diamond bit like a standard wood drill. If you press that spinning bit flat against the glazed surface, it’s going to dance across the tile like a hockey puck on fresh ice. I learned this the hard way during a kitchen backsplash project where I ended up leaving a four-inch swirl mark right above a countertop. To avoid this, you need to tilt your drill to a 45-degree angle. Start by resting the bottom edge of the hole saw on your mark and gently pull the trigger. You aren’t trying to drill through yet; you are just trying to ‘nick’ the surface to create a crescent-shaped groove. Once that groove is deep enough to act as a cradle, you can slowly pivot the drill upright until it is perpendicular to the tile.
Master the Rocking Motion for Better Dust Clearance
Once the bit is seated and you’ve moved to a 90-degree angle, don’t just push straight down. Think of the bit like a spoon stirring a thick stew. You want to oscillate the drill slightly in a circular motion. This movement allows the diamond grit to work more efficiently and helps the slurry or dust escape the hole. If the dust stays trapped, it acts as an insulator, turning your bit into a soldering iron that will eventually lead to why your porcelain tile is cracking because of the sheer thermal stress. I remember a specific job in a tight shower stall where I was too lazy to grab a sponge; within thirty seconds, the tile smelled like burnt hair and a hairline fracture raced across the face. Now, I always keep a wet sponge nearby to drip water into the cut.#IMAGE_PLACE_HOLDER_B#
Why Water is Your Best Friend During the Cut
Whether you are using a dry-core bit or a standard wet bit, moisture is the secret to longevity. Even if the packaging says ‘dry use,’ a little water goes a long way in preserving those expensive diamonds. You don’t need a pressurized hose; a simple spray bottle or a soaked sponge squeezed over the bit works wonders. This is just as critical as how to achieve flawless floor leveling before tile laying—it’s all about the preparation and the environment you create for the material. If you see smoke, you’re already too late. The heat causes the porcelain to expand at a different rate than the cooler surrounding area, and that’s when the ‘pop’ happens. I’ve found that high-speed drilling is actually counterproductive. Keep your RPMs moderate; let the diamonds do the grinding rather than trying to melt your way through the slab.
Don’t Push Too Hard on the Finish Line
The most dangerous part of the process is the last 10 percent. As you get close to punching through the back of the tile, your instinct is to push harder to get it over with. Resist that urge. Too much pressure at the end will blow out the back of the tile, potentially sending a crack through to the front. It’s similar to how flooring installation mistakes to avoid often involve rushing the final details. Ease off the pressure and let the drill’s weight do the work. If you are working on a piece of tile that isn’t installed yet, make sure it is lying on a flat, sacrificial surface like a piece of scrap plywood. Drilling into mid-air is a guaranteed way to snap your work in half. When I was first starting out, I tried to drill a hole while holding the tile in my lap—yes, I was that guy—and not only did I ruin the tile, but I nearly ended up in the emergency room. Support is everything.Once you have mastered the art of drilling through porcelain without cracking it, you might think you are ready to lay that floor. But wait—if your subfloor is not dead flat, all that precision tile work is going to look like a series of speed bumps. This brings us to a hard truth that many DIYers and even some pros refuse to accept: self-leveling compound is a total misnomer. Everyone says you just pour it out and it finds its own level like water, but in my experience, that is exactly how you end up with a floor that looks like a topographical map of the Ozarks. It requires a lot more manual help than the bag suggests.
Self-Leveling Compounds Are Not Magic Juice
The most common misconception is that gravity does all the work for you. In reality, surface tension and the thickness of the product often prevent it from flowing into every low spot on its own. If you treat it like a passive process, you will end up with ridges where the pours met. I have found that you have to aggressively move the material with a gauge rake to ensure it truly fills the voids. By mastering floor leveling pro secrets, you learn that you are the one in control, not the liquid.
Don’t Let High-Speed Mixing Ruin Your Finish
The biggest oops factor I see involves the drill you use to mix the bag. Most people grab their heavy-duty drill and a paddle and whip that compound into a frenzy. That is a massive mistake. Using a high RPM is the mixing paddle speed that ruins your leveling compound because it introduces millions of tiny air bubbles into the mix. Once those bubbles rise to the surface of your wet pour, they pop and leave a million tiny craters that will haunt your tile installation. Instead, you need a slow, deliberate mix and the spiky roller secret for a mirror smooth pour to release any trapped air before the product sets up. #IMAGE_PLACE_HOLDER_C#
Can you really skip the mechanical etching on old slabs?
Many installers believe a quick sweep and some primer is enough to bond new leveler to an old concrete slab. However, according to ASTM F710—the standard practice for preparing concrete floors—surfaces must be free of all bond-inhibiting materials like wax, oil, or existing sealers. This often means you need to perform the concrete etching step you shouldnt skip before leveling to create a mechanical profile. If you are dealing with a slab that was once finished or painted, your leveler might peel off like a bad sunburn later. This is exactly why most floor levelers fail on top of painted concrete; the bond is only as strong as the paint’s grip on the concrete, not the leveler’s grip on the floor. When I was first starting out, I tried to take a shortcut by pouring over an old garage floor that had not been properly etched. Two weeks later, as I was walking over the newly laid tile, I heard a hollow crunch. The entire section of leveler had delaminated from the slab below, and I had to rip everything out. It was a five-thousand-dollar lesson in surface prep. Before you start, make sure you know how to choose a floor leveler that wont crack based on the specific substrate and climate of your project. Have you ever poured a leveler that turned into a disaster? Let me know your horror stories in the comments—I have probably made the same mistake twice!
I have spent years chasing the perfect finish, and if there is one thing I have learned, it is that your hands are only as good as the steel they are holding. When I am prepping a room, I do not just pour and pray. I reach for my spiked shoes and a specialized roller. I tell everyone that the spiky roller secret for a mirror smooth pour is the only way to avoid the dreaded ‘moon craters’ caused by outgassing. It is a simple tool, but it makes the difference between a floor that is truly flat and one that is just ‘flat enough.’ If you are still using a basic trowel to move your compound, you are working too hard and getting worse results. I personally switched to the roller selection that prevents air bubbles in leveler because I tired of seeing pinholes ruin my prime surface.
Why moisture meters are your insurance policy
Before any wood or tile touches the floor, I pull out my moisture meter. This is not optional. According to the National Wood Flooring Association (NWFA) Technical Manual, the moisture content of a wood floor should typically be within 4 percent of the subfloor for strip flooring. If you ignore this, you are begging for cupping and gaps. I have learned how to use a moisture meter before you lay wood floors to save myself from five-figure insurance claims. A slab might look dry on the surface, but deep down, it could still be holding onto a lake of water. This tool is the single most important piece of gear in my kit for long-term success.
#IMAGE_PLACE_HOLDER_D#
How do I keep my floor from failing over the years?
Maintenance is the part most homeowners get wrong immediately. They spend thousands on a gorgeous install and then ruin it with a steam mop or harsh chemicals. For hardwood, you need to follow hardwood floor care secrets to longevity and shine, which starts with ditching the wet-mop. For tile, it is all about the grout. If you do not seal your grout or if you use the wrong cleaner, you will see it degrade within twenty-four months. I tell my clients that a floor is a living part of the house; it moves, it breathes, and it needs the right climate. Keep your humidity stable, or you will see those boards start to protest.
Expect even bigger tiles in 2025
The industry is moving toward ‘slabs’ rather than tiles. We are seeing porcelain sheets that are five feet by ten feet. This trend means that the secret to getting a flat floor for large format tiles is becoming the most valuable skill a pro can have. You cannot hide a dip in the floor with a bit of extra thinset anymore; the tile is too big and too unforgiving. Precision is no longer a luxury—it is a requirement. If you want to stay ahead of the curve, my advice is simple: buy a high-quality moisture meter today and stop guessing. Your reputation is worth more than the cost of a good tool.
The Hardest Truths About Subfloors That Most Pros Skip
I used to think that as long as the subfloor was swept, I was ready to go. That mindset led to some of my most expensive call-backs. The first thing you need to accept is that moisture is a silent killer. Even if a slab looks bone-dry, it can be exhaling water vapor that will eventually cup your hardwood or pop your tiles. This is why I never start a job without checking the stats; learning how to use a moisture meter before you lay wood floors is the single best insurance policy you can buy for your project. Another lightbulb moment for me was realizing that self-leveling compound is a misnomer. If you pour it and walk away, why your self-leveling pour looks like a topographical map will become painfully obvious once you try to set a large-format tile. You have to be an active participant in the leveling process—moving the material and breaking surface tension.
Tools That Saved My Sanity on the Jobsite
If you are tired of fighting the material, it is time to upgrade your kit. I do not go anywhere without a high-quality spiky roller because understanding the spiky roller secret for a mirror smooth pour removes the tiny air bubbles that create annoying pinholes. For tile work, a proper diamond hole saw is the difference between a clean plumbing exit and a shattered porcelain slab. I also recommend keeping the TCNA Handbook or NWFA guidelines nearby. By studying these, you learn flooring installation mistakes to avoid for lasting results before you even pick up a trowel. I trust these resources because they are based on material science, not just tradition.
#IMAGE_PLACE_HOLDER_E#
Turn Your Vision Into a Lasting Reality
At the end of the day, a great flooring installation is built on the things you cannot see: the prep work, the moisture checks, and the patience to let your leveling compound cure correctly. Do not be afraid to take that first step, even if it feels intimidating. Every pro was once a beginner who just decided to follow the right steps and use the right tools. Your home is your biggest investment, and it deserves a floor that is as durable as it is beautiful. Get out there, take your time, and build something you can be proud of for decades.
Have you ever had a tile crack right as you were finishing the very last cut? Let me know your biggest project hurdle in the comments below!