
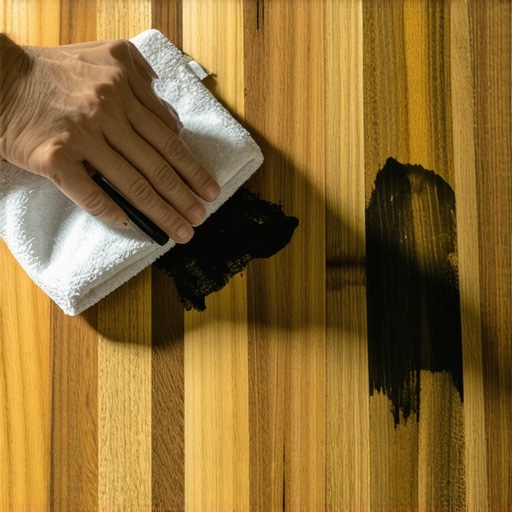
I remember the silence first. In a house with a toddler, silence is rarely golden; it is usually suspicious. I walked into the dining room to find my three-year-old meticulously ‘decorating’ our recently installed white oak planks with a thick, black permanent marker. I didn’t scream, but I definitely felt the color drain from my face. These floors were my pride and joy, the result of weeks researching hardwood floor care secrets, and now they looked like a graffiti-covered alleyway. My first instinct was to grab the harshest cleaner I could find. That was my first mistake, one that almost led to me mastering floor refinishing before I was truly ready for the task.
The Heart-Stopping Moment the Sharpie Hits the Oak
If you are reading this, you are probably in the ‘panic’ phase right now. Maybe your kid got creative, or perhaps a contractor dropped a pen while measuring for a new transition. Whatever the reason, that dark line feels like a permanent scar on your home’s soul. I have been there, and I have made the mistakes so you do not have to. Early in my DIY journey, I thought I could just scrub the ink away with a green abrasive pad and some dish soap. Not only did the ink stay put, but I scratched the protective layer so badly that my finish ended up looking cloudy and dull. It is heart-wrenching to see something you have invested so much time and money into get ‘vandalized’ by accident. But here is the good news: we are going to solve this today without needing to call a professional or ripping up boards.
Will These Chemicals Eat Through My Expensive Varnish?
This is the biggest fear I hear from my neighbors when they come to me for help. They are afraid that if they use something strong enough to kill the marker, it will kill the floor too. It is a valid concern because, according to the Journal of Chemical Education, the solvents in permanent markers—typically alcohols and ethers—are specifically formulated to penetrate surfaces quickly to ensure the pigment stays put. This means that if you use the wrong counter-solvent, you are not just lifting the ink; you are dissolving the very finish you are trying to save. It is a delicate balance of chemistry and patience.
Why Most People Make the Stain Ten Times Worse
The secret is not just what you use; it is how you use it. Most people reach for the bottle of white vinegar in the pantry, thinking it is a ‘safe’ natural cleaner. Please, stop using vinegar on your floors immediately! It is an acid, and while it might slightly fade the marker, it is also eating away at the chemical bonds of your floor’s polyurethane. I learned the hard way that ‘natural’ does not always mean ‘floor-safe.’ You might also be tempted to use a magic eraser, but on high-gloss or semi-gloss finishes, that is essentially like using 3000-grit sandpaper—it will leave a permanent matte spot. Today, I am going to walk you through the precise steps to lift that ink using the ‘low-and-slow’ method that preserves your topcoat. Have you ever had a ‘permanent’ disaster on your floors that made you want to move houses? I want to hear your horror stories in the comments below! [image placeholder] Before we dive into the cabinet of supplies, we need to understand exactly what kind of finish we are dealing with, because a pre-finished plank reacts very differently than a site-finished one. If you have ever had to fix a deep gouge, you know that these surfaces are tougher than they look, but they have their breaking points. We want to lift the ink, not the wood’s protection.
Test Your Finish Before Going All In
Before we grab the solvents, we have to play detective. If your floor is a modern pre-finished product, you likely have several layers of aluminum oxide protection. This is great news because these finishes are incredibly resilient. However, if you have an older, site-finished floor, the seal might be thinner. To check, find an inconspicuous corner and drop a tiny bit of water. If it beads up, you are good to go. If it soaks in and darkens the wood, stop immediately—your seal is compromised, and you might need a step-by-step guide to flooring installation to understand if a full board replacement is safer than chemical cleaning.
The Rubbing Alcohol Hack That Saved My Living Room
My go-to weapon is 70% isopropyl alcohol. It acts as a solvent that breaks down the permanent marker’s binders without instantly liquefying your polyurethane. I remember a specific Tuesday afternoon when I had to use this on a client’s pristine cherry floor. I was terrified of creating a permanent dull spot, similar to how hardwood floors turn cloudy after cleaning with the wrong chemicals. I took a deep breath, dampened a clean white microfiber cloth—never use a colored rag, or you will be fighting a dye-transfer stain next—and got to work. 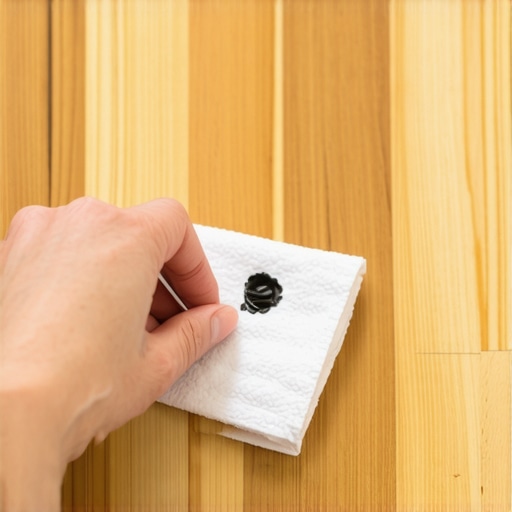
Why Dabbing Beats Scrubbing Every Single Time
This is where most DIYers fail. You want to scrub that ink out like you are cleaning a cast-iron skillet. Don’t. Scrubbing generates heat and friction, which pushes the pigment deeper into the wood grain and softens the finish. Instead, use the ‘Dab and Lift’ method. Press the alcohol-soaked cloth onto the marker line for five seconds, then lift straight up. You will see the black ink transfer to the cloth. Use a fresh, clean section of the cloth for every single dab. If you reuse a dirty spot, you are just painting the floor with diluted ink. This level of precision is exactly what I recommend when people are installing tiles like a pro; details matter more than speed.
Dealing With Stubborn Ghosting Marks
Sometimes, the bulk of the ink comes up, but a faint ‘ghost’ of the drawing remains. In these cases, a tiny amount of white toothpaste (the non-gel kind) can act as a micro-abrasive. It is much gentler than a magic eraser and can lift that last 5% of the stain. I used this trick when I was trying to remove white heat rings from wood finishes on a vintage coffee table, and it worked wonders on the floor too. Just be sure to wipe the area with a damp cloth afterward to remove any residue.
Bring Back the Shine Without Making Things Cloudy
Once the marker is gone, the area might look a little ‘thirsty’ because the alcohol has stripped away the surface oils. Do not reach for the wax! Instead, use a specialized hardwood floor refresher. If you have noticed that your matte finish hides scratches better than high gloss, you will want to match the sheen perfectly. Applying a high-gloss spot treatment to a satin floor will make the repair look like a shiny blemish. Use a cotton swab to apply a tiny amount of finish-matched restorer only to the spot we cleaned. This keeps the repair localized and prevents you from having to look into mastering hardwood floor refinishing for the entire room. If the marker was particularly deep, you might treat it like you would fix a deep gouge by layering the protector slowly and letting it cure between coats.While we often focus on the visible surface, the most expensive mistake I see homeowners make isn’t about cleaning—it’s about the ‘flatness lie.’ Everyone tells you that you need a level floor, but in my experience, ‘level’ is a luxury, while ‘flat’ is a non-negotiable requirement. You can have a floor that slopes slightly from one side of the house to the other (technically un-level) and your hardwood will still last a century, provided the plane is perfectly flat. The real disaster starts when you have dips and peaks. If you ignore these structural nuances, you will eventually see LVP floor telegraphing from the subfloor, where every bump and pit underneath eventually shows through the surface like a ghost. Even worse, those hollow spots cause the tongues and grooves to flex underfoot, eventually snapping the joints and leading to permanent damage. According to the National Wood Flooring Association (NWFA), a subfloor must be flat within 1/8 inch over a 6-foot radius to ensure the integrity of the installation. If you miss this tolerance, you are just counting down the days until a crack or a gap appears.
Why does my self-leveling pour look like a topographical map?
This is the ‘oops’ factor that separates the pros from the weekend warriors. Most people reach for their highest-torque drill and a standard paint paddle to mix their leveling compound. Stop right there! The mixing paddle speed that ruins your leveling compound is usually anything over 600 RPM. When you whip the mixture too fast, you introduce microscopic air bubbles into the slurry. Once you pour it onto the floor, those bubbles rise to the surface and pop as the mixture cures, leaving you with thousands of tiny craters and a weak, brittle surface. I once watched a neighbor spend hundreds on premium leveler only to have it look like the surface of the moon because he used a high-speed mud mixer. 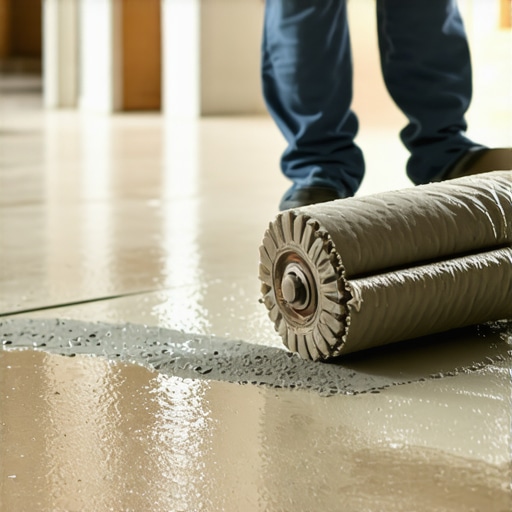 To get that glass-like finish, you need precise floor leveling techniques that involve a slow mix and the use of a tool most beginners ignore: the spiky roller. Utilizing the spiky roller secret for a mirror-smooth pour allows those trapped air bubbles to escape without breaking the surface tension of the compound. It is a nuanced step, but it is the difference between a floor that lasts decades and one that requires mastering hardwood floor refinishing way too early. Another common trap is ignoring the layout geometry. Many beginners start at the longest wall and hope for the best, but the pros use the pencil mark secret for perfectly centered tile layouts to ensure the final pieces aren’t tiny, unstable slivers at the threshold. Have you ever fallen into the trap of thinking ‘good enough’ was actually enough, only to have a floor board creak a month later? Let me know in the comments! If you’re struggling with a specific transition, check out our step-by-step guide to flooring installation for more technical deep-dives into subfloor preparation.
I’ve spent thousands on fancy saws and specialized mallets over the years, but the one tool that actually saved my sanity during my last big project was a 360-degree green beam laser level. If you are still relying on a six-foot bubble level to find high spots, you are basically guessing. I remember trying to prep a kitchen for flooring installation and leveling by eye, only to realize I had a half-inch dip near the dishwasher that I completely missed. Now, I set my laser in the center of the room and use a simple block of wood with a mark on it to check every square foot. It’s the only way to ensure you aren’t falling victim to the ‘flatness lie’ we talked about earlier.
Throw away your bubble level if you want a flat floor
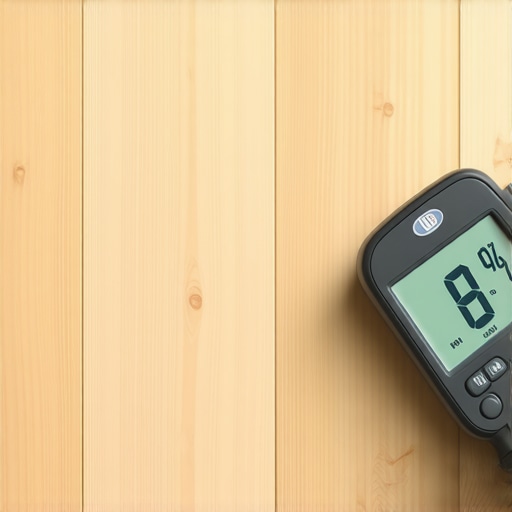
Accuracy isn’t just about the tools you use for the install; it is about the data you gather before the first plank even hits the ground. The National Wood Flooring Association (NWFA) technical manual emphasizes that subfloor moisture is the primary cause of post-installation failures. I personally never start a job without my Wagner Orion 950 pinless moisture meter. It is expensive, but it allows me to scan an entire room in seconds without poking holes in the wood. This is critical when you are trying to figure out the moisture barrier rule for basement vinyl floors. If your readings are off even by 3%, you are looking at potential buckling or gaps in six months.
How do I maintain my new flooring over time?
Long-term care is where the hobbyists and the pros really diverge. Most people think maintenance is just about the right mop, but it’s actually about atmospheric control. I keep a digital hygrometer in every room with hardwood to ensure the relative humidity stays between 30% and 50%. If the air gets too dry in the winter, you’ll see those dreaded gaps; too humid in the summer, and your boards will cup. Beyond air quality, you need to be proactive. If you have four-legged roommates, you have to stop your pets’ claws from ruining your vinyl planks or wood by keeping their nails trimmed and using area rugs in high-speed ‘zoomie’ zones. Consistency in cleaning is also vital—use a microfiber dust mop daily to remove the grit that acts like sandpaper on your finish, and you’ll find yourself needing mastering hardwood floor refinishing far less often.
Smart sensors are the next big thing in subfloor health
Looking ahead, I predict we are moving toward a world where ‘smart’ subfloors are the standard. I’ve already seen early versions of Bluetooth-enabled sensors that sit beneath your underlayment, alerting your phone if it detects a leak from a dishwasher or a spike in concrete moisture. This kind of tech will revolutionize how we handle precise floor leveling techniques, as we will be able to monitor the slab’s health long after the floor is installed. We might even see integrated heating systems that adjust based on the wood’s expansion rate. For now, focus on the basics: get yourself a quality moisture meter and a hygrometer this week. If you want to dive deeper into specialized setups, check out our guide on installing tiles like a pro for the best tool-kit recommendations.
Lessons from the Marker Disaster That Changed My Approach
I used to think that a beautiful floor was all about the topcoat, but my toddler and a Sharpie taught me otherwise. The biggest realization wasn’t just about chemicals; it was about respect for the material. First, stop the panic. Quick, aggressive reactions are the #1 cause of flooring installation mistakes that haunt you for years. Second, your subfloor is the foundation of your family’s daily life. If it isn’t flat, your expensive wood is just a ticking clock. I’ve learned that using a spiky roller is not just a ‘pro tip’; it’s the difference between a floor that feels solid and one that feels like a hollow shell. [image placeholder] Finally, hardwood floor care secrets aren’t about magic products; they’re about moisture control and consistent habits.
The Tool Kit That Keeps My Sanity Intact
I don’t recommend products unless they’ve saved me from a five-figure mistake. The Wagner Orion 950 moisture meter is my go-to because it tells the truth when your eyes can’t. For any leveling job, I rely on a 360-degree green laser level—it makes finding dips effortless. I also suggest keeping a physical copy of the NWFA Technical Manual; it’s the ‘bible’ of the industry. If you’re looking for more guidance, our step-by-step guide to flooring installation and leveling success covers the granular details I didn’t have when I started. And for those looking to breathe new life into old planks, I highly recommend mastering hardwood floor refinishing techniques that prioritize longevity over a quick shine.
Build a Floor That Lasts Generations
Installing and maintaining your own flooring is one of the most rewarding home projects you can undertake. It’s more than just a surface; it’s where your life happens. Don’t let a stray marker or a slightly uneven subfloor intimidate you. With the right tools and a little patience, you can master hardwood floor care secrets that will keep your home looking stunning for decades. You have the knowledge now—go create a space you’re proud of. Have you ever faced a ‘point of no return’ moment during a home project? Let me know in the comments below!