
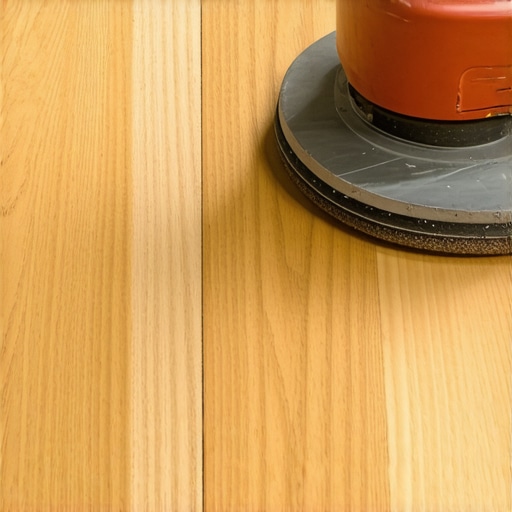
I remember the exact moment I realized I had ruined my living room floor. It was late on a Tuesday, and I had spent the entire day wrestling with a heavy-duty drum sander. I felt like a pro until I flipped on the overhead light. There they were: deep, jagged scratches cutting right across the beautiful oak grain near the bay window. I had gotten lazy with my turns and moved the machine perpendicular to the wood fibers. It looked like a frantic cat had tried to dig its way out of the room. My heart sank because I thought I’d have to rip the whole thing out and start from scratch. If you are standing in your hallway right now, staring down a similar disaster, take a deep breath. You haven’t ruined your home, you’ve just given yourself a little extra homework. We are going to get those marks out together.
Stop Staring at Those Ugly Cross-Grain Scratches
The biggest problem with sanding against the grain is that it doesn’t just scratch the surface; it actually tears the wood fibers. According to the National Wood Flooring Association, proper sanding involves progressively finer grits to smooth out the microscopic furrows left by the previous pass. When you go against the grain, you create deep valleys that the light catches at every angle. I’ve been there, and I know the temptation to just throw some stain on it and hope for the best. Trust me, hardwood floor care starts with a smooth foundation, and stain will only make those mistakes pop like a neon sign. Today, we are going to talk about the ‘diagonal’ recovery method and how to blend those marks back into oblivion.
Can you really hide these gouges without starting over?
This is the question I get most often from panicked neighbors. The answer is yes, but it requires patience. You can’t just jump to a fine sandpaper and expect the marks to vanish. In my early days, I made the mistake of trying to ‘buff out’ a cross-grain gouge with 120-grit paper, only to realize two hours later that I’d done absolutely nothing. You have to be willing to go back a step. If you are worried about the mess, remember that mastering hardwood floor refinishing is as much about fixing the ‘whoops’ moments as it is about the initial cut. Have you ever turned on the lights and felt that sudden pit in your stomach after a DIY project? Drop a comment and tell me I’m not alone!
Why Grain Direction is Your Best Friend and Worst Enemy
The reason those marks look so bad is that wood is essentially a bundle of straws. When you sand with the grain, you are smoothing the sides of the straws. When you go against it, you are shredding the ends. This is why the sanding secret for any wood species is consistent direction. If you’ve already made the mistake, our plan of attack involves a slight diagonal pass. This helps ‘reset’ the fibers without digging even deeper holes. We want to avoid the ‘topographical map’ look that happens when you focus too much on one spot. If you’ve ever dealt with subfloor leveling issues, you know that trying to fix a dip can often create a hump; sanding is no different. It is all about gradual transitions and keeping the machine moving. In the next section, I’ll walk you through the specific grit sequence you need to erase your tracks and whether you should consider a matte finish to hide any remaining imperfections.
Sweep the Drum at an Angle to Erase Those Valleys
To get those scratches out, we have to stop thinking in straight lines. When I was working on a 1920s bungalow in Detroit, I created a massive gouge by a radiator because I couldn’t get the sander turned around fast enough. I tried to just sand harder with the grain, but I was just making a trench. The secret is the ‘diagonal cut.’ Imagine you are trying to smooth out a corrugated tin roof; if you run your tool in the grooves, you just stay in the grooves. But if you run it at a 7 to 15-degree angle across the grain, you are essentially shaving off the peaks of those ‘valleys’ you created. This diagonal pass resets the surface of the wood. It is a terrifying move because it feels like you are doing more damage, but as long as you keep the machine moving, you are actually leveling the field. This is one of those mastering hardwood floor refinishing techniques that separates the DIYers from the pros.
Why You Can’t Skip the Middle Rungs of the Grit Ladder
Sanding is exactly like climbing a ladder. If you try to jump from the bottom rung (40-grit) to the top (100-grit), you’re going to fall. The coarse paper removes the wood, but the medium paper (60 or 80-grit) removes the scratches left by the coarse paper. If you jump straight to a fine finish, you’ll just be polishing the bottom of those deep gouges rather than removing them. I once tried to rush a project by skipping 80-grit on a cherry floor. Everything looked great until I applied the sealer, and suddenly every single 40-grit swirl mark appeared like it was under a magnifying glass. To ensure you’ve actually removed the previous grit’s marks, use the chalk dust secret for finding low spots. Rub a piece of sidewalk chalk over the scratched area; if the chalk stays in the scratch after a pass with the next grit, you aren’t done yet.
Keep the Machine Moving Like a Plane on a Runway
The most common way people create these cross-grain disasters is by dropping or lifting the drum while the sander is stationary. Think of the sander like a Boeing 747. It needs to be in motion before it touches the ground, and it needs to be moving as it takes off. If you stop for even a split second, you’ve just created a ‘stop mark’ that is essentially a cross-grain dent. If you are struggling with a particularly stubborn mark near a wall, don’t just lean into it. This is where flooring installation mistakes to avoid really come into play—patience beats pressure every time. Use a handheld random orbital sander for the edges, moving in small, overlapping circles to blend the machine’s path into the rest of the floor. This blending process is what ensures your hardwood floor care starts on the right foot, leaving a surface that looks uniform rather than patchy. Once the floor is smooth and the chalk marks are gone, you can breathe easy knowing you won’t need a matte finish to hide any remaining imperfections, though it’s still a great choice for high-traffic homes.
The Leveling Myth You Need to Stop Believing
Everyone tells you that self-leveling compound is a magic ‘pour-and-forget’ solution for a wavy subfloor. I used to believe that too, until I watched a five-hundred-dollar pour turn into a field of tiny craters. The contrarian truth is that leveling compound doesn’t actually level itself—it only follows the path of least resistance. If you don’t prep the surface with the concrete etching step you shouldn’t skip, the compound will simply sit on top like a pancake rather than bonding with the slab. I’ve seen countless DIYers assume that more water equals better flow, but in reality, over-watering causes ‘segregation,’ where the heavy aggregates sink and the polymers float to the top, leaving you with a brittle, chalky surface that will crack the moment you walk on it. Dealing with floor leveling challenges requires understanding that the product is only as good as the substrate it’s stuck to.
Stop Blaming the Product for Your Pinhole Problems
The most frustrating ‘oops’ moment in flooring is seeing hundreds of tiny bubbles appear in your wet leveler. Most people blame the manufacturer, but the culprit is usually your drill. I once ruined a master bathroom floor because I used a high-speed mud mixer that whipped air into the slurry like a giant whisk. This is the mixing paddle speed that ruins your leveling compound; you need to stay under 650 RPM to keep the mix dense. If you miss this detail, air escapes the porous concrete and gets trapped in the drying compound, creating ‘pinholes’ that will eventually cause your tile or vinyl to fail. To fix this, you must use the roller selection that prevents air bubbles—specifically a spiky roller—to break the surface tension and release that trapped air before it sets.
Does your concrete actually have the right profile for a bond?
This is the advanced question that separates the weekend warriors from the experts. According to the International Concrete Repair Institute (ICRI), achieving the correct Concrete Surface Profile (CSP) is non-negotiable for long-term adhesion. For most residential leveling, you are looking for a CSP 3, which feels like 60-grit sandpaper. If your slab is as smooth as glass, even the most expensive primer won’t save you from why self-leveling compounds bubble and peel. This is why how to achieve flawless floor leveling starts with mechanical abrasion, not just a broom and a prayer. Have you ever fallen into this trap where you thought the product would do all the work? Let me know in the comments.
The Hidden Danger of Moisture Vapor
Even if your floor looks flat and the sanding is perfect, there is a silent killer lurking in the slab: moisture vapor emission. Many homeowners skip the moisture barrier because the concrete ‘looks dry,’ but concrete is a sponge. If you install luxury vinyl or hardwood over a slab that hasn’t been tested, that moisture will eventually push up, causing your leveler to delaminate or your planks to buckle. Learning mastering hardwood floor refinishing or installation means respecting the invisible forces of hydrostatic pressure. Using flooring installation mistakes to avoid as your guide, always remember that a beautiful finish is just a mask if the foundation is fighting against you. Take the time to do a simple plastic sheet test before you pour a single drop of leveler, or you’ll be tearing it all out in six months.
The Tools That Turned My DIY Fails into Professional Wins
After that living room incident where I felt like I was fighting the drum sander, I realized that high-quality gear isn’t just about speed; it’s about error prevention. If you are serious about mastering hardwood floor refinishing, you need to stop relying on a standard tape measure for your layout. I never start a project anymore without a high-visibility green laser. Using the laser level move for perfectly straight hallways has saved me from the dreaded ‘run-off,’ where your planks or tiles slowly drift out of square over twenty feet. And when it comes to leveling, I’ve stopped trying to ‘rake’ the material with a flat trowel. I exclusively use a spiky roller now. It might look like a niche tool you’d only use once, but the spiky roller secret for a mirror-smooth pour is the only way to ensure the polymer chains knit together without air pockets. I personally use the Midwest Rake 18-inch model because the tines are long enough to reach the bottom of a deep pour without dragging the substrate.
How do I keep my new floors from aging too fast?
Maintaining the finish is where most homeowners fail, usually by being too aggressive with cleaning. Please, stop using vinegar on your hardwood floors immediately. The acetic acid slowly eats away at the protective polyurethane, leaving the wood vulnerable to moisture. Instead, stick to pH-neutral cleaners specifically formulated for wood. For those of you with tile-to-wood transitions, remember that long-term hardwood floor care includes checking your expansion gaps. If your transition strip is pinned too tight, it can cause the wood to buckle during humid months. According to Laticrete’s Technical Data Sheet 230 (TDS 230), the most common failure point for floor underlayments isn’t the product strength, but the ‘surface tensile strength’ of the slab. This means your maintenance starts before the floor is even laid—by ensuring that concrete is etched and primed to perfection.
Robots Might Be Sanding Your Living Room by 2030
I predict we are only a few years away from semi-autonomous sanding bots becoming affordable for residential renovations. We are already seeing robotic units in commercial settings that maintain perfectly even pressure—something a human can’t do for eight hours straight. Until then, you are the pilot. My best advice for your next project is to spend twice as long on the prep as you do on the actual installation. Try the ‘chalk dust’ trick I mentioned earlier on a small patch of your floor today; you’ll be amazed at the high spots you didn’t even know existed.
The Hardest Lesson I Learned Rescuing My Own Hardwood
If there is one thing that years of sawdust and sore knees have taught me, it is that wood is a living history of your patience. When I first started, I thought I could outsmart the grain. I quickly realized that you cannot rush a recovery. My biggest ‘lightbulb moment’ was understanding that light is your most honest critic. Never trust how a floor looks in the shadows; always use a powerful work light held low to the surface to reveal those hidden scratches before you even think about staining. Another truth experts won’t always tell you is that a sander is a beast that needs to be guided, not pushed. If you fight the machine, the machine will fight your floor. Finally, remember that every mistake is just a layer of wood that hasn’t been smoothed yet. It takes bravery to go back to a coarser grit when you are tired, but that is exactly what mastering hardwood floor refinishing is all about.
The High-Value Gear That Never Leaves My Truck
I don’t believe in buying every gadget on the shelf, but these three items have saved my reputation more times than I can count. First, the Midwest Rake Spiky Roller is non-negotiable. I used to think I could level a floor with a flat edge, but the spiky roller secret for a mirror-smooth pour is the only way to truly eliminate those tiny air pockets that ruin a finish. Second, I swear by my Bosch Green Laser. Using the laser level move is the only way to ensure your boards don’t start drifting as you move from one room to the next. Lastly, I always keep a copy of the NWFA Wood Flooring Sanding Guide in my glove box. It is the gold standard for grit sequences and species-specific advice, ensuring my hardwood floor care secrets are backed by industry science.
Turning Your Floor Disaster into a Success Story
It is easy to feel defeated when you see a gouge or a bubble, but these are just the stepping stones to a professional-grade home. Every pro you see started exactly where you are—staring at a mistake and wondering if it can be fixed. By taking the time to address those cross-grain marks and ensuring your subfloor is perfectly prepped, you are building a home that will last for generations. If you need a more step-by-step guide to flooring installation and leveling success, don’t be afraid to keep researching and practicing. Your future self will thank you every time you walk across those smooth, silent boards. Have you ever found a hidden ‘oops’ moment after you thought the job was done? Let me know in the comments below!