
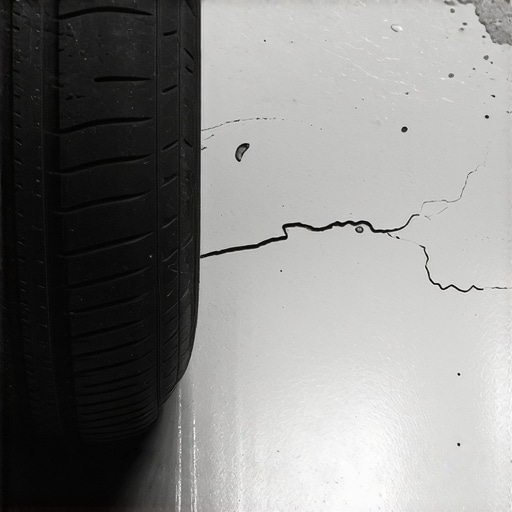
I’ll never forget the sound of my hard work literally peeling away. It was a humid Tuesday morning, and as I backed my SUV out of the garage, I heard a distinct, sickening rip. I knew exactly what it was before I even stepped out of the car. My beautiful, glossy epoxy floor—the one I’d spent three days and several hundred dollars installing—was sticking to my tires like wet duct tape. I had fallen victim to the dreaded ‘hot tire pickup,’ and honestly, I felt like a total amateur. If you’re seeing those gray or tan patches of bare concrete where your car usually sits, you aren’t alone, but I know how much it stings. Today, we’re going to figure out exactly why your coating is failing and how to stop the cycle of peeling and repainting.
Why Your Tires are Literally Eating Your Floor
Most people think the heat from the tires melts the epoxy. That’s a common myth. In reality, it’s a combination of heat and a physical bond. When you drive, your tires get hot and expand. When you park, they cool down and contract, essentially grabbing onto the surface. If the bond between the epoxy and the concrete is weak, the tire wins every time. Years ago, I made the classic mistake of thinking a quick power wash was ‘good enough’ preparation, which is one of those flooring installation mistakes to avoid for lasting results if you want your hard work to survive the summer. I didn’t realize that even concrete that feels bone dry can have hidden moisture issues. According to the International Concrete Repair Institute (ICRI), improper surface preparation or moisture vapor transmission accounts for nearly 80% of all resinous flooring failures. I spent hours scrubbing, but I skipped the mechanical grinding because I was afraid of the dust. Big mistake. You need that ‘tooth’ for the epoxy to bite into. I also learned the hard way that you must prime concrete before every major coating job to ensure the best adhesion possible. It’s those little skipped steps that come back to haunt you when the weather turns warm.
Is DIY epoxy really the miracle cure everyone claims?
You might be wondering if it’s even worth trying again or if you should just leave the concrete bare. I’ve been there, staring at the flakes of paint and wondering if I should have just hired a pro. The truth is, most big-box store kits are significantly thinner and less durable than professional-grade solids. But before you throw in the towel, you need to understand that the secret isn’t just in the paint; it’s in the prep. I eventually learned that I had to use a moisture meter to prevent floor failure before I even thought about opening a can of resin. If the slab is pushing out water vapor, no amount of expensive coating will stay stuck. Have you ever felt that sinking feeling of seeing your ‘finished’ project start to fail just weeks later? It’s frustrating, but it’s a fixable problem once you stop treating the symptom and start treating the surface. Let’s look at what’s actually happening under that rubber so you can stop the peel for good.
Grind the Concrete to Create a Permanent Tooth
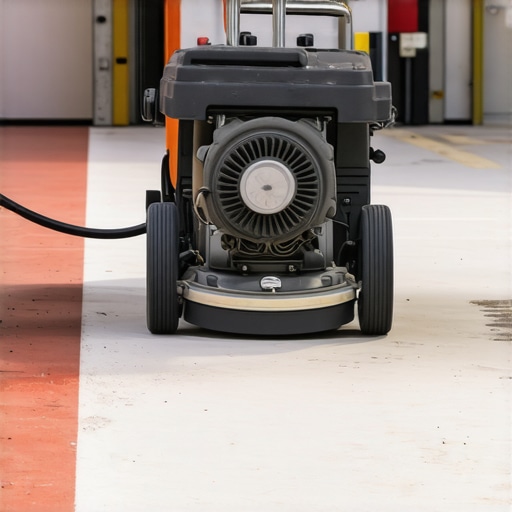
If you want your floor to last, you have to stop thinking like a painter and start thinking like a mason. The number one reason epoxy peels is that the concrete is too smooth. Think of it like trying to glue two pieces of glass together; there’s nothing for the adhesive to grab. You need to mechanically profile the concrete to a texture similar to 100-grit sandpaper. While many DIY kits suggest muriatic acid etching, I’ve found it’s often more trouble than it’s worth because it introduces even more water into the slab. I remember a humid July in Michigan where I etched a floor and waited two full days, only to find the moisture was still trapped in the pores, causing the coating to bubble instantly. Instead, rent a walk-behind diamond grinder. It’s loud and dusty, but it’s the only way to ensure you’re stripping away the ‘laitance’—that weak, milky layer on top of new or old concrete—and exposing the aggregate. This is the same logic used when you how to prep a concrete slab for glue down hardwood; you need a clean, open surface for any bond to work.
Seal the Slab Against Invisible Moisture
You might think your garage is dry because there aren’t any puddles, but concrete is essentially a hard sponge. Ground moisture is constantly trying to move upward through the slab via capillary action. If you trap that moisture under a non-breathable epoxy, the hydrostatic pressure will eventually pop the coating right off. This is why you must use a moisture meter to prevent floor failure before you even think about mixing your resin. I’ve seen guys skip this, only to have their beautiful $1,000 floor look like a topographical map of blisters six months later. If your readings are high, you need a specialized moisture vapor barrier epoxy as your first coat. It’s similar to how even concrete that feels bone dry can have hidden moisture issues that require a barrier. This layer acts as a shield, holding back the water pressure so your decorative topcoat can stay pristine.
Ditch the Water-Based Kits for Industrial Solids
Those $100 kits at the hardware store are usually 50% water or solvent. When they dry, half the product evaporates, leaving you with a film that’s barely thicker than a piece of paper. High-solids epoxy (85% to 100% solids) stays exactly as thick as when you applied it. It’s the difference between a thin coat of spray paint and a thick sheet of plastic. When I finally switched to professional-grade resins, I realized that you must prime concrete before every major coating job to prevent ‘outgassing’—those tiny pinholes caused by air escaping the concrete. A good primer soaks in and anchors the system. For the cleanest look possible, I always use the painters tape trick for clean epoxy edges along the bottom of the walls. I once tried to free-hand the edges and ended up with blue epoxy on my white baseboards; trust me, the five minutes of taping is worth the lack of a headache later.
Mix Like Your Floor Depends on It
Epoxy is a chemical reaction, not just paint that dries. If your ratio is off by even a tiny bit, or if you don’t mix it long enough, you’ll end up with ‘soft spots’ that never fully cure. I use a Jiffy-style mixer on a low-speed drill and scrape the sides of the bucket constantly. If you leave unmixed resin on the sides and pour it onto the floor, that spot will stay tacky forever. Treat the mixing process with the same precision as precise floor leveling techniques to achieve flawless surfaces. It’s about the chemistry, not the elbow grease. Once it’s mixed, get it out of the bucket and onto the floor immediately; once that reaction starts, the heat builds up, and the ‘pot life’ ticks down fast.
Let’s dig deeper into the most common flooring myth I encounter: the idea that ‘self-leveling’ compound is a set-it-and-forget-it solution. Everyone tells you to just pour it out and it’ll find its own level, but in my experience, that’s exactly why your self-leveling pour looks like a topographical map instead of a flat surface. You actually have to ‘help’ the material find its home. Without a gauge rake and a spiked roller, the surface tension of the liquid prevents it from truly flattening, leaving you with ridges that are a nightmare to sand down later. This is where precise floor leveling techniques to achieve flawless surfaces become the difference between a professional-grade finish and a weekend disaster. Have you ever fallen into this trap where the leveler just sat there like a thick puddle? Let me know in the comments.
The Hydration Trap You Are Probably Falling Into
One of the most dangerous mistakes I see is the ‘glug-glug’ method of mixing. Most people think a little extra water will make the leveler flow better. In reality, over-watering destroys the chemical bond and leads to ‘segregation,’ where the heavy sand sinks to the bottom and the weak polymers float to the top. This results in a chalky, brittle surface that will crack under the weight of your new floor. The Tile Council of North America (TCNA) Handbook, the gold standard for professional installations, warns that improper liquid-to-powder ratios are a leading cause of substrate failure. You must use a moisture meter to prevent floor failure by ensuring the slab isn’t sucking the life out of your mix too fast, or conversely, pushing moisture up through the new layer.
Why does my leveler look like a dry lake bed?
If you see a spiderweb of cracks appearing as the compound dries, you likely skipped the primer or didn’t use enough of it. Bare concrete is incredibly thirsty. If you don’t seal it first, the slab will drink the water out of the leveling compound before it has a chance to cure. This is exactly how to prevent ghosting marks on your self-leveling finish—you create a barrier that keeps the hydration in the mix where it belongs. I’ve also found that many people fall for the trowel size error that leads to hollow-sounding tiles later on because they’re trying to compensate for a subfloor that wasn’t actually flat to begin with. Remember, the goal isn’t just level; it’s flat. A floor can be sloped and still be perfectly flat, which is often more critical for avoiding flooring installation mistakes to avoid for lasting results. Stop chasing perfection with the level and start chasing flatness with a high-quality straightedge.
Why a Spiked Roller is Your New Best Friend
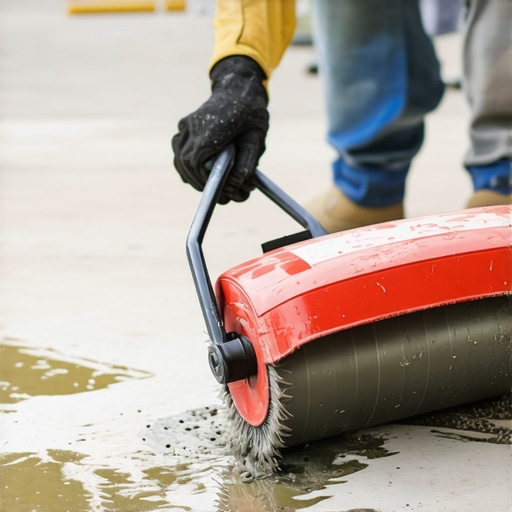
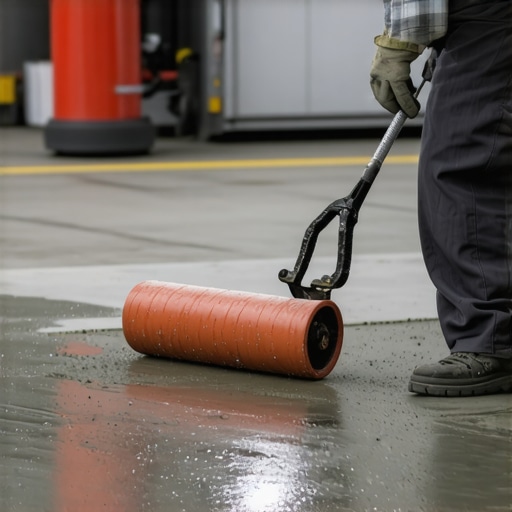
If you’re serious about a flat subfloor, you need a spiked roller. I used to think it was just for removing air bubbles, but its real magic lies in breaking the surface tension of the self-leveling compound. This allows the material to flow into the low spots naturally without you having to ‘rake’ it to death. For larger areas, I never step onto the wet material without a pair of spiked shoes; they allow me to reach the center of the room to address ridges without ruining the finish. This is a foundational part of mastering floor leveling pro secrets for perfect installations. I’ve also found that a 10-foot straightedge is non-negotiable. According to the National Wood Flooring Association (NWFA) Jobsite Preparation standards, a subfloor must be flat to within 3/16-inch in a 10-foot radius for glue-down applications. If you aren’t checking your work with a physical edge, you’re just guessing. This level of precision is exactly how to achieve flawless floor leveling before tile laying and ensures you don’t end up with those annoying dips later.
How do I maintain my high-performance floor for the long haul?
Maintenance isn’t just about cleaning; it’s about protecting the chemical bond you worked so hard to create. For epoxy, avoid parking your car with high-performance ‘track tires’ that are still hot from a long drive; give them ten minutes to cool on the driveway. For tile or wood, the enemy is almost always the wrong cleaner. You must stop using vinegar on your hardwood floors immediately because the acid slowly eats away at the protective finish, leaving the wood vulnerable to moisture. Instead, use a pH-neutral cleaner specifically designed for your finish type. If you’ve invested in hardwood floor care secrets to longevity and shine, you know that a soft microfiber mop is your best friend. Regular checks for cracks in the grout can help you catch issues before they require you to learn how to fix a hollow sounding tile without tearing it up.
The Future of Subfloor Tech is Digital
In the next five years, I predict we’ll see a massive shift toward ‘smart’ leveling compounds that use color-changing technology to signal when they are fully cured and ready for the next layer. We’re already seeing the beginning of this with moisture-sensitive primers. The days of ‘guessing’ if the slab is dry will soon be over, replaced by chemical indicators built right into the product. I also recommend setting up ‘raking’ lights—bright LED shop lights placed low to the ground while you work. This casts long shadows in every low spot, making it impossible to miss a dip. I learned this while studying precise floor leveling techniques to achieve flawless surfaces. It’s a game-changer for those of us who don’t have eagle eyes. I personally use a pinless moisture meter because it allows me to scan large areas of the slab without leaving hundreds of tiny holes. I look for consistency across the entire garage, especially near the threshold where rain might seep in. This is a vital part of the step by step guide to flooring installation and leveling success. My challenge for you: Before your next pour, go buy or rent a spiked roller and a 10-foot straightedge—the difference in your results will be night and day.
Hard-Earned Truths from the Garage Floor Trenches
Looking back at my first few failures, I realized that the biggest mistake wasn’t the product I chose, but my own impatience. One of the most important flooring installation mistakes to avoid for lasting results is rushing the ‘ugly’ phases—the grinding, the cleaning, and the moisture testing. If you can’t spare a weekend for prep, you’ll spend three weekends on repairs later. Another lightbulb moment was realizing that ‘industrial grade’ isn’t just marketing; it’s chemistry. Professional-grade solids don’t just sit on top of the concrete; they become part of it. I also learned that mastering floor leveling pro secrets for perfect installations often comes down to the environmental conditions. If the garage is too hot, your epoxy kicks too fast; if it’s too damp, your leveler never bonds. Always respect the clock and the thermometer.
Gear That Actually Makes a Difference
You don’t need a truckload of tools, but you do need the right ones. First, a pinless moisture meter is non-negotiable. I use it to use a moisture meter to prevent floor failure by scanning the entire slab, not just one corner. Second, invest in a high-quality spiked roller. It feels like an unnecessary expense until you see how perfectly it blends your self-leveling pour. Third, don’t overlook simple basics like the painters tape trick for clean epoxy edges. It’s these small, inexpensive additions to your toolkit that separate a DIY ‘oops’ from a professional ‘wow.’ I trust these items because they remove the guesswork from an already stressful project.
Your Path to a Permanent Professional Finish
Creating a floor that lasts a lifetime isn’t about luck; it’s about following a proven system. Whether you are battling hot tire pickup or trying to smooth out a lumpy slab, the principles remain the same: clean, dry, and profiled. When you take the time to follow a step by step guide to flooring installation and leveling success, you aren’t just painting a floor—you’re building a foundation. Don’t be afraid to take that first step with the grinder. Your car, your house, and your sanity will thank you. Have you ever had an epoxy floor peel on you, or did you get it right the first time? Let me know in the comments below.