
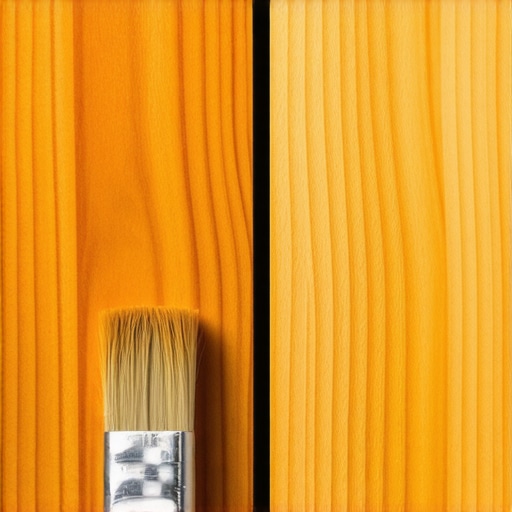
I remember the first time I pulled up a heavy wool area rug in my old bungalow’s living room. I expected maybe a few dust bunnies or a stray penny, but what I actually found was a shock: a bright, salmon-pink rectangle staring back at me from a sea of deep, rich cinnamon-brown wood. That was my first real-life lesson in the chemistry of cherry. It is a wood that does not just sit there; it evolves, reacts, and, if you are not careful, makes a mockery of your repair plans. Whether you are replacing a damaged plank or adding new flooring to an adjacent room, trying to match fresh cherry to aged cherry feels like trying to paint a portrait of a moving target.
The Pink Ghost Under My Living Room Rug
I have made plenty of messes in my time as a DIY enthusiast, but my biggest blunder involved a quart of ‘Cherry’ stain and a whole lot of overconfidence. I thought I could just buy a matching name off the shelf and call it a day. I spent hours prep-sanding, applied that stain, and the result was… well, it was hideous. The new wood looked like it was from a different planet. It lacked the depth and the natural amber glow that only decades of sunlight can provide. I had to learn the hard way that matching sun-faded cherry is not about finding the right color today; it is about anticipating what the color will be six months from now. Today, I am going to walk you through the process of ‘cheating’ time so your hardwood floors look seamless from the moment you put the furniture back. Have you ever stared at a patch of floor and wondered if you just ruined your home’s resale value? Tell me about your flooring ‘oops’ moments—I promise I have done worse.
Will My New Wood Ever Actually Match?
This is the question that keeps every homeowner up at night when they see a color mismatch. You are worried you will see that transition line forever, and the skepticism is healthy. If you use the wrong approach, you will see it. But if you stop thinking like a house painter and start thinking like a woodworker, you can get a blend that is 95% perfect. We are going to avoid the trap where wood stain looks blotchy on maple or other tight-grained woods by using specific layering techniques designed for cherry’s unique pore structure.
Why Cherry Wood Is a Beautiful, Fickle Beast
Cherry is unique in the world of flooring because of its extreme photo-sensitivity. According to the experts at the Wood Database, American Black Cherry (Prunus serotina) is notoriously light-sensitive; it starts out as a pale pinkish-brown and darkens significantly into a deep reddish-brown when exposed to UV light. This is not a defect; it is the wood’s most prized feature. But when you are refinishing floors in 2025, it is a massive hurdle. You need the right tools for a professional install to handle the delicate sanding required to blend these zones. In the following steps, we will look at why a slightly too light stain is actually your best friend and how to use the ‘window-sunning’ technique to accelerate the aging process before you even crack open a can of polyurethane. [image_placeholder_1]Instead of trying to find a stain that mimics forty years of oxidation, you need to manipulate the wood itself. First, you must realize that cherry is not just wood; it is a living archive of every photon that has ever hit it.
Stop Chasing Color at the Hardware Store
Those pre-mixed cans are designed for stable woods, not the chemical rollercoaster of cherry. I remember trying to patch a hallway once; I used a ‘Red Mahogany’ stain thinking it would bridge the gap. I ended up with a floor that looked like a crime scene—unnatural, muddy, and far too purple. The real trick is layering. You want to start with a very dilute water-based dye to hit the pink undertones, then let nature do the rest. Before you even think about the finish, you need to know how to acclimate your hardwood without taking over the whole house. For cherry, this acclimation is not just about moisture; it is about light exposure.
Give Your Wood a Tan Before It Hits the Subfloor
Professionals call this ‘window-sunning.’ If you have a south-facing room, lay your new planks out on sawhorses or the subfloor for two weeks before installation. Rotate them like you are turning a steak on a grill. This initiates the ‘burn’ that turns cherry from that salmon pink to a tawny gold. It is the difference between a spray tan and a week in the Maldives. 
Sanding Strategies That Will Not Leave You in a Cloud
Once the wood has its base tan, you need to prep the surface. If you are doing a repair, you have to feather the old finish into the new wood. I once tried to ‘eyeball’ the sanding depth and ended up with a dip in the floor that felt like a pothole every time I walked over it. To avoid my mistake, you must learn how to sand a hardwood floor without creating a massive dust cloud. Use a random orbital sander for the transitions and, for heaven’s sake, vacuum every square inch. If a single grain of grit stays under your sealer, it acts like a magnifying glass for imperfections. Always have the best way to clean dust after sanding hardwood floors ready—tack cloths are your best friend here.
Nailing the Leveling Before the First Board Goes Down
You can have the perfect color, but if the floor is bouncy, it is a failure. I have seen beautiful cherry installs ruined because the homeowner ignored a 1/4-inch dip in the plywood. Take the time to learn how to level a plywood subfloor with shims and plywood scraps. It is tedious, and it feels like you are not making progress, but it is the skeleton that holds the whole body together. If your subfloor is not flat, those cherry planks will rub against each other, creating squeaks that will drive you mad by year two. Ensure you have the 7 tools you actually need for a professional diy hardwood install, specifically a 6-foot straight edge, to find those low spots before you commit to the first nail.
Is Self-Leveling Compound Really a Magic Fix?
Everyone says that self-leveling compound is a set-it-and-forget-it solution for a wonky subfloor, but in my experience, that mindset is exactly how you end up with a brittle, crumbly mess. The most common myth I encounter is the belief that gravity will do all the work for you. While these products are designed to flow, they have a limited ‘open time’ and an even more limited ability to defy the laws of physics if your substrate is thirsty. If you don’t learn why you must prime concrete before every leveling job, the dry slab will literally suck the moisture out of your leveler before it can settle, leading to a surface that looks like a dried-up lake bed.
Stop Relying on Gravity and Start Using Your Trowel
The ‘oops’ factor usually happens about twenty minutes after the pour. You see a bubble or a slight ridge, and you try to touch it up, but the chemical reaction has already begun. This is when why your self-leveling compound is cracking like a dry lake bed becomes a reality instead of a cautionary tale. To get a truly professional result, you need to be aggressive with a spike roller to release trapped air. I have seen homeowners lose thousands in materials because they didn’t realize that even ‘self-leveling’ mixtures require manual help to reach the corners and maintain a uniform depth. This is especially critical if you are working with heat; I’ve detailed the specifics of why your floor leveler is cracking over radiant heat pipes because the thermal expansion requires a much more specialized approach than a standard plywood over-pour.
The Industry Standard for a Flawless Finish
According to the National Wood Flooring Association (NWFA), a subfloor must be flat to within 3/16 of an inch over a 10-foot radius. Most DIYers think ‘level’ is the goal, but ‘flat’ is what actually matters for your cherry planks. If you have a slope but the surface is perfectly flat, your floor won’t squeak. If you have a level room with a 1/4-inch dip in the middle, your floor is doomed. I always recommend using precise floor leveling techniques to achieve flawless surfaces rather than just eyeballing it. 
How Do I Know if My Subfloor is Ready for Tile?
Once you have mastered the leveler, the next hurdle is the chemical bond. If you are transitioning to a tiled area, the rules change entirely. You cannot simply throw thinset over any surface. You must understand how to achieve flawless floor leveling before tile laying to ensure your grout lines don’t crack three months later. I once saw a beautiful installation fail because the installer didn’t account for ‘deflection’—the bounce in the floor. No amount of leveler can fix a structural bounce; for that, you need to look into mastering floor leveling pro secrets for perfect installations, which often involves adding blocking between joists from the basement. Have you ever fallen into the trap of thinking a thicker layer of glue or leveler would hide a structural flaw? Let me know in the comments—I’ve been there, and I know how frustrating it is to see that first crack appear. If you are still in the planning phase, make sure you are avoiding flooring installation mistakes by checking your moisture levels twice and your flatness three times.
Your Back Will Thank You for This One Tool
Once you’ve wrestled with a subfloor, you realize that accuracy isn’t just about aesthetics; it’s about your sanity. I used to rely on a chalk line and a prayer, but I’ve since converted to the church of the self-leveling laser. If you’re trying to run planks from a kitchen through a narrow door and into a hallway, the laser level move for perfectly straight hallways is the only way to ensure your lines don’t drift. I personally use a Bosch three-plane level because it lets me check the flatness of the floor and the plumb of the walls simultaneously. This is where I see most DIYers fail—they get the first room right, but by the time they reach the bedroom, the layout has drifted an inch to the left, leaving them with awkward slivers of wood at the baseboards. Investing in a high-quality laser isn’t just a luxury; it’s the difference between a floor that looks ‘home-made’ and one that looks like a high-end architectural install.
How Do I Maintain My Cherry Floors Over Time?
Maintenance for cherry is different than for oak or maple. Because the wood continues to darken for years, you can’t just set a heavy rug down and forget it. I tell my clients to rotate their furniture every few months for the first two years to allow for even oxidation. It sounds like a chore, but it prevents those ‘ghost rectangles’ that haunt so many old homes. Beyond the light, you need to master hardwood floor care secrets to longevity and shine. Avoid any cleaner with wax or ‘restorer’ chemicals; these create a gummy buildup that is a nightmare when it’s time for mastering hardwood floor refinishing later on. According to the USDA Forest Service’s Wood Handbook, cherry’s extractive content makes it more stable than many other hardwoods once properly acclimated, but that stability depends entirely on keeping your indoor humidity between 30% and 50% year-round.

The Moisture Meter Is My Secret Weapon
I don’t care how long the wood has sat in your house; if you aren’t using a pinless moisture meter, you are gambling with your investment. You need to know how to use a moisture meter to prevent floor failure before the first nail is driven into that expensive cherry. I aim for a reading within 2% of the subfloor’s moisture level. If they aren’t in sync, that wood will cup or gap within one season as it searches for equilibrium. I’ve seen beautiful wide-plank jobs ruined because the installer was in a rush. If you’re working with larger formats, remember why wide planks need more than just nails to stay flat—the adhesive-assist method, where you run a bead of glue along with your nails, is your best friend here for long-term stability.
The Shift Toward Natural Finishes
Looking ahead to 2026, the trend is moving away from the plastic look of high-gloss polyurethane. We are seeing a massive return to hard-wax oils and matte finishes that celebrate the grain. I love these because they allow the cherry to breathe and darken naturally, and repairs are as simple as buffing in a little more oil rather than sanding the whole room. You should definitely check out the natural oil vs polyurethane debate for busy homes to see which fits your lifestyle. Plus, as we become more conscious of our environment, learning how to choose flooring that won’t kill your indoor air quality is becoming the new standard for luxury. My challenge to you: Buy a moisture meter before your next project and test every room in your house—you’ll be shocked at the variance. No more ‘oops’ moments; just professional results.
What They Won’t Tell You About the Long Game of Cherry
After years of working with this specific species, I’ve realized that the most common mistake is impatience. You cannot rush a process that is literally tied to the rotation of the earth and the intensity of the sun. Here is the insider truth: even the most skilled pro can’t make brand-new cherry look like 20-year-old cherry on day one without some ‘cheating.’ The goal is to get it close enough that the natural darkening process bridges the gap within six months.
- The Salmon Phase is Temporary: That pinkish hue is the wood’s ‘youth.’ Don’t panic and over-stain it. If you hit it with too much red dye now, it will turn dark purple in three years.
- Light is a Tool, Not a Nuisance: Use the sun to your advantage. If a room gets uneven light, keep the curtains open in the morning and closed in the afternoon to even out the ‘tan.’
- Accept the 95% Rule: Wood is a natural product. Tiny variances in grain and growth rings mean perfection is a myth, but a 95% match is a triumph that no guest will ever notice.
Gear That Keeps My Projects from Becoming Disasters
If you’re serious about avoiding flooring installation mistakes, you need more than just a hammer. My personal ‘must-have’ list includes the Bosch three-plane laser level. Using the laser level move for perfectly straight hallways has saved me from diagonal drift more times than I can count. Secondly, never trust your eyes regarding dryness; learning how to use a moisture meter to prevent floor failure is a skill that separates the weekend warriors from the craftsmen. Lastly, I always keep a copy of the NWFA technical manuals handy—they are the gold standard for when things get tricky with subfloor deflection or specific species requirements.
#IMAGE_PLACEHOLDER_E#
Turn Your Floor Into a Legacy
Installing or repairing cherry is more than just a home improvement task; it’s an investment in a material that actually gets better with age. While other hardwood floors might wear down and lose their luster, cherry deepens into a story of the light that has filled your home. Don’t be afraid to take the slow road. By respecting the acclimation, the light exposure, and the proper maintenance through hardwood floor care secrets to longevity and shine, you’re creating a surface that will be the envy of the neighborhood for decades. Whether you choose a classic finish or dive into the natural oil vs polyurethane debate for busy homes, the key is consistency and care. You’ve got this.
Have you ever found a surprise ‘ghost rectangle’ under an old rug or struggled to match a repair? Let me know your cherry wood stories in the comments—I’d love to hear how you handled the chemistry!