
I stood in my hallway, staring at the floorboards that looked more like dark, amber glass than wood. My house was built in 1910, and those old heart pine planks were the absolute prize of the renovation. But when I fired up the drum sander for the first time, it didn’t take long for the smell of burning sap to fill the entire house. Within five minutes, my brand-new sanding belt was clogged with a sticky, black gunk that looked like dried molasses. I was terrified. I thought I’d ruined the floors, or worse, that I was in over my head and would have to call in a pro who would charge me a fortune. It turns out, heart pine isn’t like modern oak; it’s a living, breathing resin-bomb that requires a completely different strategy than your standard flooring project. In this guide, I’m going to show you exactly how to navigate the resin-rich world of antique wood without losing your mind or your budget.
Why Your Sanding Belts Are Clogging in Seconds
If you’ve ever tried to sand old-growth pine, you know the frustration of the “sap trap.” The resin inside these old boards is basically fossilized turpentine waiting to be liquefied by the heat of your sander. My biggest mistake early on was moving too slowly and using a grit that was far too fine for the initial pass. I thought I was being meticulous and gentle, but I was actually generating enough friction to melt the pitch. I once spent four hours and six expensive sanding belts on a single 10-foot stretch because I didn’t know about the heat-friction trap. This isn’t just about mastering hardwood floor refinishing; it’s about a specific chemical battle you’re fighting against the wood itself. You need to learn how to sand a hardwood floor without creating a massive dust cloud that’s actually a fire hazard due to the flammable resin dust. If you don’t use the right grit sequence, you’ll end up with a blotchy mess that no stain can fix.
Is this ancient wood actually worth the sanding struggle?
You might be tempted to give up and look at elegant tile designs or even luxury vinyl plank installation to cover the mess. I get it. The skepticism is real when you’re on your hands and knees scrubbing gunk off a drum sander. But heart pine is a finite resource; they literally don’t make trees like this anymore. According to the Southern Pine Inspection Bureau, the resin content in “heart” wood is what provides its legendary durability and rot resistance, often reaching densities that exceed many modern hardwoods. It’s essentially a natural composite material. Once you unlock the secret of the first “angle cut,” the rest of the process becomes much smoother. Have you ever faced a floor that seemed determined to ruin your equipment? I’d love to hear how you handled it! Before you start, make sure you understand the dustless sanding secret so you don’t coat your entire home in a layer of sticky orange powder. We’re going to dive into the exact steps that saved my project and my sanity.
Cut Across the Grain First or Suffer the Sap
When you’re dealing with heart pine, you can’t just follow the boards like you’re mowing a lawn. I learned this the hard way during my first renovation when I went straight down the length of the hallway. Within ten feet, the friction had liquefied the resin, and my drum sander was literally glued to the floor. The secret is the “angle cut.” You want to run the sander at a 7-degree to 15-degree angle across the grain for your very first pass. Think of it like a snowplow; by hitting the wood at an angle, you’re shearing off the old finish and the top layer of pitch rather than letting it build up heat in a straight line. This mechanical shear keeps the temperature down and prevents the resin from turning into that black, sticky gunk. 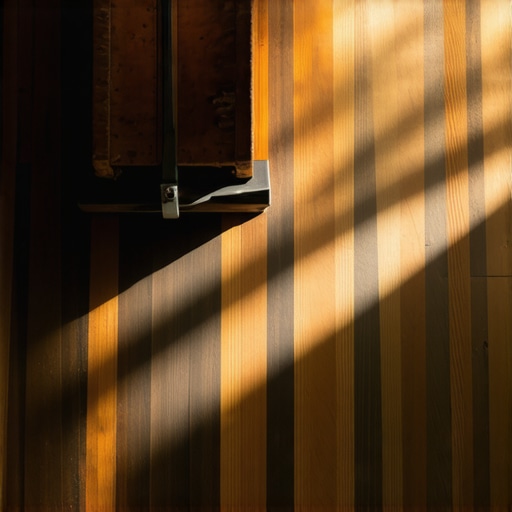
Start Much Coarser Than You Think
Forget about starting with 60 or 80 grit. On resin-heavy floors, you need to be aggressive. I usually reach for a 36-grit or even a 24-grit ceramic belt for the initial leveling. This isn’t just about speed; it’s about the best grit sequence required to strip through decades of wax and resin without the belt getting glazed over. If you start too fine, you’re essentially polishing the resin until it melts. This stage is also the best time to address any structural issues. Before you get too deep into the finish work, you should know how to fix a squeaky subfloor before you lay your new floor, because once that polyurethane goes down, those squeaks are permanent.
The Three-Foot Rule for Flat Surfaces
While you’re stripping the old wood, you’re also leveling the room. Old houses rarely have flat floors. Use the 3-foot level test for checking subfloor flatness like a pro as you go. If you find a massive dip, you might need to rethink your strategy. Sometimes, if the wood is too far gone or the subfloor is compromised, you might need to look into mastering floor leveling pro secrets for perfect installations of a new surface. But for heart pine, the goal is to flatten the humps created by the “cupping” of the wide planks.
Keep the Drum Moving to Avoid Burn Marks
The most dangerous moment is when you lower the drum. If you’re stationary for even a fraction of a second, you’ll dig a “bird bath”—a deep, round divot that is nearly impossible to sand out later. I treat the sander like a plane taking off; I start moving the machine forward before I ever let the lever down to engage the sandpaper. This constant motion is the only way to achieve flooring installation and leveling success when refinishing. If you feel the machine resisting, it’s a sign that the resin is heating up. Pick the drum up immediately. This fast-paced rhythm is how I managed to finish my living room in a weekend instead of a month.Most DIYers think the goal is to sand until every board is perfectly flush and flat across the entire room. But on 100-year-old heart pine, chasing a dead flat surface often does more harm than good. I call this the dishing trap. Because heart pine has such a stark difference in density between its soft earlywood and the rock-hard resinous latewood, aggressive sanding can actually hollow out the softer parts of the grain while leaving the hard ridges high. You end up with a washboard texture that looks terrible under a satin finish. Instead of sanding more, you need to focus on structural integrity. If you’re seeing massive gaps or movement, understanding why wide planks need more than just nails to stay flat becomes much more relevant than which sandpaper grit you choose. 
Is a quarter-inch expansion gap really necessary in a small room?
Yes, and then some. A common contrarian mistake is thinking small rooms or closets don’t breathe enough to matter. I once skipped the gap in a tiny 5×5 pantry, and by the peak of summer humidity, the floor had buckled so hard it literally popped the baseboards off the wall. This is one of the classic 7 mistakes that ruin your luxury vinyl plank installation or any wood-based project. Wood moves through hygroscopic expansion regardless of the room size. If you don’t provide a why you need a perimeter expansion gap for every room, the laws of physics will eventually win. Have you ever fallen into this trap where you thought just this once it wouldn’t matter? Let me know in the comments.
Why Your Leveler is Actually Cracking Underneath
If you decide to pivot from refinishing to a new surface because the old wood is too thin, do not assume a bag of self-leveling compound is a magic wand. I have seen countless pro jobs fail because the installer didn’t address the substrate flex. If you see your new floor looking like a dried-up lake bed, you need to investigate why your self-leveling compound is cracking like a dry lake bed. According to research from the Tile Council of North America (TCNA), subfloor deflection—the vertical bounce—is the leading cause of floor failure. You must how to check for subfloor flex before you lay rigid tile or you are essentially throwing money into a structural crack. This is why mastering floor leveling pro secrets for perfect installations involves more than just pouring liquid; it involves reinforcing the joists first. Re-evaluating these nuances is what separates a weekend warrior from someone whose floors last for another century.Once you’ve wrestled the resin and won, the real challenge begins: keeping that finish looking like a million bucks. I used to think a broom and a mop were enough, but antique heart pine is sensitive to environmental shifts. If you want your hard work to last, you need to be surgical about your equipment. My most-used tool isn’t the big sander; it’s actually a high-quality moisture meter. According to the National Wood Flooring Association (NWFA), wood should ideally be within 2-4% of the subfloor’s moisture content before installation or finishing to prevent catastrophic failure. I never touch a board without checking it first because a simple visual check isn’t precise enough. Beyond the sensors, there are the small things people overlook. For instance, I stopped using standard rubber mallets. They leave black scuff marks that are a nightmare to get out of soft pine. Now, I only use a dead blow hammer for floor capping because the internal sand-filled head prevents the bounce-back that can damage the tongue of your boards. These are the 7 tools you actually need for a professional DIY hardwood install that most rental shops won’t tell you about. 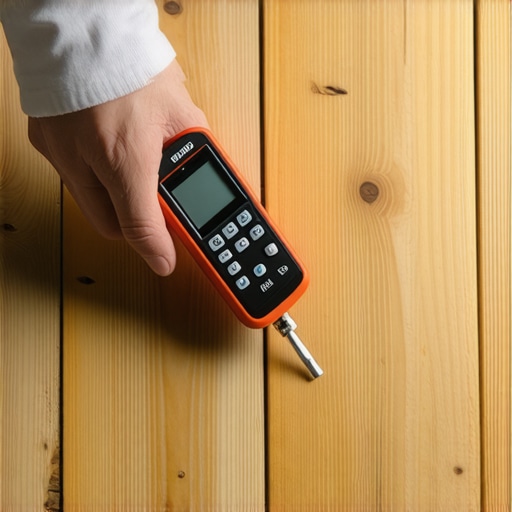 When it comes to the long-term finish, the first clean is the most important. You’ve just spent days creating dust, and you need to know the best way to clean a new hardwood floor for the first time without using chemicals that will strip your fresh wax or poly. I’ve seen people reach for the vinegar bottle immediately, but that’s the vinegar mistake why it destroys your tile grout and hardwood finishes over time. Instead, stick to pH-neutral cleaners specifically formulated for the resin density of your wood.
How do I maintain these resin-heavy floors over time?
The secret isn’t just cleaning; it’s monitoring. I believe the next big trend in flooring is going to be integrated smart sensors. We’re already seeing early versions of moisture-detecting underlayment that can alert your phone to a leak before the wood starts to cup. For now, your best defense is understanding hardwood floor care secrets to longevity and shine. If you have an old house, you also have to watch the humidity levels. I keep a hygrometer in the hallway to make sure I’m not letting the air get too dry in the winter, which leads to gapping. If you’re dealing with transitions into wet areas, you might even consider innovative tile designs that elevate hardwood flooring style. It’s often better to have a beautiful tile threshold in the kitchen than to risk water damage on your heart pine. Mastering hardwood floor refinishing expert tips for 2025 means being proactive rather than reactive. If you really want to level up, try the pencil trick for scribing wood planks against stone fireplaces—it’s the difference between a gap filled with caulk and a professional-grade fit.
Lessons Bought with Sweat and Clogged Belts
After years of wrestling with old-growth pine, I’ve realized that the wood isn’t trying to fight you; it’s just protecting its history. One thing I learned the hard way is that you can’t ‘out-finesse’ the resin. If you don’t stay aggressive with your grit sequence during the first pass, the wood will simply swallow your sanding belts whole. I also discovered that your ears are as important as your eyes. When the sander’s pitch drops, it’s a warning that heat is building up and the pitch is about to liquefy. I always keep the dustless sanding secret in mind to keep the workspace breathable. Another lightbulb moment was realizing that minor imperfections in the grain often add to the floor’s character—don’t sand away the soul of the house trying to make it look like a plastic laminate.
The Exact Tools I Keep in My Truck
If you’re serious about a professional-grade finish, you need more than just a rented drum sander. I never start a project without my moisture meter to ensure the boards won’t cup the moment I leave. For the actual installation and finish work, I only use a dead blow hammer for floor capping to avoid marring the wood. To get that tight fit against old masonry, I swear by the pencil trick for scribing wood planks against stone fireplaces. When the dust finally settles, knowing the best way to clean dust after sanding hardwood floors is the difference between a gritty finish and a glass-like surface. #IMAGE_PLACEHOLDER_E#
Give Your Old House the Floor It Deserves
Refinishing heart pine is a labor of love, but the reward is a floor that will outlast everyone reading this today. These planks have already survived a century of life, and with the right care, they’ll survive another. By mastering hardwood floor refinishing expert tips for 2025, you aren’t just renovating a room; you’re preserving a piece of architectural history. Take your time, watch your heat, and don’t be afraid to get a little resin on your boots. Have you ever uncovered a beautiful hardwood floor only to realize it was a resin-heavy beast, or did you get lucky with a clean slate? Let me know your biggest flooring surprise in the comments!