
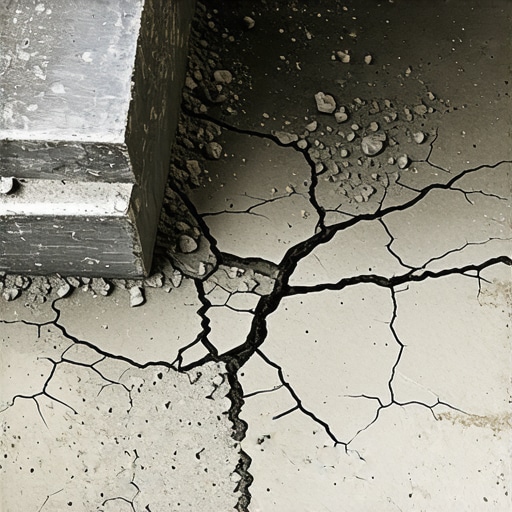
I was kneeling on my kitchen floor, sweat dripping off my nose, staring at a spiderweb of cracks that looked exactly like a dry lake bed. I’d spent six hours the day before filling every low spot, convinced I was finally ready for my dream tile. Then I heard it—the sickening crunch under my work boot. If you’ve ever felt that pit in your stomach after a long day of prep, you know exactly why we need to talk. Subfloor prep is the unglamorous, dusty part of flooring installation that everyone wants to rush, but it’s where most projects go to die. Every crack is a message from your house, and usually, it’s telling you that you missed a step.
Stop Blaming the Product and Start Looking at the Prep
Early in my DIY journey, I made the classic rookie mistake: I thought the patching compound was just thick paint for the floor. I didn’t bother to clean the dust properly, and I completely ignored the primer. I essentially tried to glue my new floor to a layer of dirt. When the compound dried, it didn’t bond to the slab; it just sat there like a brittle cracker waiting to snap. Knowing why your leveling compound is cracking often comes down to the invisible bond—or lack thereof—between the patch and the substrate. If that bond isn’t rock-solid, the pressure from your walking weight or the weight of the furniture will turn that patch into rubble. It is vital to perform the 3 foot level test before you even think about opening a bag of mix.
Is a permanent subfloor patch actually worth the effort?
You might be wondering if you should just ignore those dips and hope the underlayment hides them. Trust me, I’ve tried that too, and the result is usually a floor that squeaks and bounces for the next decade. The floor leveling challenges we face aren’t just about making things look pretty; they are about structural integrity. When you’re patching a concrete slab, you are fighting against moisture, expansion, and contraction. [IMAGE_PLACEHOLDER] According to the National Wood Flooring Association, subfloor flatness is non-negotiable for preventing mechanical failure in the locking systems of modern planks. Today, I’m going to show you how to stop the cracking for good by mastering the prep steps I used to ignore. Have you ever spent an entire Saturday on a patch only to see it fail by Sunday morning? I want to hear your horror stories!
Clear the Debris Before You Mix a Single Bag
Think of your subfloor like a canvas; you wouldn’t paint a masterpiece over a pile of sand. If there is leftover drywall mud, old adhesive, or just plain old construction dust, your patch is destined to fail. I once spent an entire morning thinking I could just go over some old residues, but you really need to know how to remove carpet glue from a concrete subfloor without chemicals to get down to the actual substrate. If the patch sticks to the glue instead of the concrete, it’s going to peel up in sheets. Use a scraper and a heavy-duty shop vac. If you can still wipe your finger across the floor and see a grey smudge, it’s not clean enough. You’re looking for a surface that feels like 80-grit sandpaper—porous and ready to grab onto whatever you put down next.
Prime Like Your Floor Depends on It (Because It Does)
I cannot scream this from the rooftops loud enough: primer is not optional. Concrete is basically a giant, thirsty sponge. When you pour a wet patch or leveler onto dry concrete, the slab sucks the water out of the mix before the chemical reaction can finish. This results in a brittle, chalky mess that cracks the moment you walk on it. Understanding why your leveling primer is peeling off the concrete is the first step toward a professional bond. You need to apply a dedicated subfloor primer that seals the pores of the concrete, ensuring the moisture stays in the patching compound where it belongs.
The Day the Bubbles Won: A Cautionary Tale
I remember a basement remodel back in 2019 where I thought I’d save an hour by skipping the second coat of primer. I poured the leveler, and within twenty minutes, I saw hundreds of tiny bubbles rising to the surface like a freshly poured soda. The concrete was literally out-gassing, and because the primer hadn’t sealed it, the air escaped through my expensive leveler. I had to grind the whole thing down the next day. Now, I always wait for the primer to go from milky to tacky and clear before I even open a bag of mix. This bond is what prevents the dreaded scenario of why your self leveler is peeling off the concrete in sheets.
Stop Guessing and Start Mixing for Success
When you finally get to the mixing phase, treat it like a chemistry experiment, not a cooking recipe where you can ‘eyeball’ the salt. Use a measuring bucket for the water. Too much water weakens the crystalline structure of the patch, making it soft. Too little water, and it won’t flow into the low spots. You need to master the best way to mix self leveler for a perfectly smooth surface by using a high-torque drill and a proper mixing paddle. Mix it until it’s the consistency of heavy cream—no lumps allowed. Once it’s down, don’t over-work it with a trowel. Let gravity do the heavy lifting. Before you commit to the final flooring, it’s smart to how to check for subfloor flex before you lay rigid tile, as even the best patch can’t survive a floor that bounces like a trampoline. Use the flashlight test for checking floor flatness before glue to ensure your hard work actually resulted in a flat plane.Let’s dig deeper into the biggest myth in the industry: the difference between “level” and “flat.” Most DIYers waste hours trying to make a floor perfectly level with the horizon, but your house can lean like the Tower of Pisa, and as long as the subfloor is flat, your project will succeed. What actually kills your project is lack of flatness. If you have a 1/4-inch hump in the middle of the room, your planks will “bridge” over that spot, creating a hollow sound and eventually snapping the locking mechanism. This is exactly why your porcelain tiles are cracking in a perfect straight line—they are under constant tension because they aren’t fully supported. Always prioritize the 3 foot level test to find the gaps, not just the slope.
The Dangerous Lie of Self-Leveling Compounds
Many people think “self-leveling” means you just pour it and walk away. That is a massive flooring installation mistake that leads to “islands” of dried compound higher than the rest of the floor. In reality, these products are “self-smoothing,” not self-leveling. You have to actively manage the pour with a gauge rake to break the surface tension. If you don’t, the material starts to set before it finds its own level, leaving you with a wavy mess. Have you ever fallen into this trap? Let me know in the comments.
Does your subfloor have too much “give” for your dream tile?
This is the nuance that separates a 5-year floor from a 50-year floor: deflection. You can have a floor as flat as a mirror, but if the joists underneath flex when you walk, the floor will fail. Rigid materials like stone cannot bend. According to the Tile Council of North America (TCNA) Handbook, the standard for large-format tile requires a substrate to be within 1/8 inch in 10 feet, and the deflection must not exceed L/360. If your floor bounces, it will eventually cause your leveling compound to crack like a dry lake bed. Before you start, you must know how to check for subfloor flex before you lay rigid tile and perform the simple test to see if your subfloor is strong enough for tile.
Don’t Ignore the Invisible Expansion Gap
Another advanced mistake is failing to account for how different materials move together. For instance, when you blend new hardwood into old flooring without a transition, you are essentially creating one giant organism that expands and contracts. If you pin that floor down too tight at the edges, it has nowhere to go. Real expertise isn’t just about the tools; it’s about predicting how the house will breathe six months later.
You can’t build a permanent masterpiece with a cheap bubble level from the bargain bin. I’ve learned the hard way that high-end tools aren’t just for showing off; they are for sanity. If you’re serious about this, you need to invest in a decent laser level. I use a 360-degree green beam because it’s easier to see in daylight and it allows me to mark the entire room’s height in one go. Beyond the laser, investing in the 7 tools you actually need for a professional DIY hardwood install really changes the game, especially if you’re tackling multiple rooms. These aren’t just gadgets; they are the difference between a floor that looks ‘okay’ and one that looks like it was done by a 30-year veteran.
The Moisture Meter is Your New Best Friend
I never pull the trigger on a hardwood job without my pinless moisture meter. If the wood is too dry or too wet relative to the subfloor, you’re essentially installing a ticking time bomb. According to the National Wood Flooring Association (NWFA) Technical Publication A100, the moisture content between the wood flooring and the subfloor should typically be within 2-4% of each other. If they aren’t, the floor will warp. This is why I always perform the moisture test you must do before gluing down wood. It’s an extra ten minutes of work that saves you ten years of headaches. If you’re working on concrete, don’t skip the bucket test how to check your concrete slab for excessive moisture to ensure you aren’t sealing in a swamp.
How do I keep my new floors looking fresh for decades?
Maintenance is where most homeowners drop the ball. You’ve spent thousands on materials and hours on prep; don’t ruin it with a cheap mop and the wrong chemicals. For starters, stop using bleach on your grout immediately. It eats the sealer and makes the grout brittle. Instead, focus on hardwood floor care secrets to longevity and shine like using microfiber pads and pH-neutral cleaners. If you’ve just finished a project, knowing the best way to clean a new hardwood floor for the first time is crucial because construction dust is abrasive and can scratch your new finish before the furniture even arrives.
Look into the Future of Flooring Tech
The industry is moving toward ‘smart’ substrates and highly advanced polymers that handle house movement better than traditional cement ever could. I predict that within five years, we will see self-leveling compounds with built-in sensors that alert you to subfloor moisture spikes before they reach the surface. For now, we have to rely on our tools and our eyes. Always be sure to check for how to identify water damage in hardwood early on, as the newer finish technologies can sometimes hide rot until it’s too late. I highly recommend you go grab a moisture meter today and check your current subfloor—you might be surprised at what you find lurking under the surface. It’s the single best proactive step you can take to ensure your next installation lasts a lifetime.
Hard Truths About Why My First Three Floors Failed
I used to think that the self-leveling compound was a “set it and forget it” solution. I was wrong. The biggest shift in my mindset came when I realized that speed is the enemy of a flat floor. If you rush the mixing or skip the pro secrets for perfect installations, you’re just pouring money down the drain. I also learned that “good enough” for a plywood subfloor isn’t good enough for tile; you have to be obsessive about those tiny humps. Another lightbulb moment was discovering that why your self-leveling compound is cracking often relates back to the temperature of the water you used—too hot and it sets before it can flow.
My Non-Negotiable Arsenal for Subfloor Success
If you’re tired of guessing, you need the right gear. I don’t step onto a job site without my pinless moisture meter to perform the moisture test you must do before gluing down wood. It takes the guesswork out of the equation. I also swear by a 360-degree laser level, which is much more reliable than a standard spirit level for large rooms. For anyone starting out, check out this list of 7 tools you actually need for a professional DIY hardwood install to ensure you aren’t missing a critical piece of the puzzle. These tools are an investment in your home’s future value. [IMAGE_PLACEHOLDER_E]
Take the Leap into Your Next Renovation
Subfloor work is intimidating, dusty, and physically demanding, but it is the soul of your home. When you finally lay that first plank and it clicks perfectly into place because you took the time to master flooring installation fundamentals, the satisfaction is immense. You aren’t just laying a floor; you’re building a foundation that will last for generations. Whether you are following a step-by-step guide to flooring installation or experimenting with hardwood floor refinishing, keep your eyes on the prep. Have you ever encountered a subfloor problem that seemed impossible to fix? Let me know in the comments below!