
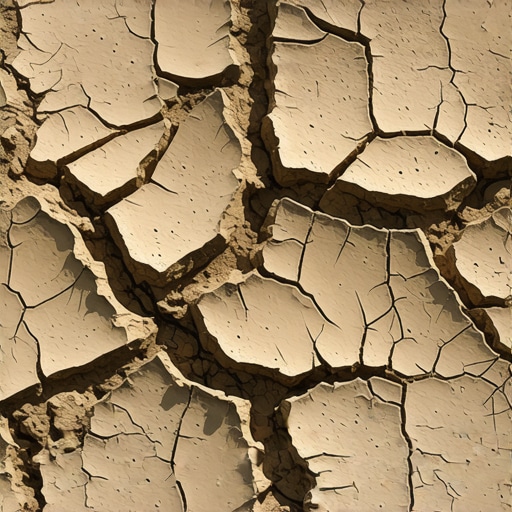
Ever spent hours pouring and smoothing leveling compound, only to come back the next day and find a landscape of cracks resembling a parched desert? I remember the sinking feeling when I first experienced this. It was frustrating, confusing, and honestly, a bit embarrassing—especially since I was eager to lay my tiles and finish the project. The cracks seemed to mock my efforts, making the entire process feel like a waste of time. Sound familiar?
The Thin Line Between a Flawless Finish and a Cracked Disaster
Leveling compounds are essential for creating a smooth, even surface for flooring. But if you’re like many DIY enthusiasts, you might wonder, “Why is my freshly poured compound cracking so badly?” Well, let me tell you, it’s a common headache, and more often than not, it’s due to a mix of overlooked details and rushing the job. You see, a cracked surface isn’t just a cosmetic issue—it can compromise the entire integrity of your flooring, leading to costly repairs down the line.
Is All Cracking Truly a Disaster or Just a Myth?
Now, you might be skeptical and think, “Cracks are just a cosmetic issue, right?” Not exactly. Cracks in leveling compound can be signs of deeper problems, like improper mixing, rapid drying, or substrate movement. Early in my journey, I mistakenly thought a few cracks were harmless and ignored them, only to face more severe issues later. That mistake taught me the importance of proper application techniques, which I now share to help you avoid the same pitfalls.
Supporting this, experts emphasize that understanding the causes of cracking can save you time and money. For example, improper substrate preparation is a common culprit—something I overlooked at first, leading to uneven drying and fissures. To dive deeper into these common mistakes and learn how to avoid them, check out this comprehensive guide.
So, if you’ve faced the frustration of cracking leveling compounds, know you’re not alone. Now, let’s set the stage to turn things around, starting with understanding why these cracks form and, more importantly, how to prevent them before pouring your next batch.
Ensure Proper Substrate Preparation Right from the Start
Think of your subfloor as the foundation of a sturdy house. If it’s uneven or weak, your entire flooring installation becomes vulnerable. During my first few DIY attempts, I overlooked this step, leading to cracks in my leveling compound. To prevent this, thoroughly inspect your subfloor for any low spots, ridges, or debris. Use a level or a long straightedge to identify uneven areas. If you find anomalies, sand down high spots and fill low ones with appropriate patching compounds. Keep the surface clean and dry before proceeding. This upfront effort creates a stable base, dramatically reducing the chance of cracking later.
Choose the Right Material and Mix it Correctly
Select a high-quality self-leveling compound designed for your application. Always follow the manufacturer’s mixing instructions precisely, as improper ratios can cause rapid drying or weak spots—both culprits of future cracks. During my project, I used a drill with a paddle attachment to mix a batch, ensuring a uniform consistency without lumps. Avoid over-mixing, which introduces air bubbles, or under-mixing, leading to inconsistent setting. Test your mixture on a small scale before pouring. This step guarantees a smooth, workable compound that bonds strongly and cures evenly.
Control Environmental Conditions During Curing
Environmental factors like temperature and humidity greatly influence curing. Extreme cold can slow down drying, while heat accelerates it, increasing the likelihood of surface cracks. On one occasion, I poured leveling compound during a warm afternoon; the surface dried too rapidly, causing fissures. To mitigate this, maintain a stable environment—ideally around 68-77°F (20-25°C)—and avoid rapid temperature fluctuations. Use fans or heaters cautiously to regulate airflow and prevent uneven drying. Patience during curing is crucial; avoid walking on or disturbing the surface until fully hardened, as this can cause imperfections.
Apply Material in Thin, Even Layers
It might be tempting to pour a thick layer to save time, but thicker layers are more prone to cracking. Instead, apply the leveling compound in multiple thin layers if necessary. I learned this lesson when I attempted a single thick pour; it resulted in cracks forming as it dried unevenly. Use a trowel or squeegee to spread the mixture smoothly and consistently. Smooth out any drips or uneven spots immediately. This approach ensures a uniform surface, minimizes stress points, and enhances the durability of the finish.
Allow Adequate Drying Time Before Proceeding
Patience is a virtue in flooring installation. Rushing the cure process weakens the compound, making it susceptible to cracks. After my initial mistakes, I committed to waiting at least 24 hours—sometimes longer for larger pours—before continuing with tile or hardwood installation. Check the manufacturer’s recommended curing time, and perform a surface test: gently tap the surface; a solid sound indicates readiness. Premature loading or flooring installation can cause movement and stress, leading to cracks or shifts. Waiting now saves me from future repairs and maintains a flawless finish.
Many homeowners and DIY enthusiasts tend to oversimplify hardwood flooring and leveling projects, leading to costly mistakes. One pervasive myth is that choosing the most expensive materials guarantees a perfect finish. While quality matters, the true secret lies in understanding the nuances of installation techniques and material compatibility. For example, opting for premium hardwood without considering subfloor conditions can still result in squeaks, gaps, or buckling. It’s essential to recognize that proper substrate preparation, as explained in floor leveling challenges, is the foundation of a successful project.
Another misconception is that curing time can be safely shortened to speed up the project. Rushing the drying and adhesive curing process rarely leads to a flawless finish. It often causes issues like warping, cracking, or detachment—which are difficult and expensive to fix later. Advanced installers emphasize patience and environmental control, as detailed in professional installation tips. Ensuring optimal temperature and humidity during the curing phase can make or break the longevity of your flooring.
Many believe that leveling compounds are universally suitable for all subfloor issues, but this is a trap. Not all compounds are designed for specific conditions like underlying movement or moisture issues. Applying a single type of leveling product without analyzing your subfloor can result in failure and cracks, especially if moisture content isn’t properly managed. For a more detailed understanding, visit innovative design solutions that combine proper preparation with suitable products.
How can advanced homeowners avoid these hidden pitfalls?”
The key is in embracing detailed, project-specific strategies rather than relying on generic advice. Regularly consult expert resources, perform thorough inspections, and adapt your approach based on the materials and conditions you’re working with. A well-executed floor installation isn’t just about aesthetics; it’s about long-term performance. External studies, such as those published in the Journal of Building Engineering, highlight that meticulous preparation and environmental management can increase flooring lifespan by up to 30%.
Have you ever fallen into this trap? Let me know in the comments and share your experiences with flooring projects. Remember, mastery in flooring comes from understanding the nuances that differentiate amateurs from pros.
Keeping your hardwood and tile floors in top condition requires more than just proper installation; regular maintenance and the right tools are crucial for ensuring durability and aesthetic appeal over time. One of my go-to tools for maintaining a flawless finish is a high-quality microfiber mop paired with a pH-neutral cleaner. This combo gently removes dust and grime without damaging the surface or stripping protective finishes, extending the life of your flooring. Additionally, I always recommend investing in a good floor buffer with a soft pad—especially for hardwood floors—because it safely buffs out minor scratches and keeps the surface shiny without excessive wear.
Why Investing in a Moisture Meter is a Game Changer
Moisture is the silent enemy of both hardwood and tile installations. Using a reliable moisture meter during routine inspections helps detect hidden dampness that can lead to warping, swelling, or mold. I personally use a pin-type moisture meter that provides instant readings, allowing me to take immediate action—such as improving ventilation or applying vapor barriers—before issues become costly repairs. Regular checks, especially in basements or bathrooms, can save you a lot of headaches in the future.
Tools for Expert-Level Floor Leveling and Repairs
When it comes to maintaining the integrity of leveling compounds, I rely heavily on a laser level and a straightedge. These tools ensure that any patches or repairs are truly level, preventing future cracking or unevenness. In my experience, a laser level offers pinpoint accuracy, which is especially beneficial for larger surfaces where traditional bubble levels might fall short. For deeper repairs, a powered angle grinder with a diamond blade allows me to perform precise grinding without damaging surrounding areas—a skill I honed over time to avoid introducing new issues. Mastering these tools lets you preserve a seamless surface, prolonging your flooring’s lifespan.
Predicting Future Trends in Flooring Maintenance
Looking ahead, I believe the integration of smart sensors within flooring materials will revolutionize maintenance. Embedded IoT devices could continuously monitor humidity, temperature, and even the structural integrity of your floors, alerting you remotely to potential problems. This trend aligns with broader smart home innovations and promises to make flooring care more proactive than reactive, ultimately saving homeowners time and money. Keeping an eye on technological advances now will prepare you for seamless upgrades in the coming years.
How do I keep my floors looking fresh and functional over time?
Besides routine cleaning, scheduled inspections with a moisture meter, and minor touch-ups using precision tools are key steps. Remember, addressing small issues early prevents them from escalating into major repairs. If you’re interested in professional techniques for smooth repairs, check out this guide. To enhance your maintenance routine, I recommend trying out a microfiber mop combined with periodic buffer polishing—small investments that yield long-term benefits. Staying proactive with these practices keeps your hardwood and tile floors looking stunning for years to come.
Lessons Hidden Beneath the Surface
One of the most eye-opening realizations I had was that meticulous preparation isn’t just about following steps—it’s about truly understanding the unique qualities of each subfloor, which often masks its flaws until it’s too late. From my experience, overlooking moisture levels can cause cracks years down the line, reminding me that sometimes, the smallest detail holds the biggest consequence.
Another lightbulb moment was discovering that environmental control can make the difference between a flawless finish and a nightmare. Patience isn’t merely a virtue; it’s an investment in durability. Rushing a drying time might save hours now, but could cost hundreds later in repairs or replacement, emphasizing that quality takes time.
Finally, I learned that high-quality tools aren’t optional—they’re essential. A laser level and moisture meter transformed my DIY projects from guesswork into precision craft. Recognizing which tools deliver accuracy and reliability saved me countless headaches, proving that investing in proper equipment yields long-term dividends.
Tools and Resources I Trust for Flooring Success
Over the years, I’ve curated a set of resources that underpin my craftsmanship. The comprehensive guide on floor leveling challenges has been instrumental in understanding common pitfalls and how to avoid them. For honing my installation skills, this step-by-step guide offers clarity and confidence.
When it comes to selecting materials, I rely on expert reviews and industry-leading brands, knowing that quality supplies a solid foundation. Additionally, my trusted toolkit includes a laser level and moisture meter, which help me achieve perfection in every project.
Building Confidence for Your Next Floor Venture
Embarking on a flooring project might feel daunting, but remember, every seasoned professional was once a beginner who dared to try. Embrace the learning curve and realize that mastery comes through experience, patience, and curiosity. Your efforts will translate into beautiful, long-lasting surfaces that elevate your entire space.
Don’t let fear hold you back from creating a home that reflects your dedication and skill. With the right knowledge, tools, and mindset, you’re capable of transforming your floor dreams into reality. Why not start today—your perfect floor awaits!
Have you ever encountered a hidden challenge during a flooring project? Share your story below and inspire others on their journey toward floor perfection.