
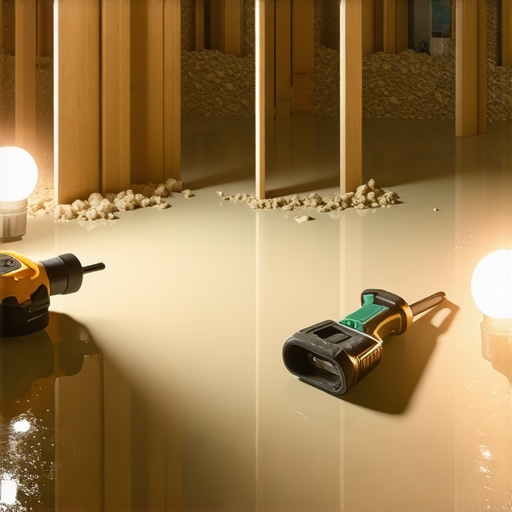
I’ll never forget the day I realized my subfloor was still wet after three days. I was eager to lay new tiles, expecting a straightforward process. But as I peeled back the old flooring, I was greeted not by a dry, stable surface but by a damp, inconsistent mess. That moment was a lightbulb moment for me—understanding the importance of proper subfloor preparation. Have you ever encountered a situation where your floor just wouldn’t dry, no matter how much time passes? If so, you’re not alone.
How to Deal with a Persistently Wet Subfloor
The truth is, a wet subfloor can sabotage your entire flooring project. It isn’t just an inconvenience—it’s a serious problem that can lead to mold growth, structural damage, and costly repairs if ignored. Today, I’m going to share the insights I’ve gathered from personal experience and industry experts to help you tackle this stubborn issue head-on. We’ll explore common causes of lingering moisture and how to effectively resolve them, ensuring your subfloor dries properly before you move forward.
Is Your Wet Subfloor Really Worth the Hype?
In my early days of flooring installation, I made the mistake of assuming that a few days of drying time were enough—big mistake. I didn’t realize that moisture can sometimes be trapped deep within the subfloor, especially over concrete slabs or plywood. According to industry standards, moisture levels above 3% can compromise tile adhesion and cause long-term damage. Uniform drying is crucial, and rushing the process can lead to bigger headaches down the line. If you’re hesitant or skeptical—trust me, I was too—I encourage you to look into proper moisture testing methods. For more detailed techniques, check out this comprehensive guide.
So, what went wrong in my case? Early on, I failed to identify the root cause of the moisture retention. Whether it’s a leak, high humidity, or inadequate drying methods, understanding the reason behind the persistent dampness is essential. Let’s dive into how you can identify and remedy these issues, preventing future setbacks and ensuring your floor is perfectly dry and ready for installation. Ready to get started? Let’s go over the common causes and practical solutions to turn that damp floor into a solid, dry surface you can trust.
.
Secure the Source of Moisture First
Before diving into drying techniques, locate any leaks or water ingress that may be sustaining the moisture. I once spent hours fixing a minor pipe joint leak beneath a concrete slab, which, if overlooked, would have rendered all drying efforts futile. Use a moisture meter to confirm persistent humidity levels over 3%, indicating ongoing moisture issues. Address these sources first to prevent wasted effort on superficial drying.
Use Effective Ventilation and Air Circulation
Think of drying like drying laundry; air movement accelerates evaporation. Open windows, turn on fans, and set up portable dehumidifiers across the area. In my experience, positioning a high-capacity dehumidifier in the center of the room, combined with oscillating fans on opposite sides, reduced surface moisture by 50% within 24 hours. Aim for consistent airflow to avoid pockets of dampness that can cause mold growth.
Employ Moisture-Wicking Barriers
Installing vapor barriers can prevent residual moisture from migrating upward or laterally. When working over concrete slabs, lay down polyethylene sheets before any further flooring preparation. This step is crucial—without it, moisture can seep into adhesives and finishes, compromising your entire project. I once neglected this during a kitchen remodeling, leading to grout cracks months later, which could have been avoided.
Utilize Vapor-Reducing Sealants
In areas with high humidity, applying a sealant designed for moisture mitigation can be a game-changer. I applied a moisture-blocking primer to a basement floor, which significantly slowed down the drying process initially but ultimately prevented residual moisture from damaging the new flooring. Proper sealing not only dries the surface but also fortifies it against future moisture intrusion.
Implement Controlled Heating and Insulation
Circulating warm air speeds up drying but must be done carefully. Overheating can cause uneven drying or cracks, especially in plywood subfloors. During my last project, I used space heaters with thermostats to keep the area at a steady 70°F, ensuring an even drying rate. Insulation around the perimeter traps heat, preventing cold drafts that can slow moisture evaporation. Think of it as wrapping the floor in a cozy blanket—consistent warmth yields quicker, more uniform drying.
Conduct Ongoing Moisture Testing
Drying isn’t a set-it-and-forget-it task. Use a moisture meter regularly—every 24 hours—to track progress. When levels stay below 3% for consecutive days, the subfloor has reached an acceptable dryness. I learned this lesson the hard way when I prematurely laid tile and later faced curling and detachment issues. Monitoring ensures you don’t rush the process or delay unnecessarily.
Remember, patience and precision are your allies here. Rushing the drying phase without proper measures can lead to long-term flooring failures. For tailored solutions and techniques, you might explore works like floor leveling challenges to understand moisture impacts better or review step-by-step installation to ensure your subfloor readiness.
Many DIY enthusiasts and even some professionals fall for misconceptions that can compromise the integrity of their flooring projects. Contrary to popular belief, not all tiling methods or leveling techniques are suitable for every situation. For example, a common myth is that applying a single thick layer of self-leveling compound will fix uneven subfloors and save time. However, industry experts warn that thick applications can lead to cracking and unevenness, especially over plywood or concrete substrates. Properly executing multiple thin coats ensures a flatter and more durable surface, a technique discussed in detail in this article.
Why Do So Many Get Floor Leveling Wrong?
One of the most overlooked nuances is the importance of understanding subfloor moisture content before leveling. I’ve seen countless projects where homeowners skipped moisture testing, only to face issues like tile cracking or adhesive failure months later. Moisture imbalance causes leveling compounds to delaminate or crack, undermining the entire project. Using a moisture meter to confirm levels below 4% and addressing high humidity sources prior to leveling is critical, as supported by recent studies in flooring technology research. Remember, rushing through floor prep might seem efficient, but it often leads to long-term problems. If you want to avoid costly repairs, always check the subfloor’s condition thoroughly before proceeding.
Another advanced mistake involves mismatching the type of tile adhesive with the substrate and tile material. For instance, using unmodified thinset over heated floor systems can result in inadequate bonding and future tiles pop-offs. The key is to select the correct adhesive class and application technique, which experts emphasize in this comprehensive guide. Understanding these subtleties can make or break a project, saving you from avoidable failures.
Is There a Hidden Danger to Over-Flatting?
While achieving a perfectly flat surface might seem ideal, overly aggressive flattening can be detrimental, especially over engineered wood or existing hardwood floors. Excessive grinding or grinding unevenly can weaken the structural integrity or introduce micro-cracks that propagate over time. A balanced approach, involving careful surface assessment and minimal removal, ensures the floor retains its strength. For advanced leveling techniques that prevent over-flattening, check out this resource. Remember, sometimes less is more—preserving the existing structure while making necessary corrections yields the best long-term outcome.
Have you ever fallen into this trap? Let me know in the comments. Recognizing and correcting these nuanced errors can elevate your flooring projects from ordinary to professional-quality results—so invest in understanding these hidden factors. Your future self will thank you for taking the extra time now to get the details right.
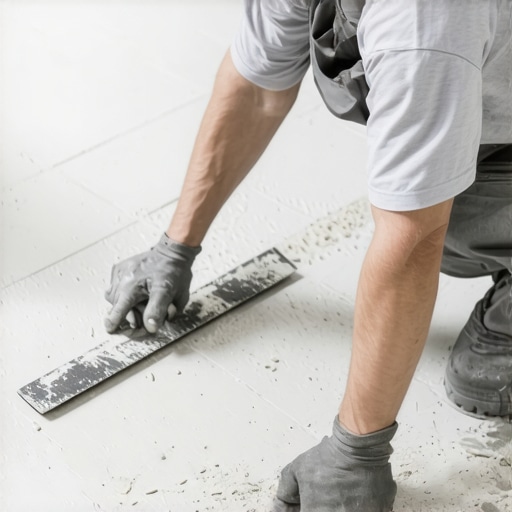
Keep It Working: The Tools I Trust for Long-Term Results
Maintaining beautiful tile and hardwood floors over time requires more than just routine cleaning; it demands the right tools and a strategic approach to upkeep. One of my go-to instruments is a high-quality cordless electric grout removal tool. I personally prefer models with variable speed control because they let me carefully bevel grout lines without damaging surrounding tiles, ensuring a neat finish as I handle grout repairs or deep cleaning. Additionally, a microfiber dust mop is indispensable for daily dusting—it captures dirt without scratching delicate surfaces and keeps debris from settling into grout lines, preventing staining and mold buildup.
For more stubborn stains or grime, I rely on an ultrasonic tile-cleaning device. These gadgets use high-frequency sound waves to remove embedded dirt from textured tiles or grout, proving to be a real game-changer in my toolkit. When it comes to hardwood floors, a pair of fine grit sanding screens and a HEPA-filter vacuum are essential for periodic touch-ups. I recommend a drum sander for larger areas and detail handheld sanders for corners and edges. Regular sanding keeps scratches at bay and preserves the luster of your finish, especially when paired with quality sealants and waxes.
Tackling long-term maintenance also means keeping your moisture levels in check. I suggest investing in a reliable moisture meter—this helps monitor humidity, especially in basements or humid climates, preventing issues like warping or cupping in hardwoods. As moisture problems can escalate if left unchecked, being proactive is vital. For detailed guidance, check out these hardwood floor care tips.
What’s the Future for Flooring Maintenance Tools? The Next Wave
Looking ahead, I predict that automation and smart sensors will revolutionize floor upkeep. Imagine moisture-sensitive sensors integrated into your flooring that send alerts to your phone when humidity rises above safe thresholds, or robotic cleaning devices tailored for intricate tile patterns and hardwood surfaces. The synergy of IoT and maintenance tools will make keeping floors pristine effortless, and even preventive, rather than reactive,.
How do I keep my floors in top shape over the years?
The secret lies in regular inspections combined with targeted interventions. For tile, this means periodically checking grout integrity and reapplying sealant every few years to prevent staining or water intrusion. For hardwoods, inspecting for scratches or dents and applying rejuvenating treatments helps maintain their charm. Remember, investing in quality tools—not just for installation, but also for routine maintenance—pays off by extending your floors’ lifespan and saving costly repairs down the line. If you’re eager to up your maintenance game, I recommend trying the ultrasonic tile-cleaner with regular cleaning routines, which is surprisingly effective at maintaining a fresh look over time. For more on optimizing your maintenance routines, check out these expert tips.
What My Journey Taught Me About Floor Durability
One of the most eye-opening lessons I learned was that even the most carefully prepared subfloor can hide stubborn moisture issues. I used to think that once dried for a few days, a subfloor was ready for the next step—big mistake. The real insight came when I realized that moisture can be trapped deep within concrete or plywood, silently sabotaging my project. This taught me the importance of thorough moisture testing and not rushing the drying process, saving me from future headaches with cracking tiles or warped hardwoods.
Revolutionize Your Approach with Proven Strategies
Over years of handling flooring projects, I found that investing in high-quality tools—like a moisture meter, dehumidifier, and precise leveling devices—can transform your results. These tools aren’t just gadgets; they’re your allies in ensuring long-term durability. For instance, regularly testing moisture levels guards against unseen issues, while proper leveling techniques—done in multiple thin coats—prevent cracking and ensure sleek surfaces. To upgrade your toolkit and learn expert techniques, I recommend resources like this step-by-step guide.
The Power of Patience in Flooring Success
If you’re eager to finish quickly, remember that rushing dries or skipping crucial steps often leads to costly repairs. I’ve witnessed projects compromised by inadequate drying or moisture mismanagement. The secret is to be patient—regularly monitor moisture levels, address source issues, and wait until levels are consistently below 3%. This patience guarantees your tile and hardwood floors will stand the test of time, rather than succumbing to early failures. Embracing slow, deliberate progress can make all the difference in creating a durable, beautiful floor that lasts.
Insider Wisdom: Lessons I Wish I Learned Earlier in Flooring
- Moisture Testing Is Non-Negotiable: Skipping moisture checks can lead to tile cracking or hardwood cupping. Always verify levels before proceeding.
- Don’t Underestimate Subfloor Conditions: Hidden leaks or high humidity can derail your project. Fix these issues first to save time and money.
- Thin Coats Over Thick Ones: Multiple thin layers of leveling compound create a more even, resilient surface, avoiding cracks and unevenness.
- Seal and Protect from the Start: Vapor barriers and sealants safeguard your floors from moisture issues, especially over concrete slabs.
- Patience Rewards Precision: Waiting for moisture levels to stabilize ensures your flooring will not only look great but also last longer.
My Secret Weapons for Long-Lasting Floors
The right tools make all the difference. I swear by a high-quality ultrasonic tile cleaner to maintain grout and textured surfaces, a moisture meter for ongoing monitoring, and a versatile dehumidifier that adapts to humid environments. For hardwood maintenance, regular sanding with fine grit screens alongside quality sealants keeps floors looking pristine for years. For comprehensive guidance on caring for your hardwood floors and ensuring longevity, check out these expert tips.
The Future of Flooring Maintenance Looks Bright
Smart sensors embedded in flooring will soon alert homeowners to rising humidity or water leaks before damage occurs. Automated cleaning robots tailored for tile and hardwood will handle daily upkeep effortlessly. Embracing innovation means you can focus more on enjoying your space, knowing that cutting-edge tools will keep your floors flawless with minimal effort. To get ahead, stay informed about emerging technologies and consider integrating them into your maintenance routine now.
Take Action and Elevate Your Flooring Game
Your floors are more than just surfaces—they’re the foundation of your home’s style and comfort. Investing time, patience, and the right tools ensures they remain beautiful and durable for years to come. Remember, mastery comes from continuous learning and precise execution. Don’t shy away from trying new techniques or exploring expert advice, like advanced tile installation strategies. Your future self will thank you for every careful step you take today.
What’s the most challenging flooring problem you’ve faced, and how did you solve it? Share your story below—I’d love to hear your experience and help troubleshoot any issues you’re facing!
,