
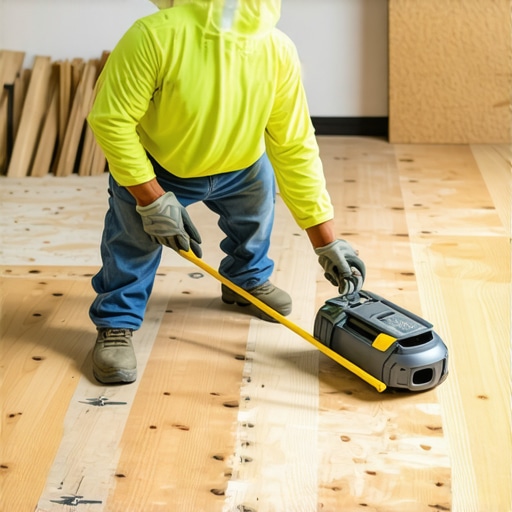
I remember the first time I laid tile over a plywood subfloor—what I thought would be a straightforward job quickly turned into a nightmare. The floor was uneven, with dips and bumps that made my tiles look amateurish rather than professional. That lightbulb moment hit me hard: if you don’t properly prepare your subfloor, even the most exquisite tile designs will suffer. And trust me, I’ve learned the hard way—skipping the right leveling process leads to cracked tiles, loose grout, and endless frustration.
Why Your Subfloor’s Flatness Can Make or Break Your Tile Project
When you’re eager to upgrade your space with beautiful tiles, the last thing you want is for your efforts to be undermined by an uneven foundation. A subfloor that isn’t level not only affects the aesthetic but also jeopardizes the longevity of your entire installation. An uneven surface causes tiles to crack under pressure, grout lines to widen or crack, and can even lead to a wobbly, unsafe floor.
Even more surprisingly, studies show that uneven subfloors are a leading cause of tile failure—so much so that experts recommend meticulous assessment and correction before laying any stone or ceramic. Missing this step can double your work in the future, not to mention your costs.
If you’ve faced similar issues—tiles that pop loose, grout that crumbles sooner than expected, or just a wobbly walk—you’re not alone. Many DIYers, and even some pros, underestimate how critical a perfectly leveled subfloor is. But with the right techniques and a little patience, you can dramatically improve your results.
In the sections ahead, I’ll walk you through the practical steps I’ve used myself to level plywood subfloors effectively. We’ll cover common pitfalls, expert tips, and how to avoid the mistakes I made early on, like rushing through the process or neglecting to check for moisture issues. If you want your tiling project to turn out flawless and last for years, ensuring a level surface is absolutely non-negotiable.
Ready to transform your uneven floor into a smooth, durable surface? Let’s dive into the fundamentals and get your project on the right footing from the start. If you’ve already faced struggles with uneven floors, drop a comment below or check out [Floor Leveling Challenges and Mistakes to Avoid](https://tiletrendshop.com/floor-leveling-challenges-common-mistakes-and-how-to-avoid-them) for more insights.
Assessing the Subfloor: The Foundation of Success
Begin by thoroughly inspecting your plywood subfloor for high and low spots. Use a long, straightedge or a leveling tool across the entire surface, checking for dips or bumps. When I did this in my basement, I noticed a significant hump near the doorway that caused tiles to crack prematurely. Mark these irregularities with a pencil for clear reference. This initial step is crucial to prevent future issues, so take your time. Remember, a stable base is like a solid foundation for a house—without it, the entire structure is at risk.
Preparing for Correction
Once identified, clean the entire area meticulously to remove dust and debris. Moisture content in the subfloor should be within acceptable limits to avoid future warping. If moisture is high, address that first with appropriate drying methods, as outlined in this guide. Tighten any loose screws or nails; loose fastening can mimic unevenness and compromise leveling efforts. Think of this step as preparing a canvas—you want a clean, flat surface before painting.
Choosing the Right Leveling Material
Select a high-quality self-leveling compound suitable for plywood subfloors. I prefer using a polymer-modified underlayment because it offers flexibility and adhesion. Before mixing, read the manufacturer’s instructions carefully; over-watering can weaken the mixture, leading to cracks like I experienced when I rushed. When mixing, avoid introducing air bubbles—use a clean, wide-mouthed bucket and mix slowly with a drill and paddle. Proper mixing ensures a smooth, bubble-free pour, which is essential for a flat finish.
Applying the Leveling Compound
Pour the mixture starting at the lowest point identified during assessment. Use a trowel or a gauge rake to spread the compound evenly, working from the highest to the lowest spots—to avoid trapping excess material where it’s unnecessary. For stubborn low spots, apply additional layers once the first has cured. I once underestimated the depth of a depression near a doorway, leading to uneven tile alignment; adding multiple thin layers fixed the problem over time. Work swiftly but carefully—self-leveling compounds set within 15-20 minutes, so plan your pours accordingly.
Ensuring a Flat Surface Before Tile Installation
After the compound has cured completely (typically 24 hours), verify flatness again. Use a long straightedge or a laser level to detect any remaining inconsistencies. In my last project, I found a subtle bump near the Kitchen entrance, which I ground down with a sanding block. For best results, the surface should be within 1/8 inch over 10 feet. If you notice irregularities, apply a second layer or spot-sand high spots. This meticulous step is the difference between professional-looking results and a tile job that will fail prematurely.
Sealing and Preparing for Tile
Once the surface is perfectly flat and smooth, clean off any dust or residual material. Apply a primer compatible with your tile adhesive to promote bonding. Skipping this step can cause tiles to loosen over time, especially on plywood. Now, you’re ready for the thinset layer, and your foundation is solid, boosting the lifespan and appearance of your tiled floor. For advanced techniques, consider innovative design tips that complement your perfectly leveled surface, creating a stunning final look.Many homeowners and even some installers fall prey to misconceptions about flooring installation, especially concerning hardwood floors, tile, and floor leveling. Let’s dig deeper into these pitfalls to help you avoid costly mistakes. One widespread myth is that leveling a subfloor is a simple, quick process, but in reality, cracks and uneven surfaces can be sneaky, leading to future damage if not addressed thoroughly. For example, some believe that a light skim coat of leveling compound suffices, but inadequate surface preparation or choosing the wrong product can cause cracking or delamination over time. Advanced mistakes include neglecting to account for moisture variations, which in high-humidity environments can cause flooring to buckle or warp prematurely. Experts recommend assessing moisture content before proceeding—something many overlook. Furthermore, a common trap involves over-relying on self-leveling compounds, assuming they can compensate for significant subfloor imperfections. That’s a misconception; large dips require more aggressive correction, such as grinding or replacement, to achieve a truly flat surface. From a professional point of view, understanding the limitations of leveling materials is crucial. For instance, the study published by the Building Science Corporation emphasizes that surface irregularities over 1/8 inch per ten feet are likely to cause tile cracking and should be corrected with proper techniques. Make sure you’re following industry best practices, not just the popular shortcuts. Don’t forget the importance of verifying your work with a laser level or long straightedge multiple times during the process. Many amateurs skip this step, resulting in hidden imperfections that only reveal themselves after tile or hardwood installation, leading to rework and expense. Have you ever fallen into this trap? Let me know in the comments. For a detailed breakdown on mastering floor leveling with expert tips, check out [Mastering Floor Leveling Pro Secrets for Perfect Installations](https://tiletrendshop.com/mastering-floor-leveling-pro-secrets-for-perfect-installations). Remember, patience and precision are your best allies in achieving professional results that last.Maintaining your flooring investment is essential to ensure durability and beauty over time. Having the right tools on hand simplifies upkeep, allows for timely repairs, and helps you achieve professional results—even as a DIYer. One of my favorite tools is the **orbital floor sander**, which I use periodically to smooth out minor surface imperfections on hardwood surfaces before refinishing. Its adjustable speed and dust collection system make the process manageable and cleaner, saving me time and effort. For cleaning and detailing, I swear by a **microfiber mop** paired with a pH-neutral cleaner designed specifically for hardwood and tile surfaces. This combo gently lifts dirt without damaging the finish, extending the pavement’s lifespan. Investing in a **laser level** is vital for ongoing tile maintenance or when correcting settling issues—precision ensures grout lines stay aligned and crack-free. As for adhesives and sealants, I only trust products backed by industry standards, like those certified by the Tile Council of North America, to prevent future delamination or discoloration.
The Hardest Lesson I Learned About flooring installation, floor leveling
One pivotal moment was when I realized rushing through subfloor correction nearly cost me my entire project. Patience in assessing every dip and bump ensured a long-lasting, beautiful finish.
3 Myths About flooring installation, floor leveling That Held Me Back
I used to believe that a quick skim coat was enough—until cracks appeared a year later. Now I know thorough prep and proper materials are non-negotiable for durable results.
What Experts Won’t Tell You About hardwood floors, tile, flooring installation, floor leveling
Moisture content can sabotage your flatness if overlooked. I learned the importance of using moisture meters and addressing high humidity environments before starting.
My Essential Toolkit for floor leveling and tile prep
A laser level and long straightedge are game-changers, helping me spot imperfections early. A high-quality self-leveling compound and a good mixing paddle are vital for consistent, smooth application.
Where to Go from Here
Once you’ve mastered leveling, explore innovative tile designs that enhance your space—check out these creative ideas to elevate your hardwood floors and tile combinations for a stunning update.
Your Turn to Try
Achieving a perfectly leveled floor isn’t just about tools—it’s about patience, precision, and learning from experiences. Are you ready to tackle your next flooring project with confidence? Share your thoughts or ask for tips below!