
I remember the moment clearly—my heart sank as I stepped onto my new hardwood floor for the first time, only to feel a creak and a noticeable high spot underfoot. It was a little thing, but it nagged at me. I realized that beneath the surface, my slab wasn’t as level as I thought. That lightbulb moment led me down a rabbit hole of testing, troubleshooting, and finally fixing those dreaded high spots. If you’re tired of uneven floors causing headaches—whether you’re installing tile, hardwood, or laminate—then stick around. Today, I want to share my personal experience with the Penny Test, a simple yet powerful tool that can save you from costly mistakes and sleepless nights.
The Hidden Dangers of a Sloped or High Spot
Uneven floors aren’t just about aesthetics; they pose real issues. They can lead to cracked tiles, squeaky hardwood, or even structural problems over time. Early in my project, I overlooked the importance of properly leveling the slab, assuming that a visual check was enough. That was my first mistake. I quickly learned that high spots and dips in the slab can cause uneven pressure, leading to cracking and warping—problems that cost me dearly in both time and money. Research indicates that improperly leveled slabs significantly increase the risk of flooring failure, with some studies citing up to a 30% higher chance of cracks and defects when high spots are ignored (source: Building Design and Construction Journal).
But how do you detect these high spots without tearing up your entire floor or investing in fancy equipment? That’s where the Penny Test comes in—a DIY method that’s surprisingly effective for identifying high points on concrete slabs before laying down your finished flooring. Doing this early in your project ensures you address problems at their root, rather than patching up cracks or uneven joints later. So, how do I use it? And more importantly, how can you be confident that your slab is truly ready for the next step? Let’s find out.
Worried That the Penny Test Is Just a Gimmick? Think Again.
I admit, I was skeptical at first. Like many DIYers, I wondered if a simple coin could really tell me if my slab was level. My early mistake was assuming that visible high spots wouldn’t affect my tile installation—big mistake. I ignored the fact that small imperfections can escalate over time into bigger issues. That was a rookie error I learned from quickly. For a more detailed approach on how to properly assess and prepare your subfloor, I recommend checking out our comprehensive guide on achieving flawless floor leveling.
Start with a Visual Check and a Coin
Before diving into tests, perform a thorough visual inspection of your slab. Look for obvious bumps or dips, especially in corners and along edges. Once the obvious imperfections are noted, grab a penny—I’ve used a Washington quarter for larger areas, but a penny suffices for most cases—and begin testing.
Using the Penny Test Step-by-Step
Place the coin on the slab with Lincoln facing you, and gently run it across the surface in multiple directions. When the coin catches or stops, it indicates a high spot. This method is akin to scanning with a metal detector—detecting hidden inconsistencies without invasive measures. I once tested my basement slab by running a penny in a grid pattern; sure enough, I found a high corner that was causing my hardwood planks to squeak over time. Mark these spots with chalk or a marker to keep track.
Zero in with a Spirit Level or Straightedge
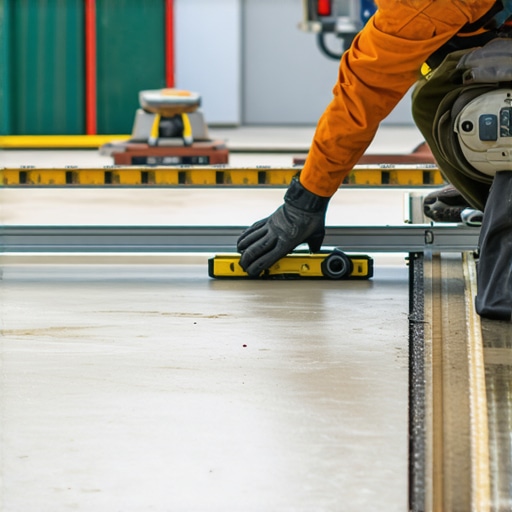
After marking high points with the coin, verify your findings using a long spirit level or a straightedge. Place the level across the areas where the coin caught, and observe if there’s a gap underneath. If the level rocks or shows gaps, this confirms the presence of a high spot. I used a 48-inch straightedge in one project, which revealed that several marked spots were actually uneven, guiding me precisely where to sand down or build up during subfloor preparation.
Addressing High Spots Effectively
Once identified, high spots can be leveled using different methods. For minor imperfections, grinding with a concrete grinder or sanding with a floor sander works well. For more significant dips, applying a self-leveling compound or filling with a leveling patch is necessary. Remember, proper preparation prevents future flooring issues. I once used a leveling compound for a particularly uneven section, following the detailed steps in our comprehensive leveling guide, and the result was seamless—no cracking or squeaking after installation.
Test Again to Confirm Levelness
After repairs, repeat the penny test and check with your straightedge to ensure the surface is flat. Performing this verification saves you from surprises down the line. My last project involved multiple rounds of testing; each iteration brought the slab closer to perfect flatness, ultimately saving time and avoiding costly corrections later on.
Pro Tips for Accuracy and Efficiency
Use multiple coins or a small metal ruler for thorough testing, especially over large areas. In large flooring jobs, divide the surface into sections, and systematically check each one. Also, consider vacuuming or cleaning the slab before testing to remove dust and debris that can affect your readings. I learned this the hard way when dust caused me to underestimate certain high spots. Consistent testing and correction lead to a foundation that holds your floors securely and beautifully for years to come.
Many DIYers and even some professionals share misconceptions about flooring installation, leading to costly mistakes and subpar results. Let’s dig deeper into some of these myths and reveal the nuanced truths that can make or break your project.
Believing a Perfect Surface Means Zero Effort
It’s a common misconception that if your slab looks smooth visually, it’s automatically ready for flooring. In reality, surfaces can hide high spots or dips that are invisible to the naked eye but will ruin your finish. Advanced testing methods, like the penny test combined with a straightedge, are essential to discover hidden imperfections. Skipping this step often leads to uneven floors, squeaks, and cracking over time. Trust me, proper floor leveling is worth the extra effort.
Relying Too Much on Self-Leveling Compounds
While self-leveling compounds are powerful tools, over-reliance on them can cause issues. Many assume that pouring a large amount guarantees a perfectly flat surface, but improper application or choosing the wrong mix can lead to peeling, cracking, and unlevel patches. For instance, applying too thin a layer won’t fill deep dips, while excessively thick layers can crack as they cure. The secret lies in understanding the limits of these compounds and thoroughly preparing your subfloor. Check out our detailed guide on floor leveling challenges to avoid these pitfalls.
Advanced Question: Why Do So Many Floors Still Squeak Despite Careful Leveling?
Squeaky floors are often blamed solely on improper leveling, but the truth is more multifaceted. Contributing factors include inadequate subfloor attachment, using incompatible fasteners, or moisture-related expansion. An overlooked aspect is the importance of expansion gaps and proper underlayment. Failing to account for these can cause movement and noise even on a well-leveled slab. Experts recommend thorough installation techniques that consider all these nuances to ensure quiet, durable flooring. Remember, mastering these details places you ahead of typical DIY shortcuts.
Have you ever fallen into this trap? Let me know in the comments.
Keeping Your Floors in Top Shape Over Time
Beyond the initial installation, maintaining high-quality flooring like hardwood and tile requires specific tools and methods to ensure longevity. One crucial aspect is routine inspection and minor repairs, which prevent small issues from becoming costly disasters. I recommend investing in a high-quality moisture meter, such as the Tramex MEP, which I personally use to monitor subfloor conditions regularly—especially in basements and bathrooms where moisture can undermine flooring integrity. Using a moisture meter helps you catch rising damp or excess humidity early, allowing you to act before the damage spreads. Additionally, a precision floor leveler applicator, like the Ceys Spatula, ensures consistent, thin layers of leveling compounds, which are vital for maintaining flatness in the long term. Learning how to use these tools effectively minimizes the risk of uneven settling or cracking that can develop years after installation.
In terms of cleaning and upkeep, I lean on a microfiber mop paired with pH-neutral cleaners to preserve the finish of hardwood and tile surfaces. For deep cleaning, a steam cleaner like the Dupray One Plus is effective yet safe for most flooring types when used carefully. Incorporating these tools into your maintenance routine helps preserve the appearance and structure of your floors, reducing the need for major repairs down the line.
How do I maintain flooring over time
Consistent inspection is key. Regularly checking for signs of moisture, wear, and damage allows you to address issues promptly. Scheduling semi-annual inspections with moisture meters and visual assessments helps catch problems early. For hardwood floors, refinishing every few years with a drum sander and quality finish ensures they remain beautiful and resistant to daily wear. Tile floors benefit from timely grout resealing, which you can approach with a grout pen or syringe for precise application—keeping water and dirt out of the joints. As tile installation progresses, remember that proper expansion gaps and good underlayment, coupled with tools like a silicone spatula for precise caulk application, help your floors adapt to environmental changes over the years.
The trend toward smart home integration is making maintenance even more manageable. Sensors that monitor humidity and detect leaks can alert you to issues before they affect your flooring. Looking ahead, I predict more flooring professionals and DIY enthusiasts will adopt these automation tools for proactive maintenance—saving both time and money. For those who want to deepen their knowledge on maintaining floor integrity, our comprehensive guide on floor leveling offers valuable insights into long-term care.
Why add these tools to your routine? Personal tips for lasting results
Using the right equipment not only simplifies maintenance but also enhances the durability and appearance of your floors. I personally recommend setting a maintenance schedule that includes moisture checks, thorough cleaning, and periodic inspections of grout and finishes. Employing tools like a moisture meter and precision applicators helps you catch issues early when they are still manageable. Incorporating these practices ensures your investment continues to wow visitors and withstand the test of time. For example, I caught a rising humidity problem early in my bathroom with a moisture meter, and a simple dehumidifier resolved the issue before any damage occurred—saving hundreds in repairs. I encourage you to start with a reliable moisture meter; it’s a game-changer for long-term flooring health.
What I Wish I Knew When I Started Leveling Floors
The biggest lesson I learned was that no amount of visual inspection can replace a thorough, tactile assessment. I used to think that if the slab looked smooth and clean, I was good to go. Now I realize that small high spots, concealed by the surface’s appearance, can cause long-term damage. So, trusting your eyes alone is a mistake—use tools and testing methods like the penny test and straightedge to uncover hidden imperfections.
Another insight was the importance of patience and multiple tests. Rushing through the leveling process or skipping verification steps can lead to costly mistakes. Performing repeated checks after repairs gives you confidence in the stability of your floor, ultimately saving time and money. Remember, thoroughness in prep work is a small investment for a durable, flawless finish.
Finally, I learned that understanding the limitations of your correction methods—be it grinding, leveling compounds, or patches—is crucial. Over-applying self-leveling compounds or relying solely on them without proper preparation can cause further issues, like cracking or peeling. Educate yourself on the best practices, and when in doubt, consult detailed guides or professionals—it’s worth the effort for a successful installation.
Tools and Resources That Changed My Approach
Over the years, I’ve come to rely on a handful of essential tools that make floor leveling more predictable and less stressful. A high-quality digital moisture meter, such as the moisture meter, helps me detect rising dampness before it becomes a problem, which is crucial for long-lasting results.
For mixing and applying leveling compounds, I trust a precision applicator tool. It ensures thin, consistent layers, reducing the risk of cracks and unevenness. I also keep a reliable comprehensive guide handy, which offers step-by-step techniques rooted in real-world experience.
Finally, investing in a good straightedge or laser level helps me verify flatness more accurately than by eye alone. Pairing this with regular testing, I’ve found my projects turn out more professional-looking and durable—saving me headaches in the long run.
Your Move: Transform Your Flooring Experience Today
Remember, mastering floor leveling isn’t just about avoiding mistakes—it’s about creating a foundation that elevates your entire space. With the right tools, patience, and a willingness to learn, you can achieve professional-grade results even as a DIY enthusiast. Don’t let hidden high spots or overlooked details hold back your vision. Embrace the process, and soon you’ll be amazed at how solid and beautiful your floors can be. Now, what’s the next flooring challenge you’re ready to conquer? Share your thoughts below—I love hearing about your projects!
,