
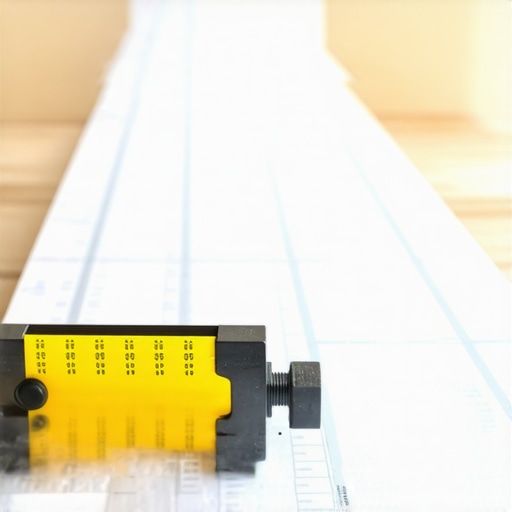
I still remember the first time I installed a wide plank hardwood floor in a long, narrow hallway—and ended up with a noticeable crooked line that looked more like a squiggle than a straight run. It was a frustrating moment, especially since I thought I had everything perfectly measured. That “lightbulb” realization hit me: I needed a secret weapon to keep long hallway runs perfectly straight. And after countless trials, errors, and some serious research, I discovered that the T-Square method was a game-changer.
Why Straight Lines Matter More Than You Think
Having a straight, crisp line in a long hallway isn’t just about aesthetics. It affects the overall feel of your space, the ease of future tile or flooring work, and even the value of your home. When a hallway looks crooked or uneven, it can subconsciously make the entire room appear poorly finished or rushed. That’s why mastering a simple but effective technique to achieve that perfect straight line is worth every bit of effort.
Is the T-Square Technique Worth the Hype?
At first, I was skeptical. I had made my share of mistakes—especially early on, when I didn’t realize how crucial precise measurements and guides are. My biggest slip was relying solely on eyeballing the layout, which always led to uneven results. It wasn’t until I learned about the blueprint-like precision of the T-Square that I truly appreciated its value. Trust me; this simple tool can save you hours of frustration and countless alignment headaches.
Today, I’ll walk you through how this secret weapon can transform your flooring project in the most practical way possible. From measuring to final alignment, I’ll help you avoid the rookie mistakes that can throw off your line, and show you step-by-step how to get that perfect, straight run you’re after.
Secure Accurate Measurements Before Starting
Start by measuring the entire hallway twice, using a reliable tape measure. I once attempted to cut corners by measuring only once, which resulted in a crooked line. To avoid this, mark the starting point clearly, then extend your measurement along the hallway, marking every few feet with a pencil. Double-check your measurements to ensure consistency. Remember, precision at this stage is your foundation for a straight line.
Set Up Your T-Square and Chalk Line
Create a Straight Reference Line
Lay your chalk line along the measured markings, ensuring it’s taut and aligned with your measurements. Snap the chalk line to establish a visual guide. When I did this for my project, I made sure to pull the chalk string tight, eliminating slack that could cause waviness. This line acts as the backbone of your installation, guiding every plank or tile placement.
Positioning the T-Square Correctly
Place the T-Square perpendicular to your chalk line, aligning it so that its long arm runs parallel to the chalked mark. Secure the T-Square with clamps or weights if necessary. I once overlooked this and found my line drifting off after a few tiles—an easy mistake to make without proper stabilization. Proper placement ensures your edge remains perfectly straight throughout the work.
Run the Guideline Along the T-Square
With the T-Square in position, draw a thin pencil line along its edge, which will serve as your cutting and installation guide. I recommend using a fine-tip pencil for clarity. This line should be visible yet easy to erase later. It becomes your constant reference point, preventing drift caused by visual fatigue or small shifts in your placement.
Triple-Check Your Line Before Laying Flooring
Measure the distance from the chalk line to the T-Square at multiple points along the hall. If discrepancies appear, readjust the T-Square or chalk line until consistent. I learned this the hard way when my first attempt was slightly off, leading to uneven planks. Making this extra check saves time in the end and ensures a flawless finish.
Maintaining Your Guidance Through the Project
As you proceed, periodically remeasure and visually inspect your line. If your floor has prominent grain or patterns, take extra care to keep your line aligned with the existing features. During my last renovation, I kept an extra T-Square handy to verify alignment after every few rows, which prevented cumulative errors that could have been costly to fix.
Addressing Common Challenges
Handling Curves or Non-Linear Spaces
While the T-Square technique excels in straight, narrow hallways, curves require a different approach, like flexible guides or spline curves. I once tried to adapt the T-Square for a curved wall, but it was too rigid, leading to inaccuracies. Recognize when your project calls for custom solutions instead of a standard straight-line method.
Adapting to Different Floor Types
Solid hardwood, engineered wood, or tile all demand slightly different techniques for line-keeping. For tile, a chalk line and T-Square combo works well, but for thicker hardwood planks, consider marking reference points before finalizing your line. Transitioning between materials may require different tools or additional guides, but the core principle remains the same: establish and follow a reliable straight line.
Leverage Online Resources for Additional Precision
For an in-depth understanding, consider referencing detailed guides like flooring installation mistakes to avoid or explore visual tutorials that demonstrate the T-Square setup in real-time. These resources can clarify subtle nuances, helping you master the technique with confidence.
Remember, patience and precision are your best allies in achieving flawless flooring lines. The initial effort invested in setup pays dividends when you stand back and enjoy the perfectly straight, professional-looking floor.
Many homeowners believe that choosing a specific type of hardwood floor or simply following basic installation steps guarantees a flawless result. However, this oversimplification often leads to overlooked nuances that can compromise your flooring’s longevity and aesthetic appeal. One pervasive myth is that all hardwoods expand and contract uniformly with humidity changes, but in reality, species like maple and oak respond quite differently, requiring tailored acclimation and installation methods. Failing to account for these differences can cause warping or gaps over time, which is why consulting expert guides like the ultimate guide to hardwood mistakes can save you headaches.
A trap many fall into involves rushing the subfloor preparation, assuming that a quick fix will suffice. But an uneven or improperly leveled subfloor is the root of most installation problems, including lippage in tile or creaking in hardwood. Advanced installers emphasize the importance of meticulous leveling techniques, such as using self-leveling compounds correctly, which is often misunderstood. For instance, applying too much or too little can lead to lumpy surfaces or residual high spots, affecting the final flooring’s flatness. Experts suggest referencing pro secrets for perfect leveling to avoid these pitfalls.
### Can You Install Hardwood Over Existing Flooring Without Full Preparation?
This question often comes up in renovation circles. Many think that laying hardwood over existing flooring or a simple underlayment will work seamlessly, but this approach risks hidden problems like moisture trapped beneath or incompatible materials that cause immediate issues. It’s critical to remove old adhesives, thoroughly clean the surface, and check for moisture levels—something that’s often overlooked. For a comprehensive view, check out techniques for flawless surface prep.
Misunderstandings about acclimation are another common mistake. Many assume that storing hardwood in the garage before installation suffices, but optimal humidity and temperature conditions can vary based on your climate zone. Allowing the wood to acclimate for at least one week in the space where it will be installed can prevent warping or gaps later. According to industry experts, neglecting this step is akin to ignoring the importance of proper curing in concrete work—an error that can cost dearly in the long run.
Finally, advanced DIYers sometimes underestimate the complexity of achieving perfectly straight runs or proper transitions between different flooring types. The subtle nuances—like ensuring expansion gaps or properly aligning transition strips—make a significant difference. For those looking to elevate their craftsmanship, exploring step-by-step strategies for installation can be invaluable.
Have you ever fallen into this trap? Let me know in the comments.
Keep Your Floors in Prime Condition with the Right Tools and Maintenance Practices
Achieving a flawless flooring installation is only part of the journey; maintaining that pristine look over time requires specific tools and a disciplined approach. I personally rely on a few key pieces of equipment and techniques that ensure my floors remain durable, beautiful, and easy to clean for years to come.
Invest in a Quality Floor Buffer for Routine Care
One tool I swear by is a high-quality orbital floor buffer. It’s invaluable for periodic polishing and removing surface scratches on hardwood. Unlike generic machines, I prefer models with variable speed settings and adjustable pads, which allow me to concentrate on high-traffic areas or delicate finishes without risking damage. Regular buffing not only restores shine but also prevents the buildup of dirt that can scratch the surface over time.
Use a Moisture Meter to Prevent Long-Term Damage
Monitoring humidity levels with a reliable moisture meter is crucial, especially in climates with fluctuating weather. My personal preference is a digital pin-type meter with quick readings and calibration features. Consistently checking moisture levels helps me prevent issues like cupping or warping in hardwood and tiles, which can be costly and disruptive. For tiles, especially those with grout joints, controlling moisture ingress is vital to avoid efflorescence or mold growth.
Adopt a Dedicated Maintenance Schedule
Developing a regular cleaning routine is essential. I recommend using pH-neutral cleaners designed for hardwood and tiles to avoid stripping finishes or grout sealants. A microfiber mop, combined with a soft brush attachment, makes quick work of sweeping and light scrubbing, keeping dirt away from joints and grain patterns. For deeper cleaning, I utilize steam cleaners cautiously, ensuring they’re suitable for your specific flooring material—consult manufacturer guidelines or hardwood floor care secrets.
Tip for Extending Floor Lifespan
Long-term durability comes down to protecting your floors from damage. Using felt pads under furniture legs prevents scratches, and installing doormats at entry points reduces tracked-in grit. Additionally, scheduling professional inspections every few years ensures early detection of issues like loose grout or uneven subflooring, which can compromise long-term integrity. When repairs or re-finishing are needed, trusted installers equipped with specialized tools, like a pneumatic sander or a tile removal gun, make the process efficient and less invasive.
Handling Floor Leveling and Repairs Over Time
Floor imperfections can develop slowly, but addressing them promptly is key. For minor dips or uneven grout lines, I recommend using a self-leveling compound. Applying this correctly requires a quality trowel and understanding the curing process—pressure and depth influence the final outcome. For larger adjustments, consulting with a professional equipped with laser leveling tools ensures precision, saving you from costly corrections later.
The Future of Flooring Maintenance
Looking ahead, I predict that smart sensors embedded in flooring could revolutionize maintenance, alerting homeowners to moisture breaches or structural shifts before visible damage occurs. Integration with home automation systems is already on the horizon, making proactive care more accessible than ever.
If you haven’t tried modern moisture meters or invested in a good orbital buffer yet, I highly recommend doing so. These tools empower you to extend your flooring’s life and keep it looking impeccable. For comprehensive guidance, check out flooring installation secrets and start incorporating these practices today.
Remember, regular maintenance with the right tools isn’t just about appearances—it’s about preserving value and enjoying comfort in your home for years to come.
Gems Hoarded in My Flooring Journey
- One of the hardest lessons was realizing that no matter how meticulously you measure, there’s always a margin for error—so double-check and trust your tools.
- Precise subfloor prep is the silent hero; rushing this step often leads to long-term headaches like warping or squeaks that spoil the entire look.
- Myth-busting: hardwood doesn’t respond uniformly to humidity. Understanding species differences in expansion can save your installation from future gaps or buckling.
- Patience beats hurry — waiting for proper acclimation was a game-changer and prevented many avoidable problems down the line.
- Investing in quality tools, like a reliable moisture meter and a good T-Square, made the difference between a professional finish and a compromise.
Tools That Transformed My Approach to Flooring
From a trusty moisture meter to advanced leveling compounds, I relied on specific tools that made a tangible difference. For perfect leveling techniques, a laser level became indispensable. My secret weapon for prepping subfloors was a high-quality self-leveling compound, which I trust for its consistency and ease of use. For understanding the nuances of flooring installation secrets, I turned to detailed guides that demystify complex steps into doable actions. These tools and insights significantly improved my results and confidence.
Fuel Your Flooring Passion Today
Embarking on your own hardwood or tile project is a rewarding challenge—one that demands patience, precision, and a willingness to learn. Remember, every skilled craftsman started somewhere, and mistakes are just stepping stones toward mastery. Dive into expert resources, trust your intuition, and don’t shy away from experimenting with new techniques. Your dream space is within reach, and with each step, you’re building not just a beautiful floor but also your experience and confidence. So go ahead—start that project today, and turn your home into a masterpiece of craftsmanship and love.