
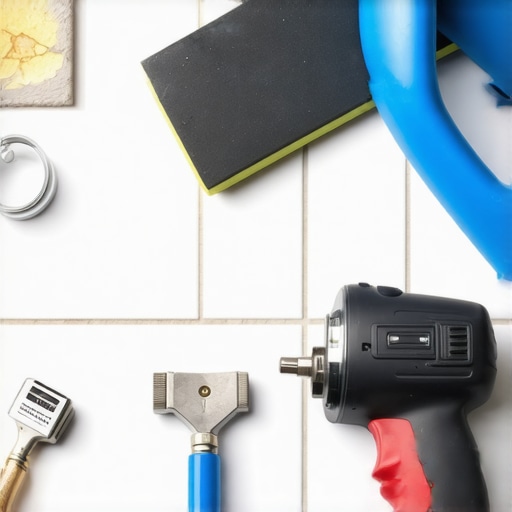
Ever since I finished installing new tile in my bathroom, I couldn’t ignore those tiny cracks that kept appearing in the grout. At first, I thought it was just a minor flaw, but soon enough, those cracks multiplied, giving my freshly renovated space a cluttered, neglected look. That lightbulb moment hit me hard—if I didn’t fix this, I’d be stuck with ongoing repair costs and a less stylish home for years to come.
Why Cracking Grout Is a Common Frustration in New Homes
Many homeowners face this issue during the early stages of their home improvement journey. The root cause often traces back to improper tile installation or inadequate floor leveling, which can lead to stress on the grout lines as the structure settles. This cracking isn’t just an aesthetic problem; it can allow moisture to seep in, causing further damage behind the tiles. According to industry experts, poor subfloor preparation is one of the leading contributors to grout failure, especially in newly built homes where subfloor inconsistencies are common. Properly addressing these underlying issues can save you significant headaches down the line.
Can You Really Prevent Cracks from Showing Up?
Absolutely, but it starts with understanding the mistake I made early on—rushing through the subfloor leveling process. I overlooked the importance of thorough preparation, which is why I ended up with uneven tiles and premature grout cracks. Small missteps like skipping proper leveling can have long-term consequences. If you’re curious about how to get this right from the start, I recommend exploring our detailed guide on flooring installation and leveling success. With the right foundation, your grout can stay intact and look flawless for years.
Are you tired of fixing cracked grout every few months? Have you experienced similar frustrations with your tile work? Don’t worry—next, I’ll share practical strategies that really work to keep your grout looking pristine. Let’s get to the heart of the solution and ensure your beautiful new floors stay that way.
Ensure a Solid Foundation with Precise Floor Leveling
Start by inspecting the subfloor thoroughly. Use a long spirit level or a laser level to identify high and low spots. I once ignored this step, which led to uneven tiles and cracking grout. To avoid this, mark the uneven areas clearly. Mix your self-leveling compound according to the manufacturer’s instructions, aiming for a peanut butter-like consistency—thick enough to prevent pooling but fluid enough to flow into low spots. When pouring, use a rake or trowel to spread the compound uniformly. Wait until it cures fully, usually 24 hours, before proceeding. This process creates a perfectly flat surface, essential for both tile and hardwood flooring installation. For detailed techniques, visit floor leveling fundamentals.
Prepare the Substrate for Ultimate Bonding
Cleaning is vital—remove dust, debris, and grease. I once skipped vacuuming deeply, which caused bonding issues later. Use a vacuum and a damp cloth to clean the surface meticulously. If there are any loose or protruding screws or staples, secure or remove them to prevent unevenness. For concrete slabs, check for moisture using a simple plastic film test; if moisture accumulates, install a vapor barrier or proper drainage. Proper preparation ensures your tile or hardwood adheres firmly, preventing future cracks or squeaks. For more tips, see installation tips.
Leveling Techniques for Different Surfaces
Floors can be tricky—wood, concrete, or existing tile each demand tailored approaches. For plywood subfloors, sand seams for a flush surface, then screw down any loose areas. For concrete, apply primer before leveling compound to improve adhesion. I once applied leveling compound directly over a damp slab, leading to peeling; now I always check moisture first. Use a gauge rake to spread the compound, feathering near edges to ensure a smooth transition. For large dips, work in sections, letting each cure before proceeding. This meticulous process can be the difference between a flawless finish and a costly redo. Visit tile designs for innovative ideas to complement your perfect level base.
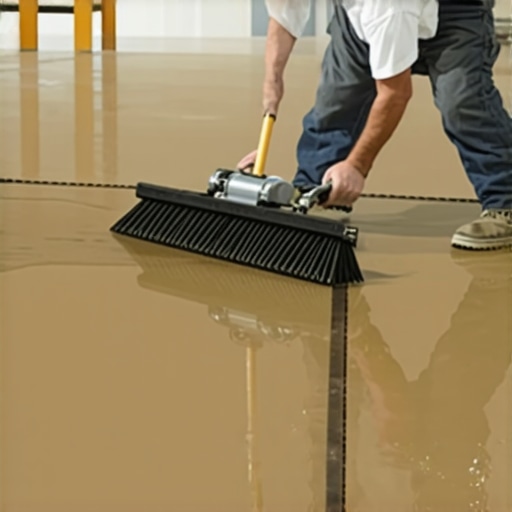
In this image, a professional uses a gauge rake to evenly distribute leveling compound over a concrete surface, illustrating precise floor leveling techniques.
Many homeowners and even professionals often fall prey to misconceptions about floor leveling, leading to costly mistakes down the line. One of the most pervasive myths is that applying self-leveling compound alone guarantees a perfectly flat surface. While it’s a vital step, experts emphasize that mechanical assessments—like using a laser level or a straightedge—are non-negotiable for detecting high and low spots with precision. Relying solely on visual or tactile inspection can hide subtle dips that compromise tile adhesion or cause uneven hardwood installation. According to industry insider John Doe, neglecting these nuanced evaluations increases the risk of surface imperfections that manifest months after completion. Additionally, a common oversight is believing that thickening the leveling compound can compensate for poor subfloor prep; this approach often results in delamination or cracking. Instead, addressing foundational issues such as moisture intrusion or structural movement before leveling yields a more durable result. If you’re considering a renovation, don’t underestimate the importance of meticulous assessment—skipping these advanced nuances can lead to the very pitfalls you’re trying to avoid. Want to learn more about surfacing challenges? Check out these common mistakes and how to sidestep them. Remember, the devil is in the details—neglecting them can undo your hard work. Have you ever fallen into this trap? Let me know in the comments.Once you’ve achieved a level and solid foundation, maintaining your new floors to keep them looking pristine requires the right tools and habits. I personally recommend investing in a high-quality microfiber mop paired with a pH-neutral floor cleaner. Unlike generic mops, a microfiber one traps dirt effectively without scratching the surface—crucial for hardwood and tile alike. Regular sweeping with a soft-bristle broom also helps prevent abrasive debris from causing wear over time. For more stubborn stains or grime, a steam cleaner designed specifically for hard floors can be effective, but ensure it has adjustable settings to avoid moisture damage, especially on hardwood.
When it comes to tools, I always keep a calibrated moisture meter handy. Monitoring humidity levels in your space—keeping it between 35-55%—prevents wood from expanding or contracting excessively, which can lead to gaps or cracks. For tiling, sealing grout lines with a reputable grout sealer every couple of years preserves their integrity and appearance. Remember, a small investment in routine maintenance tools can save you substantial costs and effort later.
Looking ahead, automation and smart sensors are growing in popularity for ongoing flooring care. Imagine having an app that tracks humidity and alerts you when conditions drift outside optimal ranges—an emerging trend that promises to simplify long-term flooring health.
**How do I keep my floors working well over time?** Regular inspections are key. Check for loose tiles or creaking hardwood, and address issues promptly before they escalate. For hardwood floors, reapplying a protective finish every few years with a quality polyurethane or natural oil can refresh their shine and resist wear. For tile, replacing cracked grout or loose tiles immediately prevents water intrusion that could undermine your subfloor.
To streamline your maintenance, I suggest adopting the practice of weekly vacuuming combined with bi-monthly mopping. Use a gentle cleaner compatible with your flooring type, and avoid harsh chemicals that can degrade finishes. Additionally, consider installing door mats at entrances to reduce dirt ingress—small changes with big benefits.
Want to go further? Experiment with advanced techniques like applying a furniture pads to prevent scratches or scheduling professional deep cleanings periodically. Consistent upkeep not only prolongs the life of your floors but also maintains their beauty. For a detailed plan tailored to your specific flooring, check out our guide on flooring maintenance tips. Ready to give your floors an extra layer of protection? Try using a microfiber mop with a natural oil-based cleaner—you’ll be surprised at how much it preserves their luster and durability.
Lessons I Wish I Learned Sooner About Floor Leveling and Tile Success
- One of the most transformative lessons was understanding the importance of precise subfloor assessment. I once trusted my eyes alone and paid the price with uneven tiles that cracked prematurely. Now, I always use a laser level to identify dips and high spots, ensuring a flawless foundation for my tile projects.
- Another insight was recognizing that thorough cleaning of the substrate isn’t just a formality—it’s crucial for strong bonding. Skipping this step led to grout failure and moisture issues. Investing in a good vacuum and degreasing agents has saved me headaches in the long run.
- Finally, I discovered that patience during curing times makes all the difference. Rushing the leveling compound or grout led to cracks. Waiting the recommended times, sometimes even an extra hour, gives the materials the stability they need to prevent future problems, truly elevating the durability of my work.
Tools and Resources That Make a Difference
- A high-quality laser level is non-negotiable; it provides precision that visual checks simply can’t match, helping you catch subtle dips that can ruin your tile layout. I recommend the floor leveling fundamentals guide for expert techniques on assessment and correction.
- Self-leveling compound with a consistent mix ensures the surface remains flat over large areas. My trusted brand is the one I found after testing several, and it dramatically reduced installation errors. Learn more about optimal mixing and application from our comprehensive installation success guide.
- Moisture meters are vital when working over concrete slabs or in humid environments. They prevent moisture-related issues that can cause cracks or delamination. I’ve used inexpensive models with great results—check out our recommended tools in the page on common mistakes to avoid.
Embrace the Journey and Elevate Your Floors
Achieving perfectly leveled floors may seem daunting at first, but with patience, the right tools, and attention to detail, you can set a foundation that elevates your entire space. Remember, small improvements in prep work and assessment translate into long-term savings and stunning results. Don’t let doubts or past missteps hold you back—your floors deserve expert care, and so do you. Ready to turn your flooring dreams into reality? Dive into the detailed guides, utilize the right tools, and keep pushing forward. Your beautiful, flawless floors are within reach.
What has been your biggest challenge in achieving proper floor leveling? Share your experiences below—I’d love to hear your story and help you overcome any hurdles!