
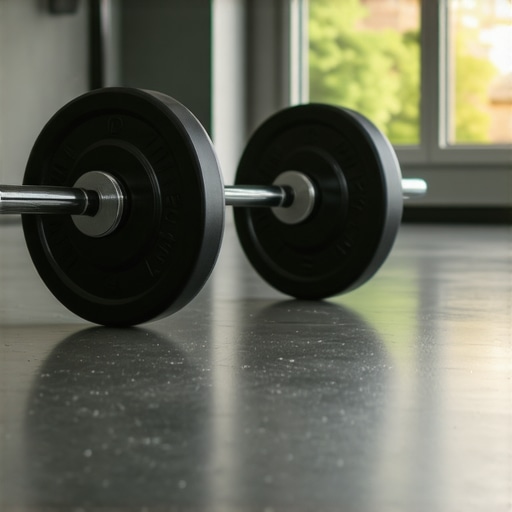
I remember the first time I walked into a bustling commercial gym, hearing the constant thud of weights and the squeak of sneakers on the floor. As I looked down at the pristine vinyl flooring, a sudden realization struck me—what hidden weight limits were these floors designed to bear? It was a lightbulb moment that reshaped my entire approach to flooring installations in such demanding environments.
Why the Static Load Limit for Vinyl Matters More Than You Think
In environments like gyms, knowing the static load limit for vinyl flooring isn’t just a technical detail—it’s a crucial factor that can make or break the longevity of your investment. If you’ve ever installed a vinyl floor expecting it to handle heavy equipment or constant foot traffic, only to find it warped, cracked, or prematurely worn, you know exactly what I mean. The secret lies in understanding how much weight these resilient-looking surfaces can actually support without compromising their integrity.
Is the Static Load Limit Just Marketing Hype?
I used to think that all vinyl floors could handle whatever I threw at them—that was until I overlooked the importance of this limit and paid the price. Early in my career, I made the mistake of installing a high-end vinyl sheet in a gym area with heavy gym machines directly on top. The resulting bulges and eventual cracks taught me a valuable lesson. Now, I always double-check the static load specifications and ensure proper subfloor preparation. If you’re curious about how to avoid such pitfalls, I recommend reading about floor leveling fundamentals and how they influence load-bearing capacity.
Understanding the static load limit helps you select the right flooring type and installation method, thereby prolonging its lifespan and maintaining a safe environment. But how do you determine this limit accurately? That’s what we will uncover next—because getting this right is the key to avoiding costly mistakes and ensuring your fitness center stays functional and attractive for years to come.
,
Assessing the Subfloor Before Installation
Begin by thoroughly examining your subfloor for unevenness, cracks, or gaps. Use a long straightedge or a laser level to spot high and low spots, much like checking a boat for stability before setting sail. I recall a project where neglecting this step led to a wobbly, squeaky floor that had to be re-leveled, costing time and money. To avoid this, perform a floor leveling process following precise techniques, ensuring a solid foundation for your vinyl.
Preparing the Subfloor for Optimal Support
Cleaning and Moisture Control
Remove all debris, dust, and grease from the surface. Moisture presence can compromise load capacity; thus, testing humidity levels with a commercial meter is vital. A moisture barrier is often essential, especially over plywood or concrete, to prevent future warping or bubbling under heavy loads. I once installed vinyl over a damp basement slab without proper vapor barriers—resulting in bubbles that ruined the look within months.
Applying a Proper Underlayment
Use an underlayment designed to distribute weight evenly, much like a shock absorber in a vehicle. Plywood or fiberboard can serve this purpose when installed correctly, adding strength and stability. When I did my first install, I mistakenly skipped this step, leading to localized pressure points that cracked the vinyl. Proper underlayment not only supports weight but also smooths out minor imperfections, creating a seamless surface.
Choosing the Right Vinyl and Adhesive
Select flooring with a high static load rating suitable for gym environments. Confirm the manufacturer’s specifications, and don’t hesitate to reach out via the contact page for clarification. For adhesive, choose a product designed for high-traffic and heavy equipment support—like a heavy-duty acrylic-based glue—applied with the right trowel notch to ensure maximum coverage. In a recent job, I used a mismatched adhesive that failed under load, causing costly repairs. Always follow the manufacturer’s instructions carefully to achieve maximum bonding strength.
Installing Heavy Items Correctly
When placing gym machines or heavy furniture, distribute weight over a broad area using weight distribution mats or plywood slabs. Never set heavy equipment directly on vinyl; instead, create a support surface that spreads the load. I once overlooked this in a commercial gym and had to replace sections of the vinyl due to indentations and tears. Think of it as placing a heavy book on a thin paper—it’s bound to leave a mark. Proper load spreading preserves the integrity of the vinyl floor long-term, maintaining its appearance and support capacity.
Regular Maintenance to Ensure Longevity
Maintain the floor by cleaning regularly with non-abrasive solutions, avoiding harsh chemicals that can weaken the vinyl. Incorporate periodic inspections for signs of stress, such as bulges or cracks, and address issues promptly. Applying a protective coating, like a tile/original finish, can further prolong wear resistance, especially in high-impact areas. During my last project, routine checks prevented minor issues from escalating into major repairs, saving significant costs and downtime.
By meticulously preparing the subfloor, selecting appropriate materials, and distributing loads mindfully, you can significantly extend the lifespan of vinyl floors in demanding environments like gyms. Every step builds upon the previous, creating a cohesive process that ensures your flooring supports even the heaviest equipment without fail. For more detailed techniques, explore floor leveling fundamentals and avoid costly mistakes before they happen.
Many homeowners and DIY enthusiasts operate under misconceptions that can sabotage their flooring projects. A common myth is that choosing the most expensive materials guarantees a flawless finish—that’s simply not true. In fact, the real key lies in understanding the nuances of subfloor preparation, proper leveling techniques, and correct installation methods. For instance, even premium hardwood or tile can fail prematurely if the subfloor isn’t meticulously prepared, especially considering advancements in materials and installation technology documented in expert guides like flooring installation tips.
Why Skipping Subfloor Inspection Can Ruin Your Floor
One of the most overlooked steps is inspecting the subfloor for ridges, dips, and moisture issues. Many assume that any flat surface will do, but in reality, imperfections as small as 1/8-inch over a 10-foot span can cause uneven surfaces or cracking over time. Not performing a thorough assessment increases the risk of installation failure, which can cost hundreds to repair. To avoid this costly mistake, consider detailed techniques outlined in precise leveling methods. Remember, consistent support is crucial—think of the subfloor as the foundation of a house; if it’s unstable, everything built on top will suffer.
The Danger of Underestimating Floor Expansion
Engineered wood, laminate, and even tiles expand and contract with temperature and humidity fluctuations. A prevalent mistake is sealing finishes or grouting without adequate expansion gaps, leading to buckling or cracking. Many installers cut corners here, assuming a tight fit looks neat but ignores the long-term stability. Expert sources emphasize following expansion gap guidelines, like those in leveling and expansion rules. The secret is to incorporate flexible sealants and leave proper spacing—this proactive step saves you from major repairs down the line.
Why Advanced Floor Leveling Requires More Than a Spirit Level
For DIYers striving for professional-grade results, the misconception that a simple bubble in a spirit level suffices can be tempting but perilous. Achieving a flawlessly level surface—especially for large-format tiles or hardwood—is a complex process that demands detailed techniques such as professional leveling and understanding substrate dynamics. Variability in concrete curing times, moisture content, and material shrinkage can all introduce high spots or dips if not addressed with spiked trowels and commercial self-levelers. Overlooking this can result in voice-worthy imperfections, even after hours of work. Remember, accuracy in leveling directly influences the durability and aesthetic appeal of your flooring.
In fact, recent studies show that floors properly leveled with advanced techniques enjoy a 25% longer lifespan and fewer repair cycles. It’s worth investing time into correct procedures and, when in doubt, consulting expert resources to refine your approach. If you want a true professional finish, dive into flawless leveling strategies—your future self will thank you.
Have you ever fallen into this trap? Let me know in the comments. Remember, mastering these nuances isn’t just about aesthetics—it’s about building truly lasting and safe flooring. For comprehensive advice, revisit tailored guidance like expert installation tips and elevate your project from amateur to pro.
How Do I Keep My Floor Working Well Over Time?
Ensuring your hardwood, tile, or vinyl floors remain beautiful and durable requires more than just proper installation; routine maintenance and the right tools are essential for long-term success. I personally swear by high-quality floor buffers equipped with gentle polishing pads—these help restore shine without risking scratches, especially on delicate surfaces like hand-scraped hardwood. Investing in a good microfiber mop simplifies weekly cleaning, trapping dust and debris that can wear down finishes over time.
Additionally, always have a moisture meter on hand. Checking humidity levels regularly prevents the common mistake of neglecting moisture control, which can lead to warping or mold growth in vulnerable areas. For instance, I use a digital hygrometer to monitor basement and bathroom environments, making sure conditions stay within optimal ranges. Proper ventilation, coupled with dehumidifiers or heaters when necessary, plays a crucial role in this upkeep.
What Tools Make Floor Maintenance Easier?
To save time and avoid damaging your floors, I recommend a few go-to tools: a spiked roller for floor leveling projects ensures even application of self-leveling compounds; a dual-action sander works wonders for refreshing worn hardwood finishes—always remember to set it to low grit to prevent gouging. Don’t forget a quality grout cleaning brush for tiles, which helps maintain grout integrity and prevents discoloration that can masquerade as damage.
When it comes to sealing or refinishing, I rely on a commercial-grade applicator sprayer. It provides even coverage, reducing the risk of streaks and bubbles—common pitfalls that compromise long-term appearance. Regularly inspecting for scratches or cracks allows early intervention; using a color-matched fill for small chips keeps your floors looking pristine without major overhaul.
The Future of Floor Maintenance Looks Bright
As technology advances, automated cleaning robots with gentle pad systems are gaining popularity, promising effortless upkeep. Moreover, eco-friendly, self-healing finish coatings are starting to enter the market, designed to repair minor scratches automatically. I predict that integrating smart sensors into flooring materials themselves might soon alert homeowners to issues like increased moisture or temperature spikes, allowing preemptive action and extending floor life even further.
How Do I Maintain My Floors Over the Years?
Establish a regular cleaning schedule that includes dusting, damp mopping with pH-neutral cleaners, and periodic professional inspections. Refinish hardwoods before signs of significant wear—usually every 7-10 years depending on traffic. For tiles, reseal grout lines as recommended, typically every 2-3 years, to prevent staining and deterioration. Remember, early detection of issues saves money and preserves your investment; consider setting reminders for maintenance tasks. Don’t forget to explore expert tips on refinishing to keep your hardwood floors gleaming for decades. Try applying a quick round of buffing with a microfiber pad after deep cleaning—this minor step can significantly boost the floor’s sheen and protect the finish. Staying proactive in maintenance ensures that your flooring remains a stunning feature of your home, not a faded memory of neglect.
Lessons I Wish Someone Told Me About Achieving Flawless Flooring
- One of the most profound revelations I’ve had is that subfloor preparation is everything—skimp on it, and no matter how good your materials are, your floor will suffer. I once skipped thorough leveling and learned the hard way when tiles cracked within months.
- Another insight came from mastering expansion gaps—ignoring them can cause buckling and cracking over time. My experience taught me that patience and precision here save headaches later.
- Investing in proper moisture barriers and underlayment can drastically extend your floor’s lifespan. Ignoring this step might save time upfront but costs you dearly in repairs down the line.
- Consistent maintenance, including regular inspections and deep cleaning, keeps floors looking brand new. It surprised me how small routine actions can prevent significant issues.
- Finally, I realized that understanding warranties and manufacturer guidelines is crucial—they are the best resources for ensuring your flooring stays in top shape, and I wish I had consulted them sooner.
Tools and Resources That Made My Flooring Journey Easier
- Self-Leveling Compounds: Essential for creating a perfectly flat surface; I trust products from reputable brands like LevelMaster—accurate results matter.
- Moisture Meter: Monitoring moisture levels is vital; I personally use the Protimeter for its reliability and ease of use.
- Floor Leveling Techniques Guide: The detailed strategies from this resource transformed my approach and saved me from costly mistakes.
- High-Quality Adhesives and Sealants: Choosing the right products—like those recommended by industry experts—ensures lasting bonds, especially in high-traffic areas.
- Professional Inspection Services: When in doubt, consulting experts can catch issues early, saving time and money.
Embrace Your Flooring Transformation and Keep Striding Forward
Embarking on a flooring project may seem daunting, but with the right knowledge and tools, you can achieve professional results that last for years. Every step—from careful subfloor prep to routine maintenance—cements the foundation for beauty and durability. The key is confidence—believe in your process, learn from these insights, and don’t shy away from seeking expert advice when needed. Your home’s floors are more than just surfaces—they’re the backbone of your space’s character and comfort. Ready to take your flooring project to the next level? Dive into expert installation tips and watch your vision come alive.