
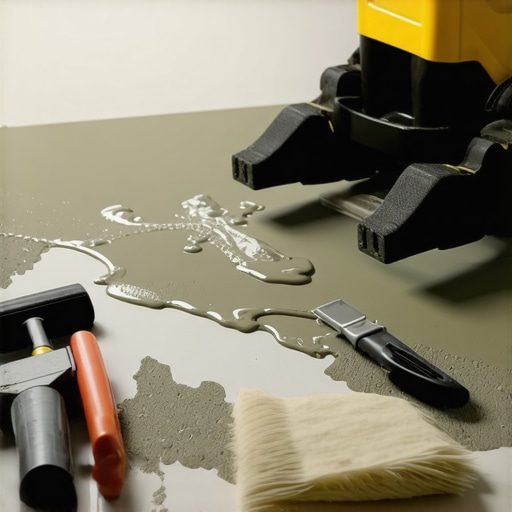
I remember the exact moment I realized I’d made a rookie mistake while leveling a concrete subfloor. I had spent hours prepping, pouring the self-leveling compound, and nervously watching it settle into place. But within days, I noticed sections starting to bubble and lift—like a bad pancake. That lightbulb moment hit hard: I hadn’t prepared the primer properly. Since then, I’ve learned that this small, seemingly insignificant step is actually the most crucial of all.
Why Skipping Prime Could Ruin Your Floor
In my early projects, I underestimated the power of proper primer application. It’s tempting to think a quick coat would do, especially when you’re eager to finish and get that beautiful new flooring down. But that’s where many go wrong—and why self-leveler can pop off the concrete, causing costly repairs and delays. The primer is like a bridge, ensuring the leveling compound bonds tightly, gracefully preventing those nasty bubbles, cracks, and pops later on. According to industry experts, failure to use a quality primer is one of the top reasons for premature failure in new floor installations source.
Is This Primer Problem Actually Worth the Hype?
I’ve heard doubts—some folks say primers are just extra steps and costs. I get it. But after facing the mess of a self-leveler pop-off, I’m convinced it’s a must. Early on, I made the mistake of rushing through that step because I thought I was saving time. The truth? Not investing in proper primer application cost me double in repairs. Trust me, that small investment at the start pays off big in the long run. Curious how you can do it right? Let’s walk through the crucial steps to ensure your self-leveler sticks where it should, not where it shouldn’t. For more in-depth guidance, I recommend checking out this step-by-step guide on achieving flawless floor leveling. Now, let’s get into the practical tips that will keep your project on solid ground.
Prepare Your Surface Properly
Start by cleaning the concrete thoroughly—remove dust, grease, or any debris that can impede primer adhesion. Use a stiff brush or vacuum to ensure no particles remain, as loose material creates gaps that weaken the bond. Once clean, inspect for cracks or holes; fill these with a suitable patching compound and smooth the surface. This prep work is like preparing a canvas—without it, your entire project could peel or bubble.
Choose the Right Primer and Apply Generously
Select a High-Quality Primer
Opt for a primer specifically formulated for concrete and compatible with your self-leveling compound. A bonding primer enhances adherence, acting like glue for your leveling material. Remember, cheaper primers might save a few dollars upfront but could compromise longevity—invest in quality to prevent future failures. For guidance on selecting the best primer, visit this expert guide.
Apply Primer in Even Coats
Pour the primer into a roller tray and use a long-nap roller for broad, uniform coverage. Spread the primer in a crisscross pattern to avoid missed spots—think of it like spreading peanut butter evenly on bread. Be thorough around edges and corners, as these are common weak points. Allow the primer to dry completely—usually 2-4 hours—before proceeding. Applying too little or rushing the drying process can jeopardize bond strength.
Timing and Environmental Conditions
Work in a climate-controlled environment, ideally between 50-80°F (10-27°C), to ensure optimal drying. Excess humidity or cold slows down curing, risking poor adhesion. If working in a damp space, consider using a dehumidifier. Gathering information about your specific conditions from common building challenges can help you plan better.
Personal Experience: A Critical Step
Once, I skipped a thorough primer coat on a basement floor, thinking a quick application would save time. The next morning, I found several areas where the self-leveler hadn’t adhered properly, bubbling up and creating uneven spots. I had to chisel off the failed layer, sand the surface smooth, and redo the primer and leveling process. That mess was costly and frustrating, reinforcing that patience in primer application pays off—literally saving me from future headaches and repairs.
Final Check Before Pouring
Before pouring your leveling compound, double-check that the primer is fully dry and the surface is dry, tack-free, and free of dust or debris. This final step ensures the bond forms correctly, preventing future delamination or bubbling. Remember, careful preparation is your best investment in a durable, flawless floor that lasts for years to come.
While many DIY enthusiasts and even professionals adhere to standard practices, some nuanced mistakes can sabotage an otherwise perfect flooring project. A frequent misconception is that all primers are interchangeable; in reality, using the wrong primer for your specific subfloor and flooring material can lead to delamination or adhesive failure, as highlighted in expert sources. Caution is needed because the compatibility between primers and adhesives is more intricate than most realize, especially when working with engineered woods or specialty tiles. Additionally, many overlook the importance of substrate preparation—failing to ensure a completely flat and clean surface can result in telegraphing, unevenness, or cracks over time. Advanced installers often use laser levels and moisture meters—tools frequently underutilized—to verify flatness and moisture content, which are critical details for long-term durability. The idea that extensive surface smoothing isn’t necessary for high-quality flooring is a myth; in fact, even minor imperfections can magnify through the lifespan of the floor, especially in large areas. Moreover, some mistakenly believe that climate control isn’t crucial during installation; however, fluctuations in humidity and temperature significantly impact material expansion, contraction, and adhesive bonding, leading to issues like buckling or gaps. As industry experts note, proper environmental management during installation is just as vital as the technical application itself. What most people get wrong about floor leveling and installation is ignoring these subtle yet impactful details. Skipping precise measurements, choosing incompatible products, or neglecting environmental factors can turn a simple upgrade into a costly disaster. To master these nuances, consult authoritative resources such as our step-by-step guide. Remember, the devil is in the details, so digging deeper into these advanced pitfalls can save you time, money, and frustration. Have you ever fallen into this trap? Let me know in the comments.
How do I maintain my floors over time?
Maintaining your flooring isn’t just about quick fixes; it requires specific tools and regular care to ensure longevity. I personally rely on a high-quality microfiber dust mop for daily cleaning—it’s gentle enough for hardwood and effective at trapping fine dust that can cause scratches over time. For deeper cleaning, I recommend a pH-neutral hardwood floor cleaner applied with a soft microfiber pad, which preserves the finish and prevents dulling. Investing in a good quality floor polisher, like the Copper Creek Floor Buffer, can help restore shine periodically, especially for hardwoods that see heavy foot traffic. Regularly inspecting your floors with a moisture meter can alert you to hidden issues before they become costly problems, particularly in areas prone to humidity fluctuations, such as basements or kitchens. Looking ahead, innovative cleaning gadgets, like robotic vacuums equipped with gentle floor-sensing technology, are becoming more sophisticated and can automate routine maintenance, freeing up your time. To keep large open spaces well-maintained, I use a combination of a long-handled duster and specialized edge-cleaning tools to reach into corners and along baseboards, avoiding the buildup of dirt that accelerates wear. In the future, I predict that smart sensors embedded into flooring could provide real-time maintenance alerts, flagging moisture or damage immediately. This technology could revolutionize how we care for our flooring, turning maintenance from a periodic chore into a continuous process.
What’s the best way to keep my flooring in tip-top shape?
One method I swear by is performing regular, targeted inspections with a moisture meter and visual checks for scratches or dents. Keeping an eye on environmental conditions with a hygrometer helps prevent issues caused by humidity swings, such as warping or cupping. Using protective pads under furniture and ensuring proper floor padding during heavy activities also minimize damage. Additionally, scheduling seasonal deep cleaning with appropriate tools prevents dirt and grime from embedding into the surface. For expert advice, look into pro hardwood floor care tips. Remember, investing in the right tools and routine maintenance now will save you a fortune later. Don’t underestimate the power of a clean, well-inspected surface, and try incorporating a professional-grade buffer or automated cleaner into your routine for best results. A small investment today in quality tools ensures your floors remain stunning for years, providing a solid foundation for your home’s beauty and value.
Why My Biggest Mistake Taught Me to Never Rush Primer Application
Bouncing back from a failed subfloor job was a game-changer. I realized that patience with primer drying times could make or break the entire flooring project. Skipping or rushing the primer step led to bubbling and lifting, costing me hours of rework. That experience ingrained in me the importance of respecting every step, especially the seemingly minor ones—like waiting for primer to fully dry—to ensure long-lasting results.
My Go-To Resources for Flooring Confidence
Over the years, I’ve come to trust a few key sources that have elevated my skills. This comprehensive guide is invaluable for understanding proper leveling techniques from start to finish. For product-specific tips, these hardwood care secrets have extended the life of my floors. And for troubleshooting, I consult industry standards outlined in this resource on common challenges. Learning from authoritative content has saved me from costly mistakes and boosted my confidence in tackling new projects.
Your Floor, Your Legacy—Make It Count
The journey to a flawless floor is as much about mindset as technique. Embracing the details, respecting each step, and continually learning from experience transforms a DIY project into a source of pride. Remember, the foundation you lay down today will support your home’s beauty for years to come. So, don’t settle for quick fixes—invest in the knowledge and tools that ensure lasting durability. What’s one small step you’re willing to improve to elevate your floor installation game? Share your thoughts and let’s learn together.