
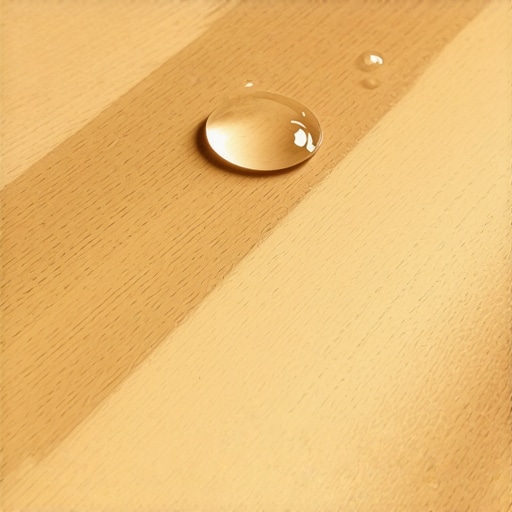
I still remember the sinking feeling when I first noticed tiny water spots on my newly refinished hardwood floor. At first, I brushed it off, thinking it was just a spill or maybe residual moisture. But then I saw the small, almost invisible, cracks forming in the finish. It was one of those lightbulb moments—realizing that my beautiful floor might not be as durable as I believed. That’s when I stumbled upon a simple yet powerful technique: the water drop test.
The Water Drop Test: Your Secret Weapon Against Damaged Finishes
As homeowners, we invest so much time, money, and hope into making our floors look perfect. Yet, tiny cracks in the finish can compromise the integrity of hardwood without us even noticing. That’s why I want to share my journey and how this test became my go-to for evaluating my floor’s health. It’s astonishing how a few drops of water can reveal so much about the protective layer that keeps our floors looking stunning for years. In today’s post, I promise to guide you through understanding this test, diagnosing issues early, and ensuring your hardwood remains as flawless as you envisioned.
Is the Water Drop Test Really Worth the Hype?
I remember making the mistake early on of assuming every water spot was just moisture that would evaporate. Turns out, doing that too often led me to overlook subtle damages that worsened over time. I learned the hard way that missing these signs can lead to costly refinishing or replacement. According to flooring expert insights, small invisible cracks in the finish can allow moisture penetration, leading to warping or staining if not caught early. That’s why I became a firm believer in this simple test—it’s quick, non-invasive, and surprisingly effective. Want to know the secrets to acting fast before these issues escalate? Stay tuned, because I’ll show you how to interpret your findings and what steps to take next, with a few tips and tricks along the way. And if you’re curious about proper floor installation techniques, I recommend checking out this guide for flawless results. Now, let’s dive into how you can perform this test confidently and avoid the pitfalls I once fell into.
Prepare Your Tools and Environment
Gather a clean, damp cloth and distilled water. Choose a well-lit area of your floor to perform the test, ideally on a spot that looks slightly discolored or worn. Remember, a controlled environment helps ensure accurate results, especially if your hardwood has a glossy finish that reflects light, making water spots easier to see. I once attempted the test in poor lighting, which caused me to overlook subtle signs; after moving to a brighter spot, I could clearly observe the water’s behavior, saving my floor from further damage.
Apply Water Drops with Precision
Dip a pipette or a small squeeze bottle into distilled water, then gently release a few drops onto the finish surface. Place each drop carefully, spacing them about two inches apart. Avoid using excessive water, as it can spill over and cause misinterpretation. In my experience, gently pressing the water drops ensures they stay in place long enough for observation, rather than sliding around or pooling. This step is critical—too much water can mimic signs of damage, leading to false positives. Think of it like testing the integrity of a fabric—gentle, precise application reveals the true story.
Observe and Interpret the Water’s Behavior
Watch how the water interacts with the finish over the next 5-10 minutes. If the water beads up and stays on the surface, your finish is likely in good shape. If the drops flatten out and seem to absorb into the finish or seep into cracks, that’s a sign of damage. I once saw the water absorb into a small crack and initially feared the worst, but upon further inspection, I realized the finish was compromised, which led me to reapply the top coat and reinforce the protection layer. This step acts as a tactile and visual check, similar to testing the resilience of a waterproof sealant. Use a flashlight to enhance visibility if necessary, especially for subtle signs.
Take a Closer Look at the Results
For thorough analysis, use a magnifying glass or a smartphone camera with macro mode. Capture images of the water drops’ behavior for comparison, especially if you plan routine checks. In one case, I documented a drop that initially formed beads but later started to flatten after 15 minutes, indicating ongoing deterioration. This documentation helps you track changes over time and decide whether professional intervention is needed. It’s like having a photographic record that shows the progression or stability of your floor’s condition. If uncertain about interpretation, consult a flooring professional or explore resources like common floor issues to understand potential causes.
Act Quickly to Prevent Further Damage
If the water test reveals signs of compromised finish, schedule repairs promptly. Light surface imperfections can usually be fixed with a new coat of finish or sealant, but deeper cracks may require sanding and refinishing. Don’t wait until your floor shows visible damage—early detection through the water drop test can save your investment. During my own testing, noticing the absorbed drops prompted me to apply a penetrating hardwood sealer, reinforcing the protection without full re-sanding. Think of this as a health check-up for your flooring—early detection and intervention are key to longevity. For expert techniques, consider reviewing floor leveling methods that complement finish protection and extend your hardwood’s lifespan.When it comes to achieving a perfectly level floor, many homeowners believe that following the basic steps suffices. However, this common misconception overlooks the nuanced challenges that can make or break your project. While tutorials might emphasize mixing your leveling compound thoroughly or checking the surface for high spots, they often omit the subtle mistakes that experienced installers are acutely aware of, such as substrate porosity variations or the importance of precise trowel techniques.
Common Myths That Sabotage Your Floor Leveling Efforts
One pervasive myth is that using a higher Maintaining your flooring’s pristine condition requires more than just initial installation; it demands the right tools, routine upkeep, and a strategic approach to scaling repairs as your space evolves. One of my favorite tools is the **laser level**, which ensures precise measurement of floor flatness during ongoing maintenance or renovation phases. I personally rely on a cross-line laser like the **Bosch GLL 3-330CG**, praised for its accuracy and ease of setup. Its capability to project multiple lines simultaneously helps identify uneven spots that might develop over time, especially after major furniture rearrangements or home renovations. For efficient detection of subtle dips or high spots, pairing this with a high-quality straightedge or a digital level can save hours and prevent small issues from escalating.
Invest in Reliable Maintenance Tools
Having reliable tools isn’t just about accuracy; it’s about longevity and consistency. I emphasize using **customized trowels** when reapplying self-leveling compounds, choosing sizes that match the area. For example, the **QEP 4 in. Notched Trowel**, which I use to ensure even thinset application when repairing underlying issues—this prevents uneven floor surfaces, as detailed in this comprehensive guide. Regularly inspecting your floor with such tools allows early detection of problems, guiding timely interventions. To keep your tools in top shape, I recommend investing in a good **tool maintenance kit**, including sharpeners, cleaning brushes, and storage solutions, which prolongs their lifespan and ensures ongoing precision.
Manage Long-Term Results with Routine Checks
An often-overlooked aspect of flooring maintenance is establishing a routine inspection schedule. Biannual checks using your laser level and straightedge can reveal minor shifts caused by seasonal humidity changes or settling, enabling preemptive repairs. Additionally, applying **penetrating sealers** periodically—roughly every 3-5 years—maintains surface integrity and resists moisture ingress that can undermine your flooring over time. For hardwoods, I prefer water-based finishes with low VOCs, like the ones described in this resource. These not only protect the surface but also ensure the environment remains safe for your family.
Scaling Up without Compromising Quality
As your space expands or renovation projects multiply, maintaining consistent flooring quality becomes more complex. I recommend creating a comprehensive damage or maintenance log, documenting issues as they arise, and planning staged repairs. When dealing with larger areas, modular tools such as **self-leveling kits** combined with professional-grade mixers like the **Luxite EVA Mixer** can significantly speed up application while maintaining quality. In my experience, investing in scalable solutions like these allows for flexibility and consistent results across multiple rooms. The trend seems to lean toward integrating **smart tools**—like digital moisture meters—into routine maintenance, offering real-time insights that prevent long-term problems. For detailed techniques on large-scale level corrections, visiting resources like this expert guide is invaluable. Ready to take your maintenance routine to the next level? Try incorporating a laser level into your quarterly inspections and see how early detection transforms your upkeep.
Lessons That Changed How I Approach Floor Repairs
One of the most profound lessons I learned was that every detail counts—skimping on surface prep or rushing the drying process can undermine even the best materials, leading to costly fixes down the line. Early in my career, I underestimated the importance of environmental control; now, I always ensure optimal humidity and temperature to prevent warping. Additionally, trusting licensed professionals for complex tasks like proper subfloor assessment has significantly increased my project’s longevity, reminding me that knowledge isn’t just power—it’s protection for your investment.
Tools and Resources That Elevate My Flooring Game
Having reliable, high-quality tools makes a world of difference. I swear by the Bosch GLL 3-330CG laser level for its precision, helping me spot uneven spots that might cause future issues. When selecting finishes, I opt for low VOC options like those detailed in this guide, ensuring my family’s health isn’t compromised. For learning new techniques, I highly recommend this comprehensive resource—it transformed my understanding of floor leveling. Last but not least, a quality self-leveling kit paired with the right mixer has expedited my projects without sacrificing quality.
Your Hardworking Flooring Future Starts Now
Remember, mastering the nuances of floor leveling, tile installation, and hardwood refinishing isn’t reserved for experts—it’s something every homeowner can confidently pursue with the right mindset and tools. Your space deserves the best foundation, and with consistent effort—like routine inspections and proper maintenance—you’ll create a stunning, durable floor that stands the test of time. Embrace the learning process, experiment with trusted resources, and take pride in transforming your home into a masterpiece of craftsmanship.
What has been your biggest challenge when maintaining or installing new flooring? Share your experiences below—your story might inspire someone else on their DIY journey!