

I vividly remember the moment it hit me—my newborn was crawling across the pristine hardwood floor I had just installed in her nursery when I suddenly paused. That lingering smell, the slight haze in the air, made my stomach tighten. It was the realization that not all flooring materials are created equal when it comes to VOC emissions, especially in a space where my child would spend countless hours. That lightbulb moment spurred me into a deep dive into the secret world of VOCs and safe flooring choices for nurseries.
Why VOCs Matter More Than You Think in Nursery Flooring
Every parent wants a safe, healthy environment for their little ones. Yet, many overlook the volatile organic compounds (VOCs) that emanate from flooring materials. VOCs are gases released from certain solids or liquids, which can cause health issues ranging from respiratory problems to neurological effects. Particularly in enclosed spaces like nurseries, the accumulation of these gases over time can be a real concern.
Early in my renovation journey, I made a crucial mistake: choosing a popular laminate flooring because of its low cost, without considering its VOC emissions. Weeks later, I noticed my baby’s increased coughing and irritation. That was a wake-up call. Research shows that some flooring products emit VOCs long after installation, and children are especially vulnerable because of their developing systems. For concrete proof, a study published by the EPA highlights the health risks associated with indoor VOC exposure.
So, how do you pick a flooring option that’s both beautiful and safe? Well, that’s the big question, and I promise, we’ll unpack it step-by-step. From understanding the VOC secret to choosing high-quality, non-toxic materials, I’ll guide you through what I wish I knew when starting out. If you’ve faced similar worries, know that there are effective solutions, and I’m here to help you make informed choices.
But first, let’s tackle the skepticism many have—”Is VOC-free flooring actually worth the hype?” Next, I’ll share my personal mistake and how understanding this secret transformed my approach.
Start With Material Selection
Choose flooring options labeled as low-VOC or VOC-free, such as certain types of outdoor-rated cork, bamboo, or naturally finished hardwoods. Personally, I visited a local supplier and asked for certifications and VOC emission data, which helped me avoid products that might emit harmful gases. Look for eco-friendly certifications; they often indicate low VOC levels. Remember, not all low-cost options are safe; prioritize quality and transparency.
Test Before Installation
Before committing, perform a simple sniff test on sample materials in a well-ventilated space. If there’s a strong chemical smell, it’s best to choose something else. I did a small test with several samples; only the ones with a faint natural smell passed my screen. This step ensures you won’t be stuck with harmful materials after installation, especially in a space with a baby.
Prepare the Subfloor Properly
Ensure your subfloor is level, clean, and dry. Use a laser level or a long straightedge to identify high spots and dips, which can cause uneven flooring. In my case, I used a 10-foot straightedge and found some irregularities. To correct these, I applied a self-leveling compound, following [this step-by-step guide](https://tiletrendshop.com/step-by-step-guide-to-flooring-installation-and-leveling-success). Proper preparation minimizes VOC emissions caused by improper installation or future damage.
Install with Care and Precision
Follow manufacturer instructions precisely, especially regarding adhesives and moisture barriers. For glued-down floors, select low-VOC adhesives — I chose a water-based adhesive and avoided solvent-based options. During installation, use proper tools like a tapping block to snug planks without damaging them. I learned the hard way that rushing can cause gaps or uneven surfaces, which might trap VOCs and mold later. For detailed techniques on perfect flooring, check [this expert guide](https://tiletrendshop.com/mastering-floor-leveling-pro-secrets-for-perfect-installations).
Ventilate Generously During and After Installation
Keep windows open and fans running for several days post-installation. This reduces airborne VOCs and accelerates off-gassing. I set up a fan and left the nursery well-ventilated for a week, which made a noticeable difference in residual smells. Remember, even VOC-free products need time to settle, especially in enclosed spaces. For more tips on maintaining a healthy home post-installation, visit [ourcare tips](https://tiletrendshop.com/hardwood-floor-care-secrets-to-longevity-and-shine).
Verify the Outcome
Once your flooring is installed and ventilated, test the air quality if possible. Use DIY kits or professional testing services to ensure VOC levels are within safe limits, especially in a nursery. If the space still smells strong or shows signs of off-gassing, consider additional ventilation or replacing the flooring. My experience taught me that patience and thorough testing protect your child’s health.
Many homeowners assume that laying hardwood flooring is just about picking the right boards, but the reality runs much deeper. A frequent misconception is that floating floors eliminate the need for meticulous subfloor prep, yet uneven surfaces can cause creaking, gaps, or warping over time. Skipping proper leveling can lead to costly repairs later—it’s similar to building a house on shaky ground. For thorough guidance, I recommend reviewing our detailed guide on [floor leveling challenges and how to dodge them](https://tiletrendshop.com/floor-leveling-challenges-common-mistakes-and-how-to-avoid-them).
Another common myth revolves around adhesives in hardwood installation. Many think that all glue is created equal, but using low-quality, VOC-heavy adhesives can trap moisture and promote mold growth, undermining the floor’s integrity. Opt for products with certifications, and always consult manufacturer recommendations. For expert tips, explore [mastering hardwood floor refinishing](https://tiletrendshop.com/mastering-hardwood-floor-refinishing-expert-tips-for-2025).
An overlooked nuance is the importance of expansion gaps—people often forget they’re essential for proper hardwood performance, especially in varying climates. Without these gaps, wood cannot expand or contract freely, leading to buckling or cupping. Precise gap-sizing tailored to your environment is a detail that separates pro results from botched jobs. For specifics on execution, see the article on [precise floor leveling techniques](https://tiletrendshop.com/precise-floor-leveling-techniques-to-achieve-flawless-surfaces).
Advanced installers often face the challenge of dealing with large-format tiles and uneven subfloors. The trick is to use specialized leveling systems or self-leveling compounds before installation. This ensures a flat surface that prevents cracked tiles and uneven transitions—an issue that can ruin the look of even the most beautiful floors. I discuss this in-depth in our upcoming guide on [flawless surface preparation](https://tiletrendshop.com/how-to-know-if-your-floor-is-flat-before-tiling).
Moreover, some believe that thicker hardwood options guarantee durability, but in reality, high-quality finishing and correct installation are more critical. Thicker boards are more forgiving during sanding and refinishing, but if the substrate isn’t level or if acclimation isn’t properly handled, even thick planks can warp or gap. Always prioritize environmental acclimation and proper subfloor prep.
Lastly, don’t forget that a lot of installation pitfalls come down to tool quality and technique. Rushing with subpar tools or skipping essential steps like taping or screwing can leave gaps or create weak spots. For a step-by-step breakdown on the best practices, dive into [our comprehensive installation tutorials](https://tiletrendshop.com/revamp-your-home-with-expert-flooring-installation-tips).
So, next time you’re preparing for a flooring project, challenge these myths and pay attention to the hidden nuances. Proper planning and expert execution will save you from headaches down the line—and your floors will thank you. Have you ever fallen into this trap? Let me know in the comments.Maintaining hardwood floors over time requires the right tools and a proactive approach to upkeep. I personally rely on a few specialized pieces of equipment that make routine care and minor repairs much more manageable. One essential tool in my kit is a high-quality microfiber dust mop. Unlike synthetic sweepers, a microfiber pad effectively traps dust and allergens without scratching delicate finishes, making it ideal for daily cleaning. For deeper cleaning, I use a pH-neutral hardwood floor cleaner, such as Bona Hardwood Floor Cleaner, which preserves the finish and extends the life of the floor. To handle scratches or surface imperfections, I keep a wood touch-up kit on hand, including fine-grit sandpaper and matching wood stain, allowing me to perform minor refinishing without professional help.
How do I maintain hardwood floors over time?
In addition to cleaning, controlling indoor humidity is crucial. Using a hygrometer and a humidifier or dehumidifier helps prevent the wood from expanding or contracting excessively, which can cause gaps or warping. Regularly inspecting your floors with a flashlight can reveal issues like small cracks or loose boards early, allowing for timely repairs. For leveling uneven areas or minor subfloor issues, a self-leveling underlayment can be a game changer, especially when combined with a laser level for precision. I recommend considering a professional assessment if you notice persistent unevenness, as it might indicate underlying structural problems. Looking ahead, automation and smart home integration might offer new ways to monitor and maintain your flooring environment, reducing manual effort and catching issues early.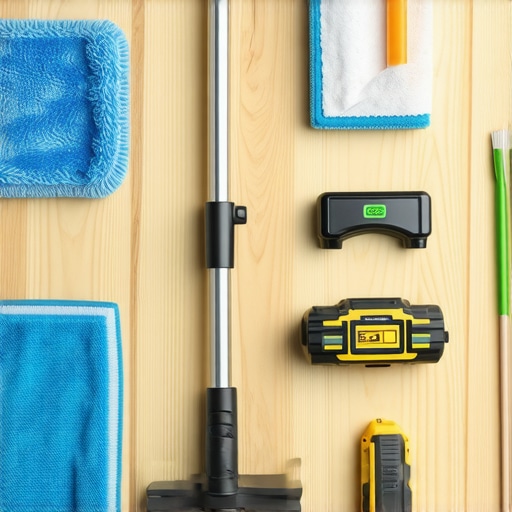
Imagine an organized toolkit featuring a microfiber dust mop, a professional-grade floor cleaner, a touch-up repair kit, and a laser level—all essential for keeping your hardwood floors in top shape. Investing in these tools not only simplifies routine maintenance but also empowers you to address minor damages swiftly, saving money and prolonging the beauty of your floors. If you’d like personalized advice on selecting the right equipment, don’t hesitate to reach out through our contact page. Remember, consistent care is your best strategy for long-lasting hardwood elegance. For detailed repair techniques, check out our expert refinishing tips for 2025 to stay ahead in long-term maintenance.
Beyond the Surface: Secrets the Pros Keep Quiet
One of the most eye-opening lessons was realizing how crucial it is to prioritize environmental health over aesthetic trends. I once chose a trendy laminate without checking VOC emissions, only to find out weeks later that it was secretly releasing harmful gases. This taught me that hidden risks often lurk behind beautiful appearances, especially in spaces meant for our little ones.
Another revelation was the importance of thorough testing and preparation. Proceeding without performing simple sniff tests or proper subfloor leveling can lead to long-term issues like uneven floors or health hazards. These seemingly small steps, when overlooked, can undermine the entire project and compromise safety.
Finally, engaging truly with certification labels and emission data uncovered the often-misunderstood nuances of safe flooring choices. Not all low-cost options are safe, and understanding certifications can be the difference between peace of mind and future regrets. The key is to look beneath the surface and demand transparency, especially when your child’s health is on the line.
Equip Yourself with Trusted Resources
I highly recommend several tools and resources that transformed my approach to safe flooring. First, [our detailed guide on floor leveling](https://tiletrendshop.com/step-by-step-guide-to-flooring-installation-and-leveling-success) provided clarity on ensuring a flawlessly flat surface—crucial for both aesthetics and safety. For materials and certifications, I relied on [eco-labels and third-party testing reports], which are my go-to sources for verified low-VOC products.
To build confidence in installation techniques, I found [professional tutorials](https://tiletrendshop.com/mastering-floor-leveling-pro-secrets-for-perf ect-installations) invaluable—they demystify complex steps and improve outcomes. For ongoing maintenance, [top-quality cleaning tools](https://tiletrendshop.com/hardwood-floor-care-secrets-to-longevity-and-shine) keep the floors looking pristine without risking VOC release or damage. These resources empowered me to make informed decisions and care for my nursery’s floors effectively.
Seize the Opportunity to Make a Difference
Taking control of your flooring project means embracing the knowledge that safety and style can go hand in hand. Don’t wait for issues to arise—start now by researching materials, testing samples, and investing in proper installation. Your children’s health and your peace of mind depend on it. Remember, every step you take towards a safer nursery creates a space where your little ones can explore freely and happily. What’s one flooring myth you once believed that turned out to be a mistake? Share your story below! Listen to your intuition, leverage expert resources, and take pride in crafting a safe, beautiful environment for your family.