
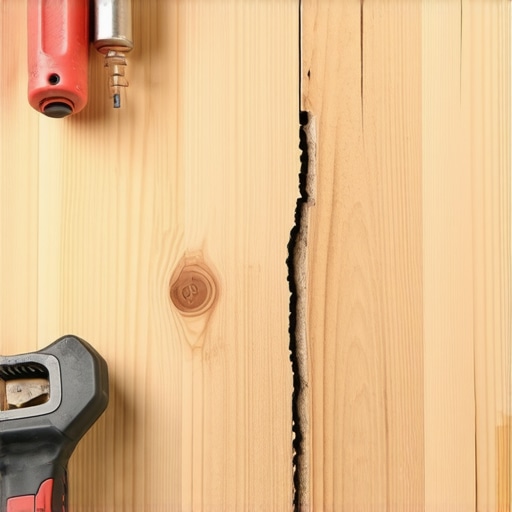
I remember the exact moment I realized my carefully installed vinyl plank floor was marred by a simple mistake—the kind that seemed harmless at first but turned into a costly repair. While assembling my flooring, I used the tapping block to snugly fit the planks together, thinking I was doing everything correctly. But within days, I noticed tiny cracks and splits along the tongue joints. It was a lightbulb moment—one that taught me the hard way how crucial proper tapping techniques are.
Why a Small Mistake Can Lead to Big Problems in Vinyl Plank Flooring
It’s easy to underestimate the power of a simple tool like the tapping block, especially when you’re focused on a fast installation. However, applying too much force or using the block improperly can damage the delicate tongue counterparts, leading to separation or cracking over time. These tiny cracks not only mar the appearance but can also compromise the overall stability of your flooring, causing unevenness and squeaks.
Are You Still Doubting the Impact of a Tapping Block?
Most DIYers assume that as long as the planks click together, the installation is solid. Early on, I believed the same, until I noticed my planks not sitting flush. That’s when I discovered that even a small, overlooked error during tapping could cause long-term damage—a mistake I had made myself early in my projects. According to flooring expert Brian D. Bell, improper use of tapping tools is one of the most common mistakes that lead to premature plank failure (source).
Understanding the nuances of how to correctly use a tapping block can save you from costly repairs and frustration down the line. So, in the next sections, I’ll walk you through the essential tips to avoid this common pitfall and ensure your vinyl planks stay pristine and durable for years to come.
Master the Tapping Process for Durable Vinyl Planks
Recall a time I struggled with aligning vinyl planks, frustrated because the tongue and groove kept misfitting. To prevent this, I adopted a precise tapping method. Start by positioning the plank so the tongue half is fully inserted into the groove of the adjoining plank, ensuring alignment. Use a soft mallet or tapping block—preferably made of rubber or plastic—to gently tap the plank into place. Think of this like fitting pieces of a puzzle: light, controlled taps confirm snug engagement without exerting excessive force.
Place the tapping block squarely on the edge of the plank’s tongue, giving equal pressure across the surface. Never strike the plank directly with the mallet; doing so risks damaging the delicate tongue. When I first tried adjusting using a homemade wooden piece, it helped distribute force evenly and reduced the risk of splits. This approach prevented my earlier mistakes of cracking the tongue, saving time and money, and ensuring a tight fit that will last.
Applying Force Evenly to Prevent Damage
Imagine trying to bend a thin rod: applying uneven pressure causes it to snap. The same applies with vinyl planks. To get the best results, always apply consistent, gentle taps—just enough to snap the locking mechanisms into place. I recall practicing on scrap pieces, adjusting my hammer strikes until I felt the palm of my hand was enough. Use a tapping block with a flat, smooth surface to avoid scratching or gouging the vinyl.
This technique also involves proper stance: stand with feet shoulder-width apart, and use your elbow and wrist to control the force. This micro-adjustment prevents over-tapping, which can create stress points. When I first overused force, I observed tiny cracks forming along the tongue, which later expanded into visible splits. By refining my tapping rhythm and force, I maintained the integrity of the planks, aligning them perfectly with minimal effort.
Ensure Proper Alignment Before Tapping
Think of laying bricks: checking alignment after every few pieces maintains straight rows. Similarly, before tapping, verify the plank’s position with a straight edge or spacer—if available, use a LEVEL for high precision. Once aligned, gently insert the tongue into the groove, then proceed with controlled taps.
In my experience, neglecting this step led to crooked lines and gaps that would demand rework. To avoid this, I started using a laser level to double-check my installation direction. Always confirm with your eyes first, then gently tap, watching for smooth engagement. Preventing misalignment at this stage makes the overall floor look seamless and professional.
Handling Tight Joints and Variations
If the planks resist fitting, do not force them with excessive taps. Instead, slightly moisten the tongue with a minimal amount of water or a special vinyl installation lubricant—this can reduce friction and facilitate easier locking. I once applied a tiny drop of water and noticed the planks clicked into place with fewer and softer taps, preventing damage.
For uneven subfloors causing gaps or tight spots, level the surface first using techniques from floor leveling guides. Proper leveling ensures each plank aligns correctly, reducing stress during tapping. Remember, patience and precision are your best tools—rushing can lead to broken planks or misaligned flooring, undermining your project’s durability.
Many DIY enthusiasts believe that mastering the basics guarantees a perfect floor, but seasoned experts know that there are deeper nuances many overlook. One common misconception is that simply sealing the subfloor is enough before installing hardwood or tile; however, research shows that even small undetected moisture or unevenness can lead to warping or cracking over time, emphasizing the importance of thorough floor leveling (see detailed leveling techniques). People often assume that heavier tools like sledgehammers provide better results for locking planks or tiles, but this myth neglects the fact that excessive force can damage tongue-and-groove systems or grout joints, causing long-term failures. Instead, controlled tapping with the correct tools ensures longevity and precision. Have you ever fallen into this trap? Let me know in the comments.
What advanced mistakes could threaten your flooring’s lifespan without your knowledge?
One subtle mistake many overlook is neglecting temperature and humidity fluctuations during installation. Engineered hardwood and certain tiles expand or contract depending on environmental conditions, and failing to accommodate these changes can cause cupping, buckling, or grout cracking. Experts recommend acclimating materials for at least 72 hours and adjusting subfloor readings accordingly (learn how to control these variables). Additionally, selecting the wrong underlayment or adhesive can be a sneaky culprit; inadequate moisture barriers or incompatible glues can lead to delamination or mold growth, which compromise both safety and appearance over time. Understanding these nuanced factors and applying advanced techniques distinguishes professional results from amateur mistakes. For more insights into perfect installation practices, visit our expert-level guides and ensure your project stands the test of time.
Keeping Your Floors in Prime Condition With the Right Tools
Investing in high-quality tools is essential for maintaining hardwood, tile, and leveled floors over the long haul. One tool I swear by is a spiked roller. Its pointed surface ensures a thorough re-application of self-leveling compounds, especially on larger surface areas, providing an even base for flooring. I personally use the spiked roller from Tile Trend Shop, which has proven indispensable for achieving professional results without adding extra labor efforts.
Another game-changing device is a laser level. Unlike traditional bubble levels, a laser provides a 360-degree projection that allows me to verify multiple points simultaneously, ensuring my subfloor remains perfectly flat—crucial before laying hardwood or tile. For precision-leveling in tricky corners, I use the budget-friendly laser level recommended by industry experts, which offers accuracy without breaking the bank.
Routine Maintenance Techniques That Extend Floor Lifespan
To keep floors looking their best, I prioritize regular cleaning with the right products. For hardwood, I opt for pH-neutral cleaners that preserve the finish; for tiles, a gentle brush combined with a diluted vinegar solution helps prevent grout discoloration. Preventative care—like using felt pads under furniture—reduces scratches and dents, especially in high-traffic zones. You might consider applying a professional-grade floor buffer periodically to restore shine and remove minor scratches, making routine maintenance more effective and less time-consuming.
Tools I Recommend for Long-Term Results
For ongoing preservation, I recommend always having a high-quality microfiber mop which prevents streaks and minimizes dirt buildup. Additionally, a handheld steam cleaner helps manage grout and tight corners without harsh chemicals. The scrub test is a handy technique to assess if your sealer is still performing well, guiding your re-sealing schedule.
Looking ahead, the trend is moving towards smart maintenance solutions. Imagine sensors embedded within your flooring that notify you when cleaning is needed or alert you to potential damage—this is where technology is heading. Embracing these innovations now can save you time and money in the future.
How do I maintain hardwood and tile floors over time?
Developing a regular cleaning routine with tools like a microfiber mop and choosing the right cleaning agents can significantly extend your floors’ lifespan. Remember, periodic professional assessments using tools like laser levels and scrub tests can catch issues before they escalate, preserving your investment for years to come. For more advanced flooring tips, check out floor installation mistakes to avoid and ensure your floors remain in excellent condition. Try incorporating a professional-grade buffer into your routine—it might just transform your maintenance game and keep your flooring looking impeccable longer.
Lessons Only Experience Can Teach About Flooring Success
- One of the hardest truths I learned is that even small missteps during installation, like improper tapping, can lead to costly repairs down the line. Careful attention to detail saves money and frustration.
- Choosing the right tools, such as a quality rubber mallet and a properly sized tapping block, made a significant difference in my results. Skimping on tools often results in damages I had to fix later.
- Patience is key. Rushing through steps like leveling the subfloor or verifying alignment can cause issues that compromise the entire project’s durability. Prioritize precision over speed.
- Environmental factors, like humidity and temperature, are often overlooked but vital. Acclimating materials beforehand prevents warping or cracking, ensuring longevity.
Tools and Resources That Transformed My Approach
- The spiked roller became indispensable for ensuring even self-leveling compounds, leading to a flawless base for my floors. I trust it for consistent results.
- The laser level helped me verify that my subfloor was perfectly flat, which is crucial for ensuring even installation and avoiding future issues with cracks or unevenness.
- Books like Mastering Floor Leveling provided in-depth techniques that took my installation to a professional level. They’re a must-have for serious DIYers.
- Reliable online sources and expert blogs offer continuous tips on latest trends, tools, and troubleshooting strategies—keeping my skills sharp and up-to-date.
Seize the Opportunity to Elevate Your Flooring Game
Embarking on a flooring project is more than a task; it’s a chance to create a space that reflects your craftsmanship and vision. With the right knowledge, tools, and patience, you can avoid costly mistakes and achieve stunning, durable results. Don’t let the lessons I’ve learned go to waste—take action today to master your hardwood and tile installations. Want to share your own experiences or ask for advice? Drop a comment below and let’s build a community of informed DIYers eager to elevate their home’s beauty and function.