
It was a Sunday afternoon when I finally cracked during my DIY flooring project. I had measured, cut, and laid down what I thought would be a flawless new hardwood floor. But as I stepped back to admire my work, my heart sank. The tiles were noticeably uneven, and the gap between the planks varied more than I cared to admit. Frustration washed over me—I hadn’t fully grasped how crucial a truly flat surface was for a professional finish. That moment of disappointment was a lightbulb moment.
Why a Flat Subfloor Matters More Than You Think
Your floors are the foundation of your entire home aesthetic. An uneven subfloor can turn a beautiful tile installation into a crooked mess, or cause your hardwood to creak, gap, and even warp over time. It’s like trying to build a house on shifting sands—nothing will sit well, and you’ll end up needing costly repairs or replacements. Upgrading or installing floors without addressing a flawed subfloor is a gamble that often results in wasted time and money.
But here’s the kicker: achieving that perfectly level foundation doesn’t have to drain your wallet. I’ll share the simple laser level hack I discovered that transformed my approach—and it can do the same for you.
Believe it or not, a standard laser level, combined with some strategic measuring, can identify high and low spots on your subfloor with surprising accuracy. This method is not only budget-friendly but also far more reliable than eye-balling or using basic tools alone. A study conducted by the National Association of Home Builders highlights that improper subfloor preparation accounts for over 70% of flooring failures (source: Flooring Installation Mistakes), making this little hack a game changer.
Do you find yourself frustrated every time you step onto your uneven floor? Have you faced delays because you couldn’t find an affordable way to ensure it’s truly level? If so, this approach is exactly what you need to avoid costly corrections down the line.
Next, let’s dive into how you can implement this laser level trick and elevate your flooring project from DIY disaster to professional finish.
Prepare Your Subfloor Before Measurement
Start by clearing the area and inspecting your subfloor for debris, dust, or loose particles. A clean surface ensures accurate readings when using your laser level. I once neglected this step and got misleading results, which caused me extra work later. Use a vacuum or broom to sweep thoroughly and wipe the surface with a damp cloth if needed.
Set Up Your Laser Level with Precision
Place your laser level on a stable, flat surface or mount it on a tripod at the center of your room. Turn it on and allow it to calibrate. I recommend using a laser level with cross-line capability for better visibility. Once set, switch it to level mode to ensure accurate readings. Think of it as setting a ship’s compass before sailing; your measurements depend on a steady, calibrated device.
Identify High and Low Spots
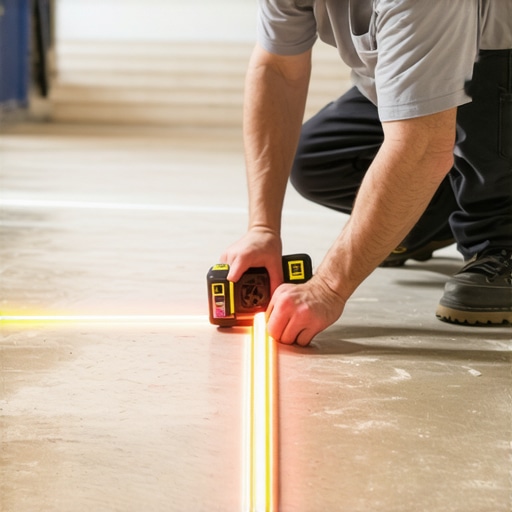
Turn on the laser and observe the lines projected onto your floor. Use a ruler or measuring tape to mark the highest and lowest points where the laser hits. For instance, I used painter’s tape to mark these spots, creating a visual map of unevenness. This method is like mapping a terrain before leveling—it guides your next moves precisely.
Use a Leveling Compound or Shim Material
Based on your markings, decide whether to add a leveling compound, self-leveling underlayment, or shims. For minor dips, shims might suffice; for deeper unevenness, a self-leveling compound works best. I once had a spot about half an inch low and used a quick-drying self-leveler, which dried flat and saved me hours of mudding. Think of this like filling potholes before paving a smooth road.
Apply Corrections Systematically
Apply your chosen fix to the identified high or low spots. For shims, slide them into place and secure; for leveling compounds, pour and spread evenly, using a trowel or spiked roller to eliminate air bubbles and ensure smoothness. Use the laser again after curing to verify adjustments. This double-checking is analogous to a builder re-measuring after adjustments to confirm accuracy.
Re-Measure and Fine-Tune
Repeat the laser measurement process after corrections. This iterative step is crucial—don’t assume your first fix is perfect. I spent extra time re-measuring until my laser line was consistently at the same height across the room, resulting in a flawlessly level surface. Think of this as tuning a guitar string until it sounds perfect—precision here makes all the difference.
Finish and Prepare for Flooring Installation
Once satisfied with the levelness, clean the surface again to remove dust and debris. You’re now ready for the final phase—laying your chosen flooring material. Proper preparation saves you from headaches down the road and ensures your investment looks fantastic for years to come.Learn more about flooring installation pitfalls.
Many DIY enthusiasts and even seasoned homeowners often fall prey to oversimplified beliefs about flooring installation, especially regarding leveling techniques. One pervasive myth is that achieving a perfectly flat subfloor is solely about applying leveling compounds generously. In practice, over-reliance on self-leveling underlayments without meticulous surface prep can lead to future issues like cracking or settling, as highlighted in the comprehensive guide on flawless leveling techniques. Furthermore, some assume that a laser level is sufficient on its own to detect subtle high and low spots; however, advanced experts emphasize that combining laser measurements with manual probing provides a more nuanced understanding of surface variances. This hybrid approach can prevent costly mistakes, as noted by industry studies indicating that improper subfloor prep accounts for most flooring failures (source).
A common trap involves neglecting the influence of environmental factors such as humidity and temperature. Many underestimate how these variables cause hardwood floors to expand or contract, potentially leading to gaps or buckling if not properly accounted for during installation. Advanced practitioners recommend performing acclimation procedures and using proper expansion joints—crucial details often overlooked. These nuances can significantly enhance the longevity of your floors.
Now, let’s explore why understanding these subtle factors can make all the difference in your flooring project.
Why Do My Floors Crack Even When I Level Correctly?
This question frequently puzzles DIYers. Cracks often occur not because the leveling was off but due to underlying issues like unaddressed moisture content, improper subflooring materials, or misjudged expansion gaps. Experts advise conducting moisture tests and selecting appropriate subfloor materials to prevent such problems. For example, using a moisture meter can reveal hidden issues that compromise the entire installation—more details can be found in hardwood finish failures.
Being aware of these advanced nuances enables you to avoid the ‘Oops’ moments common in flooring projects. For instance, misunderstanding the wood’s acclimation needs or ignoring the significance of proper substrate preparation can cause long-term damage. By integrating expert techniques and staying informed through trusted resources, you position yourself for success.
Thinking about your next project? Visit our contact page for personalized advice or explore more practical tips at step-by-step guides. Remember, mastering these subtleties is what transforms a good job into a truly professional finish. Have you ever fallen into this trap? Let me know in the comments.Maintaining perfectly leveled floors and ensuring their longevity requires more than just initial preparation; it demands the right tools, vigilant upkeep, and strategic adjustments over time. One of my go-to tools is a high-precision digital laser level, such as the Bosch GLL 3-80, which I personally use to verify surface flatness after corrections and periodically during long-term maintenance. Its self-leveling feature and remote control make it indispensable for detecting subtle dips or rises that can compromise flooring integrity. Regular calibration ensures consistent accuracy, preserving the flawless surface you’ve worked hard to achieve.
Another vital instrument is a moisture meter, like the Protimeter Surveytouch, especially when caring for hardwood floors. Monitoring humidity levels helps prevent expansion or contraction that can lead to gaps, buckling, or warping over time. I check moisture content in subfloors and the wood itself every few months, aligning with industry recommendations from experts who emphasize moisture management for long-lasting results. Incorporating these measurements into your routine can prevent costly repairs and maintain the aesthetic appeal of your flooring.
How do I keep my floors in top shape over time?Lessons from My Hard-Won Floor Overconfidence
One of the biggest takeaways I learned is that no matter how skilled you are, there’s always a hidden detail that can trip you up—like overestimating how level your subfloor truly is. I once skipped rigorous measurement, thinking my eyes would suffice, only to find uneven gaps in my hardwood that required costly fixes later. Now I know that patience and precision beat speed every time.
Another lesson is the importance of embracing the right tools early on. Relying solely on basic bubble levels almost cost me my entire project. Investing in a quality laser level and moisture meter, although an upfront expense, saves both time and frustration. These tools revealed issues I would have otherwise ignored, guiding me to make smarter decisions on fixes and adjustments.
Finally, I realized that understanding environmental factors—like humidity fluctuations—can make or break your flooring’s longevity. I used to ignore seasonal changes, leading to gaps and warping shortly after installation. Now, I perform acclimation procedures and plan for expansion joints, which keeps my floors looking pristine year-round. These lessons are invaluable for anyone aiming for a flawless finish and durable installation.
Tools and Resources That Elevate Your Flooring Game
Over the years, I’ve come to trust certain tools that bring professional results within reach. For precise subfloor assessments, the high-precision digital laser level has been indispensable, helping me spot even tiny dips. For moisture management, a reliable moisture meter ensures my hardwood stays stable over seasons. Additionally, books like The Ultimate Guide to Floor Leveling have deepened my understanding of complex techniques, making me more confident in every step. Lastly, following industry blogs such as home improvement experts keeps me updated on the latest trends and innovations, which continually refine my skills.
Your Floor Transformation Awaits
Every time I finish a flooring project, I feel a sense of pride knowing I’ve created a foundation that’s both beautiful and durable. Remember, mastering the art of floor leveling and hardwood installation isn’t just about technical steps; it’s about cultivating patience, precision, and a willingness to learn. With the right mindset and tools, you can turn any space into a stunning showcase of craftsmanship. Dive into your next project with confidence—your perfect floor is within reach. Curious about specific challenges you’ve faced or want to share your successes? Let’s talk below and keep the inspiration flowing!
,