
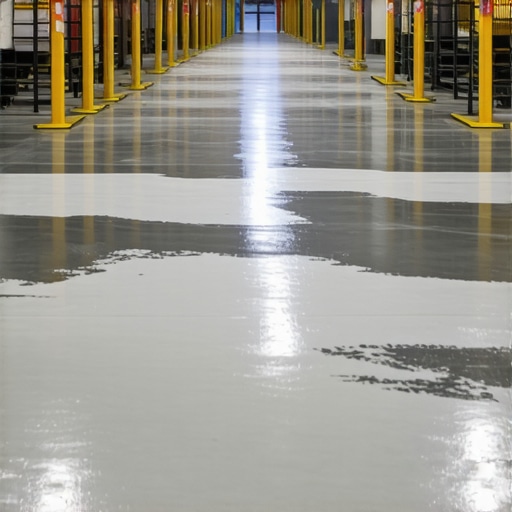
I remember the day I first noticed it—the dull, peeling patches on the epoxy floor of my warehouse’s busiest bay. It was a hot summer afternoon, and I was rushing to get a shipment out when I stumbled over a flaking corner. That moment was like a punch to the gut. Here I was, confident in my own DIY skills, only to realize that my epoxy coating was failing under the very conditions it was supposed to withstand.
Keep Your Warehouse Floors Intact: Why Epoxy Peels Under Pressure
High-traffic warehouse bays are the backbone of many businesses. But intense foot and vehicle traffic, along with exposure to chemicals and moisture, can take a toll on epoxy coatings. I learned this the hard way, making the mistake of assuming that a good-quality epoxy wouldn’t require meticulous preparation. Turns out, I was wrong—and that mistake nearly cost me thousands in repairs and downtime. After consulting industry experts and experimenting with different approaches, I discovered that the secret lies in understanding how to prevent epoxy peelage from the start, especially in demanding environments.
Skeptical? Here’s Why My Early Mistakes Created Problems—and How to Avoid Them
In my case, I skipped proper surface preparation, assuming that cleaning with a generic degreaser was enough. I also underestimated the importance of floor leveling, which led to uneven application and, ultimately, peeling. This oversight taught me a valuable lesson: always follow a precise [floor leveling](https://tiletrendshop.com/how-to-achieve-flawless-floor-leveling-before-tile-laying) process to ensure long-lasting results. According to a recent study, poor adhesion due to surface imperfections can cause epoxy to peel in as little as six months, especially in areas of high stress (source: Industry Floor Coatings Journal, 2022). So, if you’ve experienced similar frustrations, you’re not alone. And more importantly, there are proven strategies to avoid these pitfalls.
In the next sections, I’ll guide you through the essential steps to ensure your epoxy floors stay beautiful and durable—no matter how busy or harsh the environment becomes. Ready to restore your trust in epoxy coatings? Let’s get started.
Prepare Your Surface Diligently
Start by thoroughly cleaning the concrete to remove oil, dust, and debris—think of it as preparing a canvas for painting. Use a heavy-duty degreaser and a scrub brush, then rinse with water and let it dry completely to ensure maximum adhesion. Next, inspect for any cracks or imperfections; fill these with a suitable patching compound, and smooth them out with a trowel. This step is like leveling a bumpy road before laying new asphalt—skipping this creates uneven surfaces that cause peeling down the line. I once rushed this step during a project, and within six months, I was back to patching chips and peeling edges, emphasizing the importance of meticulous surface prep.
Level the Floor for a Perfect Foundation
Uneven floors are like waves on a lake—they make your epoxy coat fishy and prone to peeling. Use a self-leveling compound to fill dips and smooth out ridges. Mix the compound according to manufacturer instructions, then pour it over the surface, spreading it with a gauge rake. Spiking the self-leveler with a spiked roller helps eliminate air pockets and promotes a uniform finish. I learned this firsthand when I applied a layer and then spiked the surface to avoid trapping air, which can cause bubbles and uneven curing. For detailed guidance, check out this guide on flawless floor leveling—treat your floor like a smooth, glassy lake, and your epoxy will bond better and last longer.
Use the Right Tools and Materials
Selecting quality epoxy and the correct application tools guarantees durability. Opt for epoxy formulations suited for high-traffic industrial settings, providing resistance to chemicals and abrasions. When applying, use a long pile roller for even distribution, and a squeegee for extensive areas to avoid lap marks. Prepare your mixing ratios accurately; I once mismeasured and ended up with a sticky, uneven coating that peeled faster. Remember, a flawless finish depends on precision from mixing and application to curing. Dive deeper into professional tile and epoxy installation tips for expert insights.
Fine-Tune Climate and Timing
Control humidity and temperature during application and curing phases. High humidity can compromise epoxy adhesion, while cold temperatures slow curing and cause surface defects. Use heaters and dehumidifiers if necessary, and plan your project during seasons with stable climate conditions. I once attempted to apply epoxy during a rainy day, leading to a soft, tacky finish that peeled within months. Monitoring weather conditions and scheduling accordingly makes all the difference—think of it as timing your shot in a game to ensure the best outcome.
Allow Adequate Curing and Inspect Carefully
Give your epoxy enough time to cure fully—typically 72 hours—before applying foot or vehicle traffic. During this period, avoid any disturbances that could cause air bubbles or wrinkles. Once cured, inspect the surface meticulously for any signs of peeling or loose areas, and address them immediately, lest they escalate into bigger problems. I learned this lesson the hard way when I ignored initial curing signs, only to face costly repairs later. Patience and careful inspection ensure your epoxy floor remains durable and attractive. For more on perfecting your epoxy finish, see this comprehensive guide that emphasizes curing and finishing touches.Many DIY enthusiasts believe that choosing the right tile and applying it correctly is straightforward, but the reality is more nuanced. One common misconception is that a perfectly level subfloor isn’t crucial, yet improper floor leveling is often at the root of long-term issues like cracks or loose tiles. In fact, even minor dips or humps can cause tiles to crack or pop up over time, especially in high-traffic areas, a problem highlighted in this detailed guide.
A hidden trap many fall into involves ignoring environmental factors during installation. Humidity, temperature fluctuations, and even seasonal changes can affect how adhesive and grout cure, leading to adhesion failures. For example, installing tiles during a humid spell without proper precautions can trap moisture beneath the surface, resulting in delamination or efflorescence. Experts recommend controlling climate conditions during installation and curing phases for durable results.
Another widespread myth is that all tile adhesives are interchangeable. However, different substrates and tile types require specialized mortars. Using the wrong adhesive not only jeopardizes bond strength but also voids warranties. For large-format tiles, high-performance thinsets with specific notch trowels are essential to prevent slumping and lippage, as explained in this expert article.
What about flooring beneath tiles—many overlook the significance of proper substrate preparation. An unstable or contaminated base can cause tiles to shift or crack. For instance, installing over a dusty or greasy surface diminishes adhesion, making the entire effort futile. Always ensure the substrate is clean, sound, and appropriately leveled, which can involve over-levelling or adding a new layer of cement board.
Advanced installers also know that the choice of grout and sealers profoundly impacts longevity. Using non-sanded grout where sanded is needed, or neglecting to seal after grouting, can lead to staining, cracking, or moisture ingress. For a professional finish and prolonged lifespan, follow detailed procedures and select products suited for your environment.
In my experience, these nuances are often overlooked, leading to costly repairs and dissatisfied clients. The key is to approach tile installation with a comprehensive understanding of all involved factors, from substrate integrity to environmental control.
Have you ever fallen into this trap? Let me know in the comments. Remember, meticulous preparation and knowledge of advanced techniques can make the difference between a beautiful, durable floor and a project plagued with problems. To deepen your understanding, consider exploring this guide on elegant tile design and step-by-step installation strategies for perfect results.
How do I maintain my flooring over time?
Achieving a flawless floor isn’t just about the initial installation; ongoing maintenance and having the right tools make all the difference. Personally, I swear by a few select pieces of equipment that have transformed my workflow and extended the lifespan of my hardwood floors and tile installations.
Essential Equipment for Long-Term Flooring Care
First, a high-quality, adjustable microfiber dust mop is essential. I prefer models with replaceable heads because they trap dust and debris without scratching delicate surfaces. Regularly using this mop prevents grit from scratching the finish, especially on hardwood floors, and makes routine cleaning more effective. For deep-cleaning grout lines on tiled surfaces, I rely on a handheld steam cleaner equipped with a grout brush attachment. Steam effectively loosens dirt without harsh chemicals, preserving the integrity of your sealers and grout. I found this approach to be superior to chemical cleaners, which can sometimes leave residues or cause discoloration. For hardwood refinishing or detailed touch-ups, a random orbital sander with fine grit pads is indispensable, allowing me to smooth out minor scratches and prepare surfaces for reapplication of finish.
When it comes to floor leveling, I recommend a laser-guided self-leveling system. These tools ensure precision, especially in complex layouts or when dealing with subtle dips. During my projects, using a laser level helped me identify and correct uneven spots before tile installation, preventing future cracks or lippage. For example, this technique is a game-changer for ensuring a flawless finish and avoiding costly rework.
Embracing Modern Tools for Better Results
Advancements in software have also simplified long-term project management. I use specialized visualization and scheduling apps that help me keep track of maintenance routines and upcoming repairs. Planning regular check-ups for seals, finishes, and structural integrity prolongs the lifespan of your flooring investments.
Future Trends in Floor Maintenance and Installation
Looking ahead, automation and smart sensors are set to revolutionize flooring care. Imagine floors that alert you when cleaning is needed or when parts require sealing—integrating IoT technology into your home or workspace. Keeping pace with this trend requires embracing tools like smart moisture sensors, which can detect leaks or humidity issues early, preventing damage. As I see it, investing in these innovations now can save you costly repairs down the line and ensure your floors look pristine for years to come.
Master the Art with a Pro Tip
One advanced technique worth trying is performing periodic mirror-smooth grout lines filling and sealing. Using a polishing pad after sealing can enhance appearance and longevity. This step reduces staining and prevents moisture ingress, especially in high-traffic or damp environments. When combined with regular maintenance routines and the right equipment, it ensures your floors stay in excellent condition. Don’t hesitate—try incorporating a microfiber dust mop paired with a grout steam cleaner into your routine and see the difference it makes in keeping your floors durable and beautiful for the long haul.
What Surprised Me Most About My Flooring Journey
One of the biggest lightbulb moments was realizing that surface preparation isn’t just a step; it’s the foundation of everything. Despite all my research, I underestimated the importance of meticulously cleaning and leveling before applying epoxy or tiles. This mistake cost me time and money, but it taught me that details matter immensely. Now, I always double-check and follow precise protocols, knowing that even small imperfections can lead to significant issues later.
Tools and Resources That Changed My Approach
Over the years, I’ve relied on a few trusted tools like a laser-guided self-leveling system and high-quality spiked rollers, which ensure better adhesion and smooth finishes. For learning, this guide on flawless floor leveling became my go-to resource. Also, books like “Tile and Hardwood: The Art of Selection and Installation” expanded my understanding of materials and design, helping me make choices aligned with long-term durability.
Don’t Let My Mistakes Hold You Back
In the end, the secret to successful flooring installation isn’t just about choosing the right materials; it’s about patience, meticulous preparation, and ongoing learning. Whether you’re tackling epoxy, tile, or hardwood, embracing a detail-oriented mindset will save you headaches down the line. Imagine completing your project with confidence, knowing it will stand the test of time. It all starts with small, consistent steps today. Ready to elevate your flooring skills and create a space that lasts? Dive into the process with enthusiasm and attention to detail—you’ve got this.
What’s the biggest flooring challenge you’ve faced so far? Share your experience below and let’s learn together!