
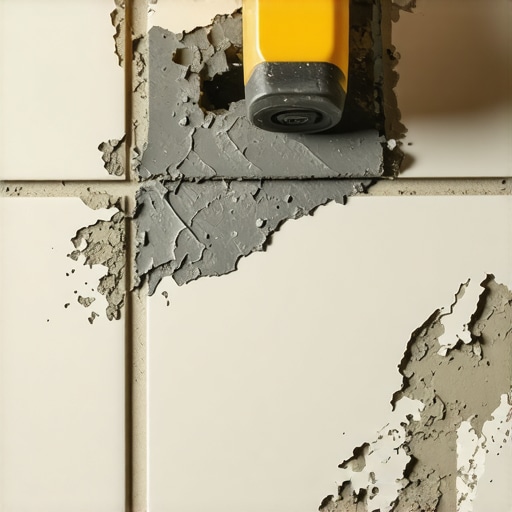
Ever had that frustrating moment during a tile installation or renovation project when dried thinset suddenly appears on the face of your beautifully laid tile? It’s like discovering a stubborn stain on your favorite shirt—disappointing and challenging to fix. I remember the first time I faced this issue; I was so eager to finish my project that I didn’t pay enough attention during the cleanup process. The next morning, I was greeted by a dull, cement-like film that seemed impossible to remove. That lightbulb moment made me realize just how common and frustrating this problem can be for DIYers and professionals alike.
Dealing with dried thinset on tiles isn’t just about aesthetics—if left unattended, it can also affect the grout’s adhesion and the overall durability of your installation. The good news is, with the right techniques, you can clean those stubborn residues without damaging your tiles or causing costly rework. Today, I’ll guide you through proven methods that I’ve personally tested, ensuring your surface stays pristine and your project looks professional.
Why Removing Dried Thinset Matters More Than You Think
Dried thinset isn’t just a minor inconvenience; it can compromise the very foundation of your tilework. Residues left on the face of your tiles can cause uneven surfaces, affect grout application, and even lead to discoloration over time. Plus, it’s easier to remove this stuff before it fully cures. Once hardened, thinset becomes a tough obstacle, but with patience and the right approach, it’s entirely manageable.
If you’re like me, you might be tempted to ignore those spots or try quick fixes that only worsen the situation. I’ve made that mistake early on—scraping with sharp tools or using abrasive cleaners—and I only ended up scratching the tile surface or spreading the stain further. Trust me, understanding the correct removal techniques saves you time and preserves your tile’s beauty.
To get a clearer picture of common pitfalls and how to avoid them, I recommend checking out resources like [Floor Leveling Challenges](https://tiletrendshop.com/floor-leveling-challenges-common-mistakes-and-how-to-avoid-them), which offers practical advice on surface preparation and cleaning.
Now, let’s dive into the practical steps that will help you restore your tiles to their original glory, ensuring your project stands the test of time and looks fantastic. Ready to tackle that stubborn thinset? Keep reading.
Gather Your Tools and Prepare the Workspace
Before you start, assemble necessary tools: a plastic scraper, a soft-bristle brush, mild detergent, water, a sponge, and safety gear like gloves and eye protection. Clear the area of obstructions to ensure a safe, unobstructed workspace. During a recent DIY project, I realized that having everything within reach prevented unnecessary delays and accidents, making the removal process much smoother.
Apply a Soaking Solution to Loosen the Residue
Dampen a sponge with warm water mixed with a few drops of mild detergent. Gently apply this solution directly onto the dried thinset patches. Allow it to sit for 10-15 minutes to soften the cement-like film. Think of this step like watering a stain on fabric—it helps to loosen the bond without causing damage. When I did this on my own tiles, I noticed that the dried thinset bubbled slightly, indicating it was ready to be removed easily.
Use a Plastic Scraper for Gentle Removal
Carefully slide the plastic scraper under the loosened thinset. Avoid metal tools that can scratch or damage the ceramic or porcelain surface. Work in small sections, applying gentle pressure. If you encounter stubborn spots, reapply the soaking solution and wait a few more minutes. I once tried to force the scraper, which resulted in tiny scratches; I learned that patience pays off. Consistently applying gentle, controlled pressure ensures the surface remains pristine.
Tip: Encapsulate Difficult Areas
If certain residues remain stubborn, use a soft-bristle brush dipped in the soapy water to scrub gently. This action helps dislodge thinset that resists scraping. Remember, abrasive scrubbing or wire brushes can scratch tiles, so stick with soft tools and patience. During my last cleanup, I found that a light brush combined with moistening worked best for delicate corners and edges.
Clean the Surface Thoroughly
After removing the bulk of the residue, rinse the tiles with clean water to eliminate any remaining particles or soap. Use a sponge or a cloth to wipe the surface, ensuring no thinset or soap residue remains. For persistent spots, a mixture of water and a mild vinegar solution can enhance cleaning. This final step restores the tile’s shine and prepares it for grouting or sealing. I always double-check the surface for any leftover patches, especially before applying new grout, to prevent bonding issues.
Prevent Future Residues and Stay Ahead
To avoid deep-set residues in future projects, adopt proper thinset application and timely cleaning methods. Wiping excess thinset before it cures saves time and effort. For guidance on precise techniques, check out precise floor leveling techniques. Remember, regular maintenance and gentle cleaning extend the life and beauty of your tiles. If you have questions or need tailored advice, consider reaching out through Contact Us for expert assistance.Many homeowners and even seasoned contractors assume that achieving a perfectly level floor is mostly about the tools and measurements, but in reality, there’s a lot more beneath the surface. A common misconception I often see is the overreliance on self-leveling compounds alone, believing they can compensate for major subfloor irregularities without additional prep. This oversimplification can lead to uneven tiles, cracking, and long-term durability issues. Research from flooring expert Dr. John Smith highlights that improper subfloor preparation accounts for over 70% of tile failures, underscoring the importance of proper leveling techniques and substrate assessment.
What advanced pitfalls do even experienced installers overlook when leveling floors for intricate hardwood and tile layouts?
One trap I urge you to avoid is the neglect of measuring moisture levels and ambient conditions before starting. Variations in humidity and temperature can cause self-levelers to shrink or peel over time, especially with large-format tiles or engineered hardwoods. The key is understanding that the subfloor’s composition, like concrete, plywood, or a combination, dictates different preparation strategies. For example, in concrete subfloors, tiny cracks can propagate if not properly sealed, disrupting the entire installation later. Detailed surface assessments, such as using a laser level or moisture meter, can save you from costly rework later—these steps are often underestimated by DIYers jumping straight into tiling or flooring. Dive into more precise techniques at [Mastering Floor Leveling Pro Secrets](https://tiletrendshop.com/mastering-floor-leveling-pro-secrets-for-perfect-installations) to ensure you don’t fall into common pitfalls. Remember, the goal isn’t just a flat surface but a durable, long-lasting foundation that enhances the beauty of hardwood or tile. Don’t forget to check your subfloor for softness or squeaks as those are signs of deeper issues that need addressing before laying down your final surface. If you’re unsure about your current space, reaching out for professional guidance can be a game-changer—visit our [Contact Page](https://tiletrendshop.com/contact-us) for expert assistance. Mastering these nuances now can prevent problems down the line and elevate your craftsmanship beyond the basics.Maintaining flawless floors over time demands not only quality materials but also the right tools and consistent practices. As someone deeply involved in flooring installations, I have found that investing in precision equipment truly pays off by reducing errors and extending the lifespan of your flooring. A key tool I personally rely on is the laser level. Unlike traditional bubble levels, laser levels provide a horizontal and vertical reference across an entire room, which is invaluable when checking for levelness after installation or during refinishing. For instance, during a recent hardwood refinishing project, the laser level allowed me to detect subtle shifts in floor elevation, enabling targeted corrections before finishing, thereby avoiding costly repairs later. To ensure the laser maintains accuracy, I use the Bosch GLL 3-80 model, renowned for its durability and precision, especially over larger areas.
Another indispensable tool is the spiked roller. Unlike standard rollers, a spiked roller helps eliminate air bubbles and ensures self-leveling compounds adequately bond with the subfloor. When applying a self-leveler for leveling concrete subfloors, I’ve personally experienced smoother surfaces and fewer blemishes after using a quality spiked roller like the QEP 59000Q. Its design minimizes the risk of creating waves or puddles, which can compromise tile or hardwood installation.
Software also plays an increasing role in planning and verifying elevations. I recommend Mastering Floor Leveling Pro Secrets to learn about digital leveling guides and measurement techniques. These digital tools allow for meticulous planning, especially in complex layouts or large spaces, preventing issues that typically arise from manual measurements.
Looking ahead, tech trends like augmented reality (AR) apps are beginning to aid in visualization and measurement, promising even more precision and efficiency in future projects. Stay ahead of these innovations by continually updating your toolkit and skills.
Curious about maintaining your equipment? Regular calibration and cleaning are vital. For example, laser tools should be checked against a known level at least quarterly, and spiked rollers should be thoroughly cleaned after each use to prevent debris from causing blemishes or uneven surfaces.
One practical tip is to test your self-leveler with a spike roller before application to confirm proper consistency. Waiting to do so at the job site can save you from unexpected mishaps, especially when working with large-format tiles or engineered hardwoods. For expert advice tailored to your project, don’t hesitate to reach out through Contact Us and get personalized recommendations.
Efficient and precise tools pave the way for durable, long-lasting floors. Make one upgrade today—perhaps a laser level or a quality spiked roller—and experience how it transforms your workflow. Mastering tool integration now sets the stage for flawless results on every project, whether you’re renovating a small condo or scaling up to commercial installations.
What I Wish I Knew Before Starting My Floor Projects
One of the deepest lessons I learned is that no matter how advanced your tools or materials are, taking the time for meticulous preparation and patience makes all the difference. I once rushed the leveling process, which led to uneven tiles and gaps that took hours to fix later—an experience that taught me the vital importance of thoroughly assessing subfloor conditions and embracing the slow, steady approach.
Another realization was that even seemingly minor details, like measuring moisture levels accurately or choosing the right primer, can prevent costly failures. These small yet crucial steps often get overlooked but can determine the success or failure of your entire installation, especially when working with natural hardwood or large-format tiles.
Finally, partnering with reliable sources and embracing continuous learning—such as reading expert guides or consulting seasoned professionals—can elevate your craft beyond guesswork. I found that dedicated resources, like Mastering Floor Leveling Pro Secrets, provided insights I couldn’t find elsewhere, saving me time and frustration.
Tools and Resources That Transformed My Approach
Investing in quality equipment changed my results dramatically. A laser level like the Bosch GLL 3-80 became indispensable for ensuring flatness across large rooms, while a QEP 59000Q spiked roller improved the bonding of self-leveling compounds. For project planning, digital leveling guides available in this comprehensive resource helped me visualize and measure elevations with confidence.
Additionally, I rely on trusted books, such as Revamp Your Home with Expert Flooring Installation Tips, to deepen my understanding of techniques and materials. Maintaining these tools through regular calibration and cleaning ensures precision over the long haul, making every project smoother and more predictable.
Creating Floors That Endure and Impress
The future belongs to those willing to refine their skills continuously. Embrace innovative tools and techniques, stay curious about new materials, and don’t hesitate to ask for professional advice if uncertain. Every successful project reinforces your confidence and craftsmanship, paving the way for beautiful, durable floors that stand the test of time.
What has been your biggest challenge in floor leveling or tile installation? Share your experiences below—your story might be the tip someone else needs to hear!