
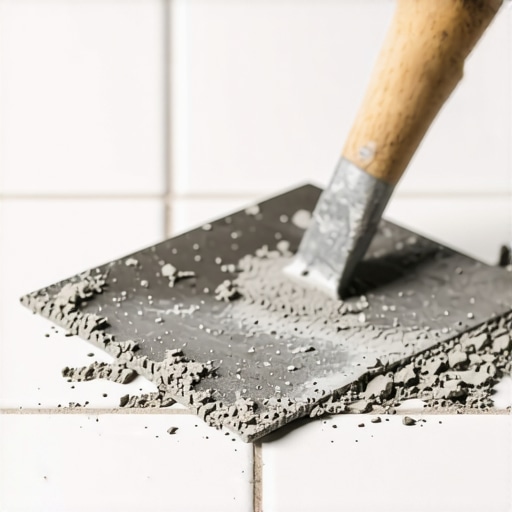
I remember the first time I spent hours laying tiles only to find that the thinset wasn’t bonding properly. The tiles moved, shifted, and I felt that sinking feeling of doubt creeping in. It was a lightbulb moment—what I thought was a simple process was actually haunted by misconceptions, especially the infamous Trowel Notch Myth. Maybe you’ve faced something similar—spreading thinset, expecting that perfect bond, but ending up with loose tiles or uneven surfaces. This frustration can turn anyone into a DIY disaster.
Why Your Thinset Seems To Fail—And What You Can Do About It
Today, I’m diving into **the real reason** your tile adhesive isn’t grabbing, based on my personal experiences and solid research. It turns out, many of us—myself included—fall for the myth that using a specific trowel notch size guarantees success. The truth? There is no one-size-fits-all. If you’ve been following the same trowel pattern with the expectation of flawless adhesion, I promise you’re not alone. And spoiler alert: that might be why your tiles are acting stubborn.
Is the Trowel Notch Myth Actually Worth the Hype?
I used to think that bigger notches meant better bonding. It sounds intuitive—more mortar, better grip, right? Wrong. Early on, I made the mistake of grabbing the largest notch I could find, thinking it would ensure maximum coverage. Instead, I ended up with thin spots, air pockets, and loose tiles. Ever read about the importance of proper coverage? It’s backed by experts — according to a study on tile installation standards, consistent coverage is critical for durability, and that doesn’t come from just choosing a bigger notch. You can read more on precise floor leveling techniques to ensure a solid surface.
So, what *really* matters? It’s about understanding the substrate, the type of tile, and applying the correct trowel size for the job—not just the biggest or most popular pattern. In the next sections, I’ll walk you through straightforward steps to fix common thinset bonding issues, so your creation stands the test of time. Ready to get your tile project back on track? Let’s do this.
Prepare Your Surface Properly Before Applying Thinset
Start by inspecting the substrate to ensure it’s clean, dry, and level. Use a putty knife to scrape off old adhesive, dirt, or debris. If the floor has uneven spots, address them with a self-leveling compound, following the manufacturer’s instructions exactly. When I did my own floor, I learned that a smooth, clean surface vastly improved thinset adhesion, preventing future loose tiles. For detailed techniques on leveling, check out this guide.
Choose the Right Trowel Size for Your Tile
Match the Notch to Tile Size and Substrate
For small to medium tiles (up to 12 inches), a 1/4-inch square-notched trowel usually works best. Larger tiles or heavy porcelain require a 3/8-inch or 1/2-inch notch. When I first started, I thought bigger notches meant better grip—until I saw air pockets forming under the tiles. Proper coverage depends on matching the trowel size to your tile and substrate. Remember, a thicker layer isn’t always better; it can cause uneven bonding. Learn more about choosing the correct trowel here.
Apply Thinset with a Precise Technique
Spread the thinset onto your substrate using the notched side of your trowel at a 45-degree angle, creating a uniform grid. Then, back-butter the tiles—pressing thinset onto the back of each tile before laying them down. I made this mistake early on, and the tiles only partially bonded, leading to looseness. Consistent pressure when pressing tiles into place helps eliminate air gaps and ensures full coverage. Don’t rush this step; take your time to press and wiggle each tile gently. For a detailed walk-through, visit this article.
Use Correct Spacing and Leveling Techniques
Insert spacers between tiles to maintain consistent grout joints. To prevent lippage—uneven heights—use a Leveling System or a straightedge across the tiles, adjusting as needed. I once skipped this, and my grout lines ended up crooked, making the whole floor look amateurish. Regularly check with a level or a straightedge and tap tiles lightly to align them. Proprietary leveling systems, like wedge-and-clip, can save time and produce professional results. More about proper leveling can be found here.
Allow Adequate Curing Time and Maintain Conditions
After laying your tiles, let the thinset cure undisturbed for at least 24 hours. Keep the area free of foot traffic, and maintain good ventilation to prevent rapid drying or cracking. When I hurried, some tiles shifted or didn’t bond well, which trailed me into future fixes. Remember, patience now saves effort later. For tips on proper curing and avoiding common pitfalls, see this guide.When it comes to flooring, many amateurs and even seasoned DIYers focus on the obvious—choosing the right material or mastering basic techniques. However, there’s a subtle yet critical nuance that often trips people up: the assumption that a perfectly level subfloor guarantees flawless installation. In reality, ignoring the intricacies of subfloor preparation can undermine even the most meticulous work.
Contrary to popular belief, ensuring a flat surface isn’t just about filling in low spots or sanding down high points. The moisture content, material composition, and structural stability of the subfloor play a vital role in the long-term success of your flooring. For instance, a concrete slab with high moisture levels can cause hardwood or tile to warp or cup over time, even if it appears perfectly level initially. Experts recommend conducting comprehensive moisture testing before installation, as highlighted in studies on subfloor preparation best practices.
Why Do So Many People Overlook the Subtle Signs of Subfloor Problems?
Many installers rely solely on visual cues or basic level checks, missing hidden issues like minor cracks, weak spots, or residual moisture that can lead to major headaches down the line. The superficial focus often results in costly repairs, re-installations, or rapid deterioration of the floor covering. A comprehensive approach involves inspecting the subfloor’s integrity, checking for moisture using appropriate meters, and understanding the material’s behavior over time. This attention to detail is crucial, especially when working with engineered hardwood or tile, which demand stricter substrate conditions.
Furthermore, overlooking the importance of expansion gaps and proper sealing around the edges can cause subfloor movement to translate into visible lippage or cracking in the finished floor. Properly addressing these nuances requires experience and an understanding of how environmental factors influence the substrate’s performance over time. For a detailed guide on this topic, visit this comprehensive resource.
Are Level Floors Truly Level or Just Noticed as Such?
In high-end flooring installations, the distinction between a visually level surface and a geometrically true plane is often overlooked. Small deviations—less than 1/8 inch over a 10-foot span—can cause uneven wear, cracking, or grout line misalignment. Advanced professionals use laser levels and digital measurement tools to detect these subtle discrepancies, ensuring a truly flat and stable foundation. Remember, a floor that looks good at a glance might still harbor hidden flaws that compromise its longevity.
Integrating these advanced considerations into your flooring projects distinguishes a standard installation from a professional-grade job. My own experience taught me that spending extra time on subfloor evaluation and moisture management pays off in durable, beautiful results. Want to refine your skills further? Check out this guide to choosing the right hardwood or common flooring mistakes to avoid.
Keep Your Flooring Working Smoothly: Tools and Maintenance Tips
Maintaining your flooring over the long term requires a combination of the right equipment and proactive care. I rely on specific tools that have proven their worth in ensuring flawless installation and enduring beauty. One such essential is a high-quality laser level. Unlike traditional bubble levels, a laser level projects straight lines across large surfaces, making it invaluable for checking floor flatness during leveling or post-installation assessment. For example, using a leveling pin kit in conjunction with a laser level allows for precise adjustments, preventing future lippage or uneven grout lines. This combination has become a staple in my toolkit, especially when working on larger rooms.
Another cornerstone tool is a moisture meter designed specifically for subfloors. Moisture issues can silently undermine your flooring, leading to buckling or warping over time. I personally prefer pin-type meters because they provide accurate readings even through thick concrete slabs. Regular use of a moisture meter not only preemptively detects problems but also ensures the substrate’s conditions meet industry standards, thus safeguarding your investment.
For cleaning and minor repairs, I recommend an oscillating multi-tool fitted with a carbide blade. It’s perfect for removing old adhesive residues, smoothing out rough edges, or trimming down tiles during adjustments. Its versatility saves time and reduces the risk of damaging adjacent materials. When installing hardwood floors, I also keep a drum sander and edger handy for refinishing or correcting imperfections, prolonging the material’s lifespan and maintaining aesthetic appeal.
Looking ahead, the trend in flooring maintenance is leaning toward smart technology. New moisture sensors connected via Wi-Fi can monitor humidity levels in real-time, alerting homeowners or contractors about adverse conditions before they cause damage. As these innovations become more affordable and reliable, I believe integrating digital solutions into routine maintenance will become standard practice — a real game-changer for DIY enthusiasts and professionals alike.
Curious about how to keep your hardwood floors shining year after year? Applying a high-quality, science-backed hardwood floor care product can dramatically extend the time between refinishing sessions. For expert tips, check out this guide.
How do I maintain my flooring tools and long-term results? Regular cleaning of your equipment is crucial. For instance, thoroughly cleaning your laser level after every use prevents dust buildup that can distort measurements over time. Similarly, calibrating your moisture meter annually ensures ongoing accuracy. Proper storage — keeping tools in a dry, temperature-controlled environment — further extends their lifespan and reliability.
Investing in quality tools isn’t just an upfront expense; it’s about safeguarding your flooring investment for years to come. Remember, a well-maintained tool kit combined with consistent care can make complex projects feel manageable and ensure your floors continually look their best. To stay ahead of potential issues, consider adopting moisture sensors or advanced leveling systems, which are rapidly becoming industry standards. For an advanced tip, try integrating a laser level with a digital inclinometer — it provides unmatched precision, especially over large or uneven spaces. Want to learn more? Visit this resource for detailed guidance on perfecting your leveling technique.
The Hardest Lesson I Learned About floor leveling,hardwood floors,tile,flooring installation
One of my biggest realizations was that perfection isn’t achieved by following a set of rules rigidly but by understanding the subtle interplay between materials, environment, and technique. I once underestimated the importance of moisture testing my slab before laying hardwood, which led to buckling months later. That experience taught me to always prioritize substrate conditions, reinforcing the value of thorough prep over rushing into installation.
Three Myths About floor leveling,hardwood floors,tile,flooring installation That Held Me Back
- The bigger the trowel notch, the better the bond. I believed this until I saw tiles with air pockets due to excessive mortar, weakening the adhesion.
- A perfectly level floor guarantees a flawless finish. In reality, minor high spots can cause lippage; thorough compensation and shimming are essential.
- You don’t need precise moisture control if the floor looks dry. Moisture issues can be hidden, leading to damage over time—testing is non-negotiable.
What Experts Won’t Tell You About floor leveling,hardwood floors,tile,flooring installation
Many seasoned professionals know that the smallest imperfections can compromise the entire project. They often use laser levels and moisture meters not just for compliance but as tools to ensure long-term durability. The real secret? Investing in quality tools and understanding environmental influences can save time, money, and frustration. For insights into elevating your flooring projects to a professional standard, explore this detailed guide and learn from the best practices shared by industry veterans.
Keep Your Flooring Working Smoothly: Tools and Maintenance Tips
My toolkit now includes a laser level that projects precise lines, making flatness checks effortless. A reliable moisture meter has become my best friend, catching hidden issues before they escalate. I also swear by a quality oscillating multi-tool for quick repairs—keeping these tools clean and calibrated ensures their accuracy over time. Going forward, integrating smart sensors for moisture monitoring is a game-changer, allowing me to act before problems develop. Maintaining your tools with care isn’t just about longevity; it’s about guaranteeing flawless results every time. If you’re interested in time-tested techniques and gear recommendations, visit this resource for expert advice.