

I remember the moment vividly. I was in my new bathroom, excited to finally see my tile project finished. I reached out to run my hand over the freshly laid surface, and suddenly, I felt a lumpy, uneven patch. Panic crept in. Had I unwittingly installed a bad tile job? It was a lightbulb moment—realizing I needed to learn how to spot the early signs of a poor installation before the grout settled permanently. Because, trust me, once grout dries, fixing mistakes becomes a costly nightmare.
Why This Matters: The Hidden Costs of Overlooking Tile Quality
Let me be honest—I’ve made my share of mistakes early on, and one of the biggest was not recognizing trouble signals during installation. That initial oversight cost me extra time, money, and some serious frustration. The truth is, a bad tile job can lead to cracked tiles, uneven surfaces, and even structural issues if left unchecked. According to industry experts, many common flooring mistakes, like improper leveling, only become apparent after the grout dries, making repairs more complex and expensive. Good preparation and keen observation during the initial stages are your best defenses.
Will I Be Able to Spot Problems Before Grout Starts to Cure?
Many people, myself included, have fallen victim to rushing the process or relying solely on the contractor’s word. Early on, I ignored subtle signs like uneven spacing or inconsistent tile adhesive application, which later turned into ugly, unfixable flaws. I learned the hard way that understanding those early warning signs is crucial. Fortunately, you don’t have to repeat my mistakes. With a little know-how, you can catch issues when they are still manageable. Want to know exactly what to look for? Keep reading—I’ll guide you through the key indicators and simple steps to assess your tile work effectively. Curious if your project shows these warning signs? Check out our comprehensive guide on common flooring installation mistakes to avoid future issues.
Now, let’s explore how to visually and tactilely inspect your tiles and subfloor area. With the right approach, you’ll be able to tell if your tile job is headed for trouble or if it’s on the path to long-lasting beauty. Ready to become your own inspector? Let’s get started!
.
Assess Your Subfloor Thoroughly
Before laying any tile, inspect your subfloor meticulously. A common mistake the first time I attempted tiling was skipping this step, leading to tiles cracking later. Use a long level or straightedge to spot dips or humps, as unevenness can compromise the entire surface. If you notice irregularities, plan for leveling with a self-leveling compound. To ensure an even, durable foundation, I recommend checking the flatness and stability, addressing any issues before proceeding. For expert guidance, see our installation mistakes guide.
Prepare and Level the Surface
Choose the Right Leveling Method
Depending on your subfloor’s condition, select the appropriate leveling technique. Concrete subfloors often require a self-leveling compound, while plywood may need additional reinforcement or patching. When I faced a bumpy concrete slab, I used a trowel to spread the self-leveler, but I struggled with air bubbles. To avoid this, spike the mixture with a spiked roller to eliminate voids. For flawless results, follow proper mixing ratios and application procedures detailed in our flawless leveling tutorial.”}
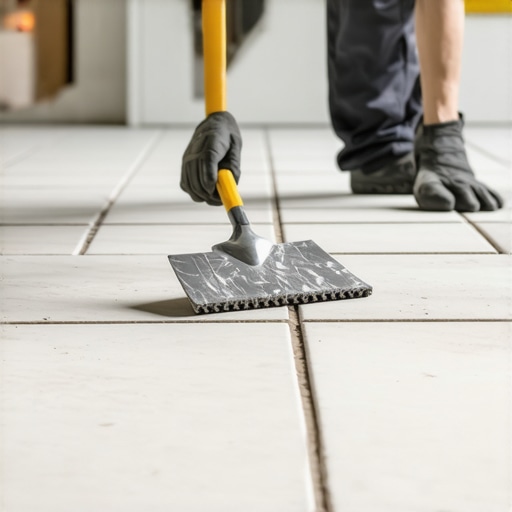
Plan Your Tile Layout Carefully
Visual planning can prevent awkward cuts and uneven patterns. I laid out tiles on the floor without testing the pattern, which resulted in tiny slivers along edges. To avoid this, measure your room and create a detailed layout, using spacers and chalk lines. Consider starting from the center and working outward to maintain symmetry. Remember, a well-planned layout minimizes awkward cuts and enhances visual appeal. For tips on selecting tile styles that complement your hardwood floors, see design inspiration.
Applying Thinset with Precision
Correct thinset application is vital. I once applied too thick a layer, which caused tiles to slide and shift. Use a notched trowel appropriate for your tile size—larger tiles need a bigger notch to ensure proper adhesion. Spread the thinset evenly in small sections, pressing the tile in with a twisting motion to achieve full contact. Check regularly for levelness, making adjustments as you go. A consistent technique here can save hours of correction later. For more on mixing and applying thinset, visit this detailed guide.
Utilize Proper Spacing and Grouting
Even grout lines create a professional finish and prevent water seepage. I once ignored uniform spacing, resulting in crooked lines that distracted the eye. Use spacers at each joint and check for consistency in spacing, especially around edges and corners. After laying the tiles, let the thinset cure fully before removing spacers, then carefully apply grout, pressing it into joints with a rubber float. Wipe excess grout with a damp sponge in a diagonal motion. Proper sealing afterward can prevent staining and damage. For sealing tips, read our sealing techniques article.
Final Checks Before Grout Coursing
Once grout is applied, inspect for any unevenness or lippage. Use a straightedge or a level across different sections; if discrepancies exist, consider grinding high spots or reapplying grout for low areas. A thorough inspection ensures longevity and a neat appearance. When I made my first tile mistake, a simple tape test revealed uneven surfaces that I corrected immediately, saving me future headaches. For detailed surface assessment methods, consult our inspection tips.When it comes to flooring, many homeowners and even professionals often believe they have a grasp on the basics, but beneath the surface lie sophisticated pitfalls. One common misconception is that meeting the general specifications guarantees a perfect result. For example, adhering to the industry-standard 1/4-inch expansion gap or following typical leveling procedures might seem sufficient, but small oversights here can cause long-term issues like buckling or uneven surfaces. Advanced practitioners understand that nuances in subfloor conditions, such as moisture content or substrate stability, demand meticulous attention. Experts like those documented in our floor leveling guide emphasize that proper assessment of these factors can prevent costly fixes later.
A pivotal yet often overlooked detail is the importance of fiber reinforcement in self-leveling compounds. Many installers assume that pouring and spreading the mix is enough, but without proper reinforcements like fibers or additives, the surface can develop micro-cracks over time, compromising durability. As detailed in industry studies, such as one from the advanced leveling techniques article, integrating reinforcement improves crack resistance and ensures a long-lasting floor.
Turning to tile installation, a prevalent myth is that applying excessive thinset ensures better adhesion. In my experience, this often leads to uneven coverage, resulting in lippage and compromised aesthetic. Instead, mastering the correct trowel notch size and application method is vital. Over-application not only wastes material but can also cause the tiles to slide during setting, creating inconsistent joints. Advanced installers advocate for precise, thin application coupled with sponging out air pockets—details I cover extensively in our thinset application tutorial.
For hardwood floors, a significant mistake is neglecting the importance of specialized acclimation routines. While most recognize that wood must equilibrate with indoor humidity, few realize the nuance of differences among species. For example, Brazilian Cherry is more susceptible to rapid color change and warping if not acclimated correctly, which contradicts the common belief that all hardwood behaves similarly. According to research from floor manufacturing experts, understanding species-specific characteristics and ensuring proper humidity levels can prevent gaps, cupping, or warping. Check out our hardwood refinishing insights for more detailed guidance.
Another overlooked nuance concerns floor leveling in scenarios involving radiant heat systems. Conventional leveling approaches sometimes omit the critical step of verifying the compatibility of subfloor temperature with leveling compounds, leading to improper curing or delamination. The experts at installation success stories stress the importance of pre-warming the substrate, especially in colder climates. Failing to do so traps moisture or causes uneven setting, which can be disastrous for the integrity of the finished floor.
In sum, mastering flooring involves more than just following standard procedures. It requires a deep understanding of subtle variables—from substrate properties and material behaviors to application techniques—that influence the longevity and aesthetics of your install. Incorporate these insights into your projects, and you’ll avoid the typical pitfalls that compromise quality. Have you ever fallen into this trap? Let me know in the comments.
Keeping your floors in top shape requires not only careful installation but also the right tools and ongoing maintenance routines. As someone who has tackled various flooring projects, I can attest that investing in quality equipment significantly extends the lifespan of your floors. For leveling, a high-grade spiked roller is indispensable. I personally rely on a steel-spiked roller from ProLevel Tools; its robust construction ensures that self-leveling compounds bond properly by expelling trapped air, which prevents uneven surfaces and cracks. Regularly spiking the leveling compound after pouring guarantees a durable, flat finish, aligning with our techniques for flawless surfaces.
In the realm of tile installation, a high-quality notched trowel tailored to your tile size makes a monumental difference. I prefer the MARSHALLTOWN SmartyPants Trowel because its ergonomic handle reduces fatigue during prolonged use, and the precise notch sizes—ranging from 1/4″ to 1/2″—assist in applying just the right amount of thinset. This not only streamlines the process but also ensures maximum adhesion, reducing the risk of lippage and grout cracking over time. When applying thinset, I recommend spreading it in small sections and using a consistent technique—an essential step for professional-quality results.
Maintaining hardwood floors involves more than just sweeping. To preserve their beauty, I equip myself with a microfiber mop, which traps dust without scratching the surface. For deeper cleaning, I use a specially formulated hardwood floor cleaner like Bona Hardwood Floor Cleaner—it’s pH-neutral and leaves no sticky residue, unlike generic products. Regularly using such high-quality solutions prevents the buildup of dirt and grime that can deteriorate the finish. Pay special attention to humidity levels with a reliable hygrometer; fluctuations can cause wood to expand or contract, leading to gaps or cupping. Implementing a humidifier in dry seasons and a dehumidifier during humid months maintains a stable environment, extending the life of your hardwood, in line with expert advice in our hardwood floor care.
How do I maintain my flooring tools and ensure long-term results?
Proper maintenance of your equipment is crucial for longevity. After each use, thoroughly clean your notched trowel and spiked roller with warm water and a brush to remove any residual adhesive or leveling compound. Dry them immediately to prevent rust, especially if you’re using steel tools. Sharpen or replace worn notched edges to keep thinset application uniform. For cleaning large surface tools like mops and vacuum attachments, follow manufacturer instructions for longevity. Investing in these routine maintenance steps keeps your tools performing optimally, saving you money and effort in future projects.
Looking ahead, the trend leans toward incorporating smart technology in maintenance routines. Devices like digital hygrometers with data logging can help monitor humidity fluctuations and predict areas prone to expansion or contraction. Additionally, innovative tools with ergonomic designs reduce user fatigue and improve precision, making DIY projects more accessible. By staying informed about the latest tools and practices, you can elevate your flooring outcomes from good to exceptional.
If you’re ready to take your skills a step further, I highly recommend trying out the spiked roller technique for ensuring impeccable self-leveling results. It’s a simple yet game-changing tip that pays off in the durability and appearance of your floor. Remember, consistent upkeep and quality tools are the foundation of long-lasting flooring—don’t overlook them on your next project!
The Unseen Details That Changed My Approach to Flooring
One of the most valuable lessons I discovered was the importance of patience and preparation. Rushing through subfloor inspections or ignoring small imperfections often led to costly mistakes down the line. Now, I always double-check flatness and moisture levels, knowing that these seemingly minor steps are the foundation of a successful project.
I also realized that understanding the material nuances makes a huge difference. For example, not all hardwood species behave the same under humidity changes, and choosing the right type can save years of frustration. This insight pushed me to do thorough research before selecting the perfect flooring for each space.
Another lightbulb moment was mastering the art of joint spacing. Proper grout lines not only look professional but also prevent water seepage and damage. I learned to trust high-quality spacers and to measure meticulously—small details that yield big results.
Finally, I uncovered that ongoing maintenance and tool care are vital. Regularly cleaning and sharpening tools ensures precision and durability, which ultimately affects the quality of each project. These lessons have transformed me from a DIY enthusiast into a confident installer.
Tools and Resources That Elevate My Craft
For flawless results, I rely on a few key tools I trust deeply. A high-quality spiked roller from ProLevel Tools helps eliminate air bubbles in self-leveling compounds, ensuring a perfectly flat surface every time. Pairing that with a versatile notched trowel like the MARSHALLTOWN SmartyPants has streamlined my thinset application, resulting in stronger, more even adhesion.
When it comes to information, I’ve found that expert guides on mastering floor leveling are invaluable for tackling complex projects. Additionally, my go-to source for tile design inspiration and trends is trend-focused resources that keep my work current and appealing.
Personally, I also trust brands like Bona Hardwood Floor Cleaner for regular maintenance, ensuring my floors stay pristine over decades. Keeping my tools and materials in top shape isn’t just about efficiency—it directly impacts the longevity and beauty of my work.
Let Your Floors Inspire Your Next Move
Remember, every successful flooring project begins with a mindset geared toward learning and growth. Your dedication to mastering these details can turn a simple space into a masterpiece that lasts for generations. Don’t be afraid to experiment, measure twice, and refine your technique. With patience and the right resources, you can elevate your home and your skills to new heights.
What’s the biggest flooring lesson you’ve learned through your projects? Share your story below—I’d love to hear about your experiences and tips!
,