
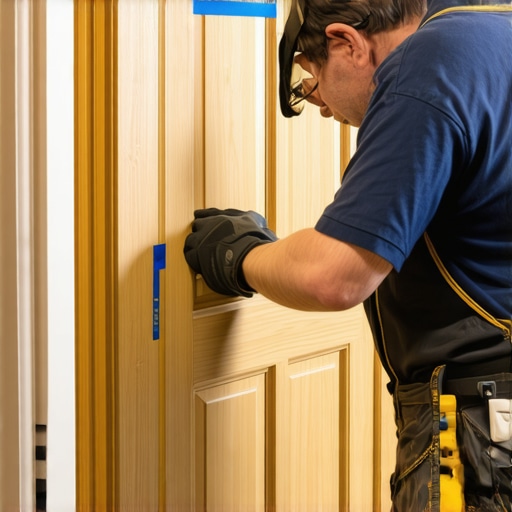
It was late one evening when I realized I had made a costly mistake—trying to cut hardwood flooring without the right guide. The saw slipped just enough to splinter the edge, and I knew I’d have to start over unless I found a better way. That lightbulb moment led me to discover the Blue Tape Trick, a simple yet effective method that transformed my approach to doorway cuts. If you’ve ever wrestled with splintered edges or uneven cuts, you’re not alone. Many DIYers and pros alike experience these frustrations, especially when working with hardwood or tile floors.
The Secret to Cutting Hardwood Doorways Like a Pro
The key problem I faced was how to keep the saw blade from splintering the delicate surface of hardwood or tile during cuts. Traditional guides often leave you with rough edges or require extensive sanding afterward. But what if I told you there’s a straightforward solution that not only prevents splintering but also makes your cuts cleaner and more precise? That’s where the Blue Tape Trick shines. By applying painter’s tape along the cut line, I found I could significantly reduce splintering and improve accuracy. This simple step acts as a barrier, holding the wood fibers in place as you saw.
Now, I’ll walk you through how I’ve perfected this method and how you can do the same. Whether you’re installing new floors, replacing a doorway, or doing a quick repair, this trick is your new best friend. Plus, it’s super affordable and easy to do on the spot. For a thorough understanding of preparing your subfloor and ensuring a perfect finish, you might want to explore [floor leveling techniques](https://tiletrendshop.com/the-ultimate-guide-to-floor-leveling-for-a-perfect-finish). And if imperfections in your subfloor are giving you grief, that’s a whole other story worth mastering—check out [these skills](https://tiletrendshop.com/precise-floor-leveling-techniques-to-achieve-flawless-surfaces).
So, if you’ve faced the frustration of splintered cuts or uneven doorway edges, stay tuned. We’ll dive into the step-by-step process to apply the Blue Tape Trick effectively and share some insider tips that make a real difference.
Prepare the Surface Thoroughly
Before starting your cut, ensure the floor surface along the line is completely clean and dry. Remove any debris, dust, or grease that could interfere with tape adhesion. I learned this the hard way when dust on the surface caused a slip-up that led to a crooked cut. Use a damp cloth to wipe the area, then let it dry completely.
Mark Your Cut Line Precisely
Use a straightedge or a chalk line to mark where you want to cut. Double-check your measurements; precision at this stage prevents headaches later. Remember, a mis-measured line is like a crooked stair—hard to fix and unsightly. In my experience, taking ten extra seconds to verify measurements saves hours of sanding and re-cuts.
Apply Painter’s Tape Effectively
Lay painter’s tape along the marked line, ensuring it adheres firmly without bubbles. Press down along the tape edges with your fingers or a putty knife to create a tight seal. This tape acts as a barrier, reinforcing the fibers and preventing splinters. During a recent doorway upgrade, I meticulously pressed the tape so it couldn’t lift, leading to cleaner cuts and less post-cut cleanup.
Use Multiple Layers for Extra Strength
If the cut line is particularly intricate or deep, layering tape can offer additional support. Apply a second strip over the first, aligning carefully. The extra thickness helps keep the fibers in place during the sawing process, especially when cutting through dense hardwood. It’s like wrapping a fragile item in bubble wrap—more layers, more protection.
Set Up Your Saw with the Right Blade
Select a blade designed for hardwoods or tiles, depending on your material. Ensure the blade is sharp; a dull blade increases splintering risk. During a recent project, switching to a fine-tooth blade made a noticeable difference—edges were smooth, and splinters minimal. Think of it as using a scalpel instead of a butter knife.
Saw Along the Tape Line Carefully
Guide your saw along the tape, maintaining steady pressure and speed. Keep the blade aligned with your marked line, and don’t force the saw—let the blade do the work. The tape-guided cut reduces vibrations that lead to splintering. I once attempted a quick cut without tape, resulting in a splintered mess and a re-cut, costing me hours. Instead, slow and steady becomes your best friend here.
Remove the Tape and Inspect Your Work
Once the cut is complete, peel off the painter’s tape slowly, peeling back on itself to prevent tearing. Examine the edge; if minor splinters remain, lightly sand with fine-grit sandpaper. The tape often improves the edge quality so well that minimal finishing is required. Remember, a few seconds of cautious removal can preserve your crisp, splinter-free edge.
Additional Tips for Perfect Cuts
For especially intricate or lengthy cuts, consider using a clamp or guide to keep the saw steady. Also, practicing on scrap pieces helps build confidence and refine your technique. Don’t rush—precision always beats speed in flooring projects. For a comprehensive approach to ensuring your subfloor is level before making cuts, check out this detailed guide.
By following these concrete steps, applying painter’s tape becomes a game-changer that saves you time, effort, and frustration. With patience and the right preparation, your doorway cuts will be clean, professional, and splinter-free every time, making your entire flooring project look impeccable.
,Many believe that choosing the right flooring material and following basic steps guarantee a perfect result, but real expertise demands understanding nuanced pitfalls that even seasoned DIYers often overlook. A prevalent misconception is that floor leveling is a straightforward process: in reality, subtle errors like neglecting proper substrate preparation can cause long-term issues such as uneven wear or cracking. For instance, relying solely on self-leveling compounds without addressing underlying moisture problems can lead to delamination, a mistake highlighted by flooring experts. Moreover, there’s a myth that hardwood floors only require minimal acclimation time—contrary to this, advanced installers recognize that species like bamboo need extended periods to prevent future gapping. An often underappreciated nuance involves the adhesive quality used in tile installation; selecting a poor or incompatible mortar can compromise adhesion and cause tiles to crack or loosen over time. Be wary of shortcuts like skipping proper surface cleaning—residual dust or grease reduces bond strength significantly, a detail crucial for lasting durability.
What role does substrate quality play in long-term flooring success?
Experts emphasize that the stability and moisture content of the subfloor are foundational to flawless installation. Ignoring this step leads to issues such as squeaks, hollow spots, or tile delamination, which frustrate homeowners and blow out budgets. For practical guidance, review detailed strategies on floor leveling techniques that go beyond the basics. Additionally, advanced mistakes involve improper expansion gap management, especially with large-format tiles or hardwood planks, which can cause buckling under temperature changes. Manufacturers and experts stress that understanding and implementing correct gap sizes are essential for accommodating natural material expansion. Considering these nuances early ensures your investment stands the test of time, rather than becoming a recurring maintenance nightmare. These insights are backed by studies such as the one published in the *Journal of Building Materials* that stresses the critical impact of subfloor conditions on installation longevity. Don’t fall into common traps—acknowledging these advanced details elevates your flooring project from good to professional quality. Have you ever fallen into this trap? Let me know in the comments.
Keeping Your Flooring in Prime Condition with the Right Tools
Maintaining durable and beautiful flooring requires investing in quality tools that you can rely on over the years. One tool I swear by is a high-precision moisture meter. Specifically, the Protimeter Surveymaster has become my go-to for ensuring subfloor dryness before installation or after long-term use. Its accuracy prevents issues like warping or buckling, which are common when moisture levels are unchecked. Proper moisture testing is critical; see this guide to understand how essential it is before installing new flooring.
Another vital tool is a calibrated pneumatic floor sander, especially for hardwood floors. It allows me to smooth out uneven surfaces and remove old finishes efficiently. The key is choosing a sander with adjustable pressure settings; this prevents gouging delicate wood or leaving swirl marks. Regularly inspecting and replacing worn sanding belts ensures a clean finish. Investing in quality abrasives prolongs the sander’s lifespan and enhances results.
For tile projects, I recommend using a rapid-set mortar mixer. Mixing thinset with a drill-mounted paddle attachment ensures a consistent, lump-free blend, crucial for strong adhesion and clean grout lines. Follow this mixing technique to optimize your tile setup.
Lastly, incorporating a laser level simplifies aligning large or complicated flooring patterns. I prefer the Bosch GLL3-330CG for its versatility and pinpoint accuracy. Precise leveling minimizes the need for costly adjustments later, helping your project stay on track both time-wise and budget-wise.
Extend Your Floor’s Life with Routine Care
Beyond tools, consistent maintenance makes all the difference. Sweep regularly using a soft-bristle broom to prevent grit from scratching surfaces. For hardwood floors, I use a damp microfiber cloth with a drop of hardwood floor cleaner, avoiding excessive water that can cause swelling or staining. For tiles, a mixture of vinegar and water in a spray bottle effectively removes grime without damage.
Schedule annual inspections to identify and repair minor issues before they escalate. This proactive approach saves money and preserves your floors’ integrity for decades. For more detailed techniques, check this resource.
What’s Next for Flooring Maintenance Technologies?
Advancements in sensor technology and smart home integration are set to revolutionize how we care for floors. Future tools may include IoT-enabled sensors that monitor moisture and wear in real-time, alerting homeowners immediately to potential problems. As these innovations become more affordable, expect maintenance routines to become even more streamlined and preventative.
Don’t wait for issues to arise—try adopting high-precision moisture testing today. It’s a game-changer that can save you from costly repairs later and ensure your flooring remains stunning over the long haul. For deeper insights and expert tips, visit our contact page.
What I Wish I Knew About Flooring Before Starting
One of the toughest lessons I learned was the critical importance of substrate testing. Ignoring moisture content and surface stability can lead to long-term problems like warping or cracking, which are costly and frustrating to fix. This realization came after battling a misaligned hardwood floor that revealed underlying issues I overlooked initially. Always invest in quality moisture meters, like the Protimeter Surveymaster, to ensure your subfloor is truly ready for installation.
Why Precision in Preparation Pays Off More Than You Think
Skimping on preparation steps—like cleaning debris thoroughly or leveling uneven areas—may seem minor, but it leads to bigger headaches later. I once skipped thorough cleaning before tile installation, and grout lines started to crack prematurely. Taking that extra time to verify and prepare ensures your flooring lasts decades without issues. For detailed strategies, check out this guide on floor leveling techniques.
How Small Tweaks Can Elevate Your Flooring Results
Simple modifications, such as adjusting the expansion gaps or using multi-layer painter’s tape for cuts, can dramatically improve your project. I discovered that layering tape for intricate cuts prevents splintering and saves sanding time. Applying a high-quality blade suited for your material, like a fine-tooth blade for hardwood, ensures cleaner edges. These insights, gained through trial and error, can transform your approach from amateur to professional-quality outcomes.
The Power of Consistent Maintenance and Smart Tools
Investing in tools like moisture meters and proper cleaning equipment—not just for installation but ongoing care—extends your floors’ lifespan. Regularly inspecting for early signs of issues and addressing them swiftly can avoid costly repairs. For expert recommendations on maintaining your hardwood floors, visit this resource. Embracing technological advancements, such as smart moisture sensors, will further empower homeowners to keep floors in prime condition and prevent problems before they start.