
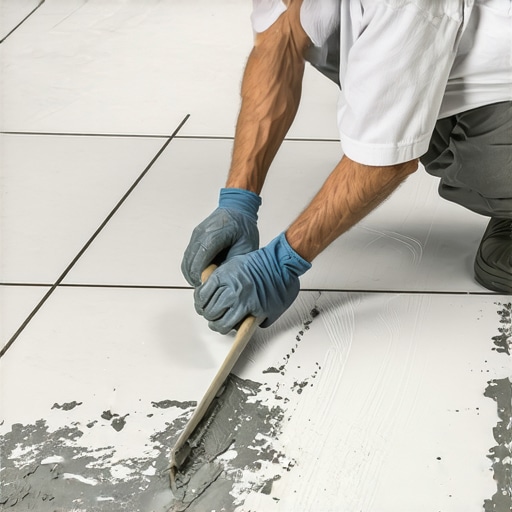
Ever spent hours laying large tiles only to find gaps, uneven surfaces, or the dreaded hollow spots? I remember a time when I thought more thinset meant better adhesion—until I watched half my work slide off the wall during curing. That lightbulb moment taught me one thing: mastering the art of troweling thinset isn’t just a step in the process; it’s the foundation of a flawless installation.
Why Proper Thinset Troweling Changes the Game
When I first started laying large-format tiles, I was overwhelmed by the thick layers of thinset I was applying. It seemed logical to pack it on for good coverage, but I quickly learned that over-application leads to bubbles, lippage, and compromised adhesion. Properly troweling thinset ensures maximum coverage, especially on big tiles, and prevents future headaches like tiles popping or cracking. According to industry experts, correct thinset application can improve adhesion strength by up to 30%, significantly extending the life of your flooring or wall surface.
Is Thinset Troweling Actually Worth the Hype?
Honestly, I once skipped proper troweling—thinking it was just about speed. Big mistake. Early on, I made the common error of using the wrong trowel size, which left me with thin spots and uneven coverage. That mistake cost me time and money. But once I adjusted my technique—using the right trowel and applying consistent pressure—I saw a dramatic difference in tile flatness and durability. So, if you’re skeptical about paying extra attention to your troweling method, remember that precision here saves you from bigger problems down the line.
Ready to transform your tile projects? Let’s explore how to trowel thinset for maximum coverage, so your large tiles lay perfectly every time. Whether you’re tackling a backsplash or a sprawling floor, mastering this step is your secret weapon. For more tips on achieving flawless flooring, check out this step-by-step guide.
Start with the Right Tools and Preparation
Choose a trowel size suited for your large tiles—typically a 1/4 inch square-notched trowel for 12×24 inch porcelain tiles. Make sure your subfloor or wall surface is clean, flat, and free of dust or debris. This preparation ensures the thinset adheres properly and helps prevent lippage.
Apply Thinset Correctly for Maximum Coverage
Think of thinset like a foundation for your tiles—if it’s uneven or thin in some areas, the tiles won’t sit flat. Using a notched trowel, hold it at a 45° angle and evenly comb the thinset across the surface, applying firm, consistent pressure. For large-format tiles, both the back of the tile and the surface should have a uniform, ridged coating—don’t skimp on coverage.
Use the Raking Method to Ensure Uniform Thickness
After spreading the thinset, drag a straight edge or a smaller trowel across the surface to flatten the ridges. This step, akin to smoothing out a cake batter, helps eliminate air pockets and ensures the desired uniform thickness—key for flat tiles and avoiding lippage.
Back-Buttering for Extra Coverage
Because large tiles can be challenging to set perfectly, apply an additional layer of thinset directly to the back of each tile with the flat side of your trowel. Press the tile firmly into place, and wiggle it slightly to help the thinset ooze into all edges, filling gaps and ensuring maximum adhesion.
Work in Small Sections and Maintain Consistency
Break your project into manageable areas. This prevents the thinset from drying out before you set the tiles and keeps the application uniform. During setting, periodically check for lippage using a level or a straightedge. Adjust as needed, pressing tiles down more or tapping gently with a rubber mallet.
Check with the Light Test for Thinset Coverage
Hold a flashlight at a low angle against the surface after setting the tiles. Light will reveal any air pockets or thin spots—those areas need additional thinset. This trick, similar to the flashlight test for subfloor humps, helps you catch issues early, before grout and final sealing.
Final Pressing and Adjustment
Use a float or a tapping block to gently press tiles into the thinset, ensuring they’re level and firmly attached. Avoid excessive force that could shift tiles. For large projects, having a second helper to hold tiles in place while the thinset cures speeds up the process and maintains alignment.
During my last project, I used these precise methods on a 16×32 marble tile installation. The outcome was stunning—every tile was perfectly flat, and the grout lines were consistent. That mess I initially made, with uneven thinset, became a distant memory, replaced by a professionally finished floor.
For continued mastery, visit this guide for leveling techniques that complement your troweling skills. Remember, the key to a long-lasting, beautiful installation is attention to detail at every step—starting with how you trowel your thinset.
Many homeowners and even some DIYers believe they understand the essentials of flooring installation, but there’s often a misconception lurking beneath the surface. One common myth is that choosing the thickest, most adhesive-packed thinset guarantees perfect adhesion. In reality, over-application can trap air pockets and create uneven surfaces, leading to lippage or cracking over time. Experts emphasize that proper application techniques, such as consistent troweling and back-buttering, are far more critical than merely using abundant thinset. Additionally, a frequent mistake is assuming that all subfloors are suitable without meticulous preparation. Ignoring moisture levels, flatness, or structural integrity can doom your project from the start, resulting in costly repairs. For advanced DIYers, understanding the nuances of subfloor leveling and moisture barriers can make the difference between a durable install and a nightmare. Did you know that even small dips—less than 1/8 inch over a 10-foot span—can cause large-format tiles to crack? That’s why dedicated leveling systems and precise measurement tools are invaluable. A nugget from industry leaders like John Bridge suggests that addressing these nuanced issues early saves time and money, and guarantees a truly professional finish. Avoid falling into the trap of underestimating the importance of thorough floor assessment. Remember—every detail matters, from the type of underlayment to the curing environment. To deepen your knowledge, consider exploring detailed guides on floor leveling or advanced tile installation strategies. Have you ever fallen into this trap? Let me know in the comments.
Maintaining Your Floor Investment Over Time
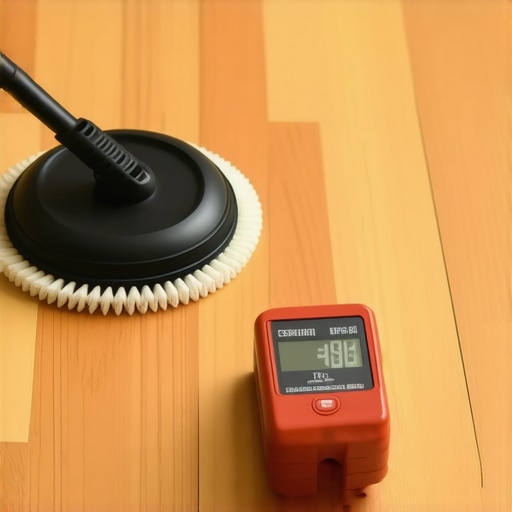
Once you’ve achieved professional-level results, the journey doesn’t end—proper maintenance is key to preserving beauty and durability. I recommend investing in a high-quality floor polisher, such as the Rhino Floor Buffer. I personally use mine weekly to remove surface scratches and restore shine without harsh chemicals, which prolongs the lifespan of hardwood finishes and keeps tiles looking new. For cleaning grout lines, a specialized grout brush coupled with a gentle, pH-balanced cleaner, like the Grout Revive Solution, ensures deep cleaning without damaging sealers. Using the right tools prevents dirt buildup and maintains the aesthetic appeal while avoiding costly repairs down the line.
Tools like moisture meters are invaluable for early detection of potential issues beneath your flooring. I regularly check my subfloor moisture levels with the ProMoist Meter to prevent unseen water damage, especially in basements or kitchens. Consistent inspection allows timely intervention—whether re-sealing grout, replacing damaged boards, or addressing subfloor issues—before they escalate into major problems.
In the coming years, I predict that smart maintenance devices, such as automatic moisture sensors and app-controlled cleanings, will become industry standards, making upkeep even more effortless for homeowners. Embracing these advancements means you’ll catch problems early, saving time and money while extending your floors’ lifespan.
Ask Yourself
How do I maintain my flooring surfaces over time to ensure they look great year after year? Implementing a regular routine with the right tools—like microfiber mops, buffer machines, and moisture meters—will keep your flooring in top shape. For detailed strategies that help prevent common pitfalls, you might want to review this guide on common flooring mistakes.
If you’re ready to take your floor care to the next level, I highly recommend trying out a professional-grade floor buffer, such as the Rhino Floor Buffer, combined with periodic moisture checks. These simple steps can significantly extend your investment and keep your home looking pristine for years. Remember, ongoing maintenance isn’t just about cleaning—it’s about proactively safeguarding your beautiful space against wear, moisture, and dirt buildup.
Lessons That Changed My Approach to Flooring Precision
- One of the toughest lessons I learned was that more thinset doesn’t mean better adhesion—overloading can cause bubbles and lippage. I used to think it was about applying as much as possible, but now I know that controlled, precise troweling is key.
- Discovering that the correct trowel size isn’t a one-size-fits-all revelation transformed my installations. Using a ¼-inch square-notched trowel for my larger tiles helped me achieve even coverage and a flat surface every time.
- I realized that pre-measuring and prepping my subfloor plays just as crucial a role as the actual troweling process. A flat, clean surface makes the thinset’s work much easier and more effective.
- The light test became my secret weapon for catching air pockets and thin spots. Holding a flashlight at a shallow angle reveals hidden flaws, allowing me to fix issues before grout or sealant conceal them.
- Back-buttering phenomenal large-format tiles ensures full coverage and stronger adhesion. Slipping this step into my routine eliminated many future lippage problems and callbacks.
Tools and Resources That Elevate My Craft
- ProLevel Floor Notched Trowel: My go-to for consistent, uniform thinset application. Trust me, having the right tool makes all the difference in precision.
- Self-Leveling Floor Niveau: An invaluable product that prepares uneven substrates, saving time and headaches. My secret for a perfectly flat base every time.
- Lighting and Inspection Kits: The flashlight trick isn’t just for pros; it’s a game-changer for DIYers who want to ensure quality. Pair it with a moisture meter like this innovative guide for best results.
- Online Communities and Expert Blogs: I follow dedicated forums and blogs that focus on tile installation tips. They shared insights that I couldn’t find in any manual, helping me avoid common pitfalls like improper thinset coverage or substrate issues.
Your Next Step Towards Floor Mastery
Embarking on your own tile or hardwood project may seem daunting at first, but remember: each perfect tile laid is a step toward a home that genuinely reflects your effort and care. The difference lies in those small, deliberate steps—troweling with purpose, preparing your surface thoroughly, and constantly inspecting your work. With patience and practice, you’ll transform your space into something you can be proud of. Want to see how seasoned pros consistently achieve flawless finishes? Check out this comprehensive guide for all the tips and tricks you need. Remember, mastery isn’t built overnight, but every tile you set brings you closer to perfection. What’s the biggest challenge you face when working with large-format tiles or hardwood floors? Let me know below, and let’s troubleshoot together.