
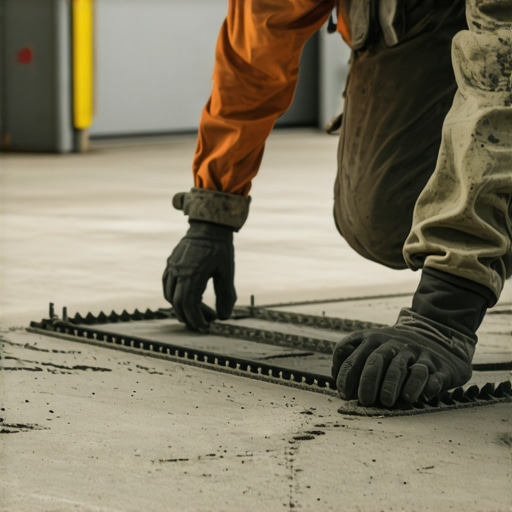
I vividly remember the first time I saw a nearly perfect self-leveling compound settle into a cratered, uneven mess. It was supposed to be the miracle solution for achieving a seamless floor surface—yet there it sat, looking flat but feeling bumpy underfoot. That lightbulb moment hit me hard: even if a self-leveler appears flat, it might not be as smooth as it seems. I learned the hard way that neglecting to spike the self-leveler can result in stubborn high and low spots, undermining the entire flooring project.
Unlock the True Potential of Self-Leveling Compounds
As a DIY enthusiast and seasoned flooring installer, I’ve come to realize a crucial step that many overlook: spiking the self-leveler. When I initially skipped this, I faced uneven surfaces that compromised my tile alignment and increased my frustration. It’s a common mistake, but one that’s easily fixed once you understand why it matters.
By adding small perforations or spikes into the self-leveler, you allow air bubbles to escape and prevent voids from forming beneath the surface. This process ensures a more consistent pour and a flatter, more durable finish. Imagine pouring pancake batter into a pan—if you don’t break the bubbles, you’ll end up with uneven pancakes. The same principle applies here.
Interestingly, industry experts agree that for optimal results, the use of a spike roller—often called a spiked roller—is highly recommended. It not only helps with air removal but also promotes better adhesion by improving the bond with the subfloor. According to a detailed guide by Tile Trend Shop, mastering these techniques can make the difference between a good floor and a perfect one. Check out their comprehensive tips on [precise floor leveling techniques](https://tiletrendshop.com/precise-floor-leveling-techniques-to-achieve-flawless-surfaces).
Have you ever faced issues with a self-leveler that just wouldn’t set right, leaving you with lumps or dips? If so, you’re not alone. Recognizing this common problem is the first step toward fixing it. In the upcoming sections, I’m going to walk you through why spiking is essential—even if your surface looks perfectly flat—and how to do it properly.
Getting this step right will save you headaches down the line and ensure your flooring installation stands the test of time. Ready to dive into the details? Let’s explore exactly how and why spiking your self-leveler transforms a good job into a professional finish.
Prepare Your Tools and Subfloor
Before you begin, ensure you have a high-quality spiked roller, a drill with a suitable attachment, and the self-leveling compound recommended for your project. Clean and dry the subfloor thoroughly, removing any dust, debris, or existing coatings, since contaminants can create voids or bonding issues. Think of the subfloor as the foundation to a sturdy house—if it’s not prepared properly, the entire surface will suffer.
Mixing the Self-Leveler Correctly
Follow the manufacturer’s instructions meticulously to mix the self-leveling compound. Use a clean mixing bucket and a drill with a paddle attachment to achieve a smooth, lump-free consistency. Remember, a properly mixed self-leveler is like a perfect pancake batter—fluid enough to flow easily but not so thin that it runs everywhere. Skipping or rushing this step could cause uneven settling, making your spiking efforts less effective.
Pour and Spread with Precision
Pour the mixed self-leveler at one corner of the room and gradually work your way across, using a trowel to spread it evenly. Don’t worry about perfect spread—your goal is a uniform layer that just covers the surface. At this stage, don’t disturb the compound once poured; let it flow naturally. This initial pour sets the stage for effective spiking, preventing air pockets from becoming trapped underneath.
Use the Spiked Roller Properly
Once the compound begins to level out and has thickened slightly—usually after a few minutes—grab your spiked roller. Roll back and forth across the surface with steady pressure, overlapping each pass to ensure all areas are covered. The spikes puncture the self-leveler, breaking through any surface bubbles or tiny voids, much like a plumber clearing airlocks in a pipe. This step is crucial for eliminating trapped air, which can cause dips or weak spots later.
Tip: How to Master the Spiking Technique
During my first attempt, I thought a light pass would suffice—only to notice pockets of air later. Once I realized I needed to press down more firmly, the surface became noticeably smoother. Think of it like brewing coffee: pressing too lightly results in weak flavor, pressing just right ensures richness. Spend a bit more time applying even pressure and make sure to cover the entire surface area. This process may seem time-consuming, but it’s a game-changer for achieving an ultra-flat finish. For detailed layering and spiking strategies, visit this comprehensive guide.
Allow the Compound to Cure Properly
After spiking, leave the self-leveler undisturbed for the recommended curing time—typically 24 hours. Avoid walking or applying any pressure, as movement can disturb the surface and reintroduce air pockets. Patience during this phase ensures that the spiked layer sets flat and solid—much like pouring concrete for a driveway. Rushing this process is a common mistake that leads to dips and uneven spots.
Final Check and Sanding
Once cured, inspect your surface for consistency. Use a straightedge or long level to identify any minor high or low spots. If needed, lightly sand any imperfections, but often the spiking process reduces the need for correction. Remember, a flat, void-free layer sets the perfect foundation for your tiles or hardwoods, making your entire flooring project look more professional.
Many DIY enthusiasts and even seasoned installers often fall prey to misconceptions that can compromise the quality of their flooring projects. One prevalent myth is that achieving a perfectly flat subfloor guarantees a flawless finish. However, this overlooks the significance of proper surface preparation and nuanced techniques like effective spiking of self-leveling compounds, which are often misunderstood. Rushing through the leveling process or neglecting to evacuate air pockets with a spike roller can lead to subtle dips and dips that become glaring once tiles or hardwood are laid. Remember, even a slight high spot can cause lippage in tiles or create an uneven appearance in hardwood planks, undermining the entire aesthetic and longevity of your flooring.
A common mistake is assuming that a self-leveling compound, poured and left untouched, will naturally settle into perfection. This is far from true. Proper application involves meticulous mixing, pouring, spreading, and crucially, spiking or rolling with a spiked roller immediately after pouring. Industry experts emphasize that this step removes trapped air and prevents voids that surface as dips or hollow spots over time. Skipping this can result in a surface that appears level but hides underlying imperfections.
Another critical nuance lies in curing. Many underestimate the importance of undisturbed curing times, especially after spiking. Movement or premature weight on the surface can cause the compound to shift, leading to unevenness or bonding failures. Patience here ensures a durable, flat substrate ready for your chosen flooring.
From an advanced perspective, understanding the difference between Portland and gypsum-based levelers can significantly influence your outcome, especially on challenging substrates like old concrete or over radiant heat systems. Portland-based solutions tend to offer greater strength and adhesion, which are essential for high-traffic or heavy-load areas, as detailed in industry guides. Moreover, assessing the moisture content and potential off-gassing of your subfloor before leveling can prevent future issues like bubbling or curling in your finished floor, according to recent flooring research.
Avoiding these common pitfalls requires a blend of technical knowledge and patience—qualities often overlooked by beginners eager to see results fast. Ensuring your subfloor is properly prepared, applying the right leveling products with correct techniques, and respecting curing times will elevate your results from mediocre to professional. For more insights on flawless surfaces, visit this detailed guide.
Have you ever fallen into this trap? Let me know in the comments! Mastering these subtle but crucial steps can save you time, money, and frustration in the long run.Achieving a flawless floor isn’t just about the initial installation; ongoing maintenance and using the right tools are vital for preserving those perfect surfaces over time. One indispensable tool I personally rely on is a high-quality vibrating power scraper. It’s perfect for periodically removing stubborn dirt and old sealers from tile grout lines without damaging the surrounding areas, keeping your floors looking fresh and clean. For hardwood floors, a microfiber mop paired with a gentle wood floor cleaner helps maintain their natural sheen and prevents buildup, reducing the need for deep re-sanding later.
Investing in a moisture meter is also crucial, especially when dealing with subfloors prone to moisture issues. Regularly checking the moisture levels ensures your tile or wood remains well-adhered, preventing issues like de-lamination or warping. I recommend models that provide instant readings and store data; this habit can catch problems early, saving you money and trouble.
To keep your floor surfaces in tip-top shape, I recommend adopting a consistent cleaning routine that avoids harsh chemicals, which can degrade sealants or finishes over time. Instead, opt for pH-neutral cleaners; they preserve the integrity of your surfaces for years. Additionally, applying a suitable topcoat or sealant every few years enhances durability, resistance to staining, and wear.
Looking ahead, I predict that smart floor care technology—like IoT-enabled sensors monitoring humidity, foot traffic, and surface wear—will become standard in the industry. These tools could provide real-time data, guiding maintenance routines proactively, and extending the lifespan of your flooring.
How do I maintain my floors over time?
Regular inspections are your best friend. Keep an eye out for signs of wear, cracks, or moisture intrusion, and address issues promptly. For tiles, reseal grout lines periodically—at least once every couple of years—to prevent staining and degradation. For hardwoods, refinish surfaces every 7-10 years, depending on traffic, to remove scratches and refresh the protective layer, as detailed in this guide.
Don’t forget the importance of proper humidity levels—ideally between 35-55%. Too dry or humid environments can cause hardwood to expand or contract, leading to gaps or buckling. Using a dehumidifier or humidifier as needed can keep your flooring stable.
Finally, I recommend developing a scheduled maintenance plan that includes vacuuming, damp mopping, and periodic inspections. Incorporate advanced tools like moisture meters and specialized cleaning equipment to stay ahead of potential problems. This proactive approach can ensure that your investment remains stunning and functional for decades.
Consider trying out a microfiber mop with a neutral cleaner for your next cleaning session—it’s a simple step that yields immediate benefits in preserving your floors’ beauty and longevity. For more expert tips on long-term care, visit this resource. Staying consistent with maintenance and leveraging the right tools will make your flooring last a lifetime.
The Hardest Lesson I Learned About Floor Leveling and Flooring Installation
One insight that transformed my approach was realizing that surface flatness isn’t enough—air pockets beneath the self-leveling layer can still sabotage your project. I once thought that pouring and waiting would guarantee perfection, but tiny dips appeared later, causing headaches during tile installation. Now I know that proactive spiking is the secret to long-lasting, flawless floors.
This One Technique Will Elevate Your Flooring Skills
Using a high-quality spiked roller immediately after pouring the self-leveler isn’t just a step—it’s the game-changer. It removes trapped air and ensures bonding, preventing cracks and dips later on. Trust me, this small adjustment in your workflow leads to big leaps in finish quality. Learning this from industry experts has saved me from countless pitfalls.
The Myth That Might Be Hindering Your Progress
Many believe that you can skip spiking if the surface looks flat. I used to think so too—until I encountered uneven tiling and creaking beneath my hardwood. Real-world experience taught me that surface appearance can hide hidden flaws. Embracing proper spiking and curing turned my results from average to professional-grade, highlighting the importance of these nuanced steps.
How Curiosity and Persistence Led to Better Floors
My curiosity about why some floors fail despite careful leveling led me to deeper research. I discovered that materials matter— Portland-based self-levelers bond better over challenging substrates, and proper subfloor preparation is essential. Exploring reliable sources like comprehensive guides has been invaluable in refining my methods and achieving the best results.
Key Tools and Tips You Can’t Do Without
Invest in a durable spiked roller, a moisture meter, and high-quality leveling compounds. Pair these with patience—allow proper curing times before walking on or finishing your floors. Regular inspection with simple tools like a straightedge or level can catch issues early. My go-to has become a moisture meter, preventing future problems in high-moisture areas, which I learned the hard way. For thoughtful product recommendations, check out my favorite picks at this resource.
Find Joy in the Process—Your Perfect Floor Awaits
Remember, mastering floor leveling isn’t just about technique—it’s about embracing the learning journey. Each project teaches you something new, and patience pays off in the form of a stunning, durable floor. Don’t rush the curing or skip essential steps; your future self will thank you. Take pride in your craftsmanship, and soon you’ll be the one others turn to for excellent flooring results. Ready to start your next flooring adventure? Share your experiences or ask questions—I’m here to help build your confidence in floor leveling and installation.