
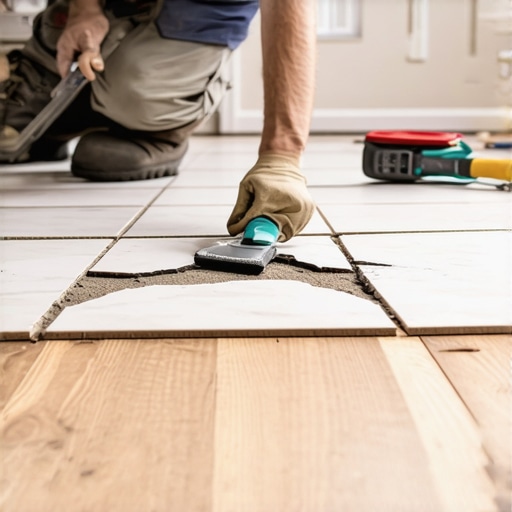
I remember the moment vividly—walking across my kitchen floor, feeling the faint but unsettling crack beneath my feet. That tiny fissure started as an annoyance, but soon it grew, transforming into a constant reminder that my beautiful tile had a hidden weakness. It was a lightbulb moment for me: to fix this without the chaos of ripping up the entire floor. If you’re like I was, frustrated by a crack in your tile but hesitant to undertake a costly, labor-intensive demolition, then this post is for you.
Why Ignoring a Cracked Tile Is a Recipe for Bigger Problems
Chances are you’ve faced this dilemma—spotting that stubborn crack and debating whether to call in the professionals or try your hand at a quick fix. But here’s the truth: even a small crack can be the beginning of a much larger issue, like water seepage or shifting beneath your floors. According to experts, a minor crack isn’t just an aesthetic flaw; it can compromise the integrity of your entire surface if left untreated. That’s why acting promptly, with the right approach, can save you a ton of time, money, and stress.
Suspect Your DIY Solution? Think Again!
Early on, I made the mistake of slapping some inexpensive sealant over my crack, thinking it would hold. Spoiler alert—it didn’t. The crack widened over time, and I ended up paying more for a partial repair than I would have for a proper fix from the start. Trust me, I’ve learned that understanding the right techniques—like those outlined in flooring installation tips—can make all the difference. If you’re questioning whether simple repairs are enough or if your problem requires professional intervention, keep reading. I’ll guide you through practical steps that have transformed my approach and can do the same for you.
This article will walk you through how to repair a cracked tile effectively—without the upheaval of tearing up your entire floor. From assessing the damage to choosing the right materials, I’ll share insights rooted in experience and backed by industry standards. So, if you’re tired of looking at that unsightly crack and ready to restore your space, you’re in the right place.
Are you tired of staring at that crack and wondering if there’s a quick fix? Let’s get started.
Assessing the Damage Effectively
Start by removing any loose debris around the crack using a small brush or vacuum. Use a flashlight to inspect the crack’s depth and width—if it’s superficial or deep-seated. I once used a putty knife to run along the edges, feeling for any loose pieces that might fall out during repair. This initial check prevents surprises later and helps you decide if a simple fix will suffice or if professional intervention is needed.
Preparing the Surface for Repair
Before applying any material, ensure the area is completely dry and free of dust or grease. Slightly dampen the cracked area with water to improve adhesion of repair compounds. During my first repair, I cleaned the crack thoroughly with a damp cloth, which helped the filler bond more securely, preventing future lift or crack expansion. Proper preparation is critical and can be compared to priming drywall before painting—neglect it, and your repair may not last.
Choosing the Right Repair Material
Select an epoxy or a high-quality ceramic tile filler designed specifically for your tile type—glazed or unglazed. I learned this the hard way when using an all-purpose filler on glazed tile, resulting in an uneven finish. For best results, match the filler color to your tile to hide repair lines. For larger cracks, a two-part epoxy provides superior strength, comparable to curing concrete, and is worth the extra effort for longevity.
Applying the Filler with Precision
Mix the filler according to manufacturer instructions. Use a plastic putty knife to carefully press the filler into the crack, ensuring it fills from bottom to top without air pockets. I once tried smoothing with a wet finger, but this created unevenness. Using a small trowel or putty knife ensures a smooth, even surface—think of it as applying icing to a cake, evenly spreading to hide imperfections.
Allowing Proper Curing Time
Let the filler cure undisturbed for the time specified—usually 24 hours. Avoid foot traffic or cleaning during this window. I rushed curing once and found that the filler cracked again within a week, much like rushed paint jobs that peel prematurely. Patience here guarantees a durable repair, mimicking the curing process of concrete or epoxy in construction projects.
Finishing the Repair Seamlessly
Once cured, gently sand the area with fine-grit sandpaper to match the tile’s surface and eliminate any excess filler. Clean the dust with a damp cloth. To blend the repair further, apply matching grout or sealant, carefully feathering the edges. I used a small brush to apply grout, making sure it integrated smoothly with the existing lines. This step is like blending paint shades—small, deliberate strokes produce the best visual results.
Final Checks to Confirm Success
Inspect the repair undergood lighting, gently pressing around the area to ensure stability. If any imperfections are visible, lightly reapply filler or grout, repeating the process. Trust me—I learned to double-check from the start, avoiding future headaches. Proper finishing and inspection can prevent recurring issues and extend the life of your floor, much like routine maintenance preserves a vehicle’s performance.
Remember, while small cracks seem minor, they can escalate if ignored. By following these concrete steps, you can restore your tile seamlessly without costly replacements or professional help, saving both time and money in the long run. For additional tips on durable flooring solutions and pitfalls to avoid, don’t hesitate to check out these flooring installation insights or reach out through contact us for personalized advice.
Many homeowners and even some professionals propagate misconceptions about hardwood floors, floor leveling, and tile installation, which can lead to costly mistakes. One prevalent myth is that all floor leveling compounds are interchangeable, but in reality, choosing the wrong type—such as using gypsum-based instead of Portland cement-based self-levelers—can result in premature cracking or pooling in corners, as highlighted by experts on floor leveling intricacies. Understanding the specific requirements of your subfloor, including moisture content and surface smoothness, is crucial for a durable finish. A common oversight involves assuming that less prep work, like skipping proper surface cleaning or forgetting to set expansion joints, doesn’t affect the long-term stability of your flooring. This kind of shortcut can cause issues like tile lippage or hardwood buckling over time. Additionally, many believe that a perfectly flat surface is unnecessary, whereas small dips—just a few millimeters—can lead to significant problems, such as uneven flooring and premature wear. Using a laser level and employing simple assessment techniques can reveal hidden imperfections that might otherwise be overlooked. When installing tile or hardwood, professional contractors emphasize the benefits of meticulous underlayment preparation—it’s not just about aesthetic appeal but ensuring longevity and safety. Failing to consider the proper adhesive or grout for specific materials, like high-traffic areas or moist environments, is another advanced mistake that can compromise your entire project. Moreover, many underestimate the importance of acclimating materials to the environment—leaving hardwood in a humid space or tiles in a dry, heated room can lead to expansion or contraction, causing future cracks or gaps. According to flooring expert hardwood refinishing tips, these nuances are vital for a seamless, lasting installation. Always remember, flooring is as much an art as it is a science—cutting corners or neglecting the details can undo years of craftsmanship. Have you ever fallen into this trap? Let me know in the comments.
Mastering Maintenance with Precision Tools
Maintaining hardwood and tile floors over time demands the right equipment to ensure longevity and pristine appearance. Personally, I swear by a high-grade moisture meter when assessing subfloor conditions before installation or repair. Its ability to give instant readings on humidity levels helps prevent future issues like warping or cracking, which are common pitfalls when moisture is overlooked. For instance, I use the Moisture Meter Pro—a device renowned for its accuracy and ease of use—making it my first step in any flooring project.
In addition, a laser level remains indispensable for ensuring that your floor surfaces are perfectly flat or level. I prefer using a rotary laser with a smart receiver, which allows me to quickly identify high and low spots across large areas, especially when dealing with uneven subfloors or during leveling projects. Not only does it save time, but it also guarantees the meticulous attention needed for professional results, aligning with best industry practices.
When it comes to final finishing, nothing beats a quality orbital sander with fine-grit discs for smoothing out minor imperfections in hardwood surfaces. For example, after refinishing my floors, I used an orbital sander with dust collection to achieve a seamless, uniform finish that makes the entire space look renewed.
Predicting future trends, I believe automation and smart tools will play a larger role, providing even more precise assessments and repairs. Imagine wireless moisture sensors integrated with your home automation system or AI-driven leveling machines that analyze subfloor conditions autonomously. Embracing these innovations could revolutionize how homeowners and professionals maintain flooring long-term.
So, I challenge you today: try employing a high-accuracy moisture meter before your next flooring project. Not only will this help you avoid costly mistakes, but it also offers peace of mind knowing that moisture-related issues are under control. Curious to learn more about advanced tools and techniques? Reach out here for expert guidance or explore our detailed guides to perfect your flooring skills.
Lessons that Changed My Approach to Flooring Fixes
- Always prepare thoroughly—skipping steps like cleaning or moisture testing can turn a simple repair into a nightmare. A lightbulb moment for me was realizing that surface prep isn’t just a preliminary step but the foundation of a lasting fix.
- Using the right materials saves time and money—initially, I was tempted to cut corners with generic fillers, but learning about high-quality epoxy and matching grout made my repairs seamless and durable.
- Patience is key during curing—rushing the drying process led to cracks reappearing weeks later. Embracing the wait ensures the repair stands the test of time.
- Assessment tools like laser levels and moisture meters are game changers—investing in these tech essentials elevated my work from amateur to professional quality and helped avoid costly mistakes.
Tools and Resources That Elevated My Flooring Game
- Expert flooring installation tips: For comprehensive guidance on flawless installs, this resource is invaluable. It covers everything from surface prep to finishing touches, ensuring my projects are professional-grade.
- Floor leveling techniques: Understanding the nuances of leveling made my surfaces perfectly flat, preventing future cracks or uneven tiles. It’s a must-have reference for any serious DIYer.
- Hardwood refinishing tips: Reviving worn hardwood floors became accessible with insights from this guide, helping me achieve a like-new appearance without replacing planks.
- Moisture meters: This simple tool prevented me from installing floors over damp subfloors, saving me from future buckling and mold issues.
Your Next Step Toward Flawless Floors
If you’ve ever hesitated to start a repair because it seemed overwhelming, remember that with the right knowledge and tools, restoring your floors can be both satisfying and rewarding. Don’t let small cracks or uneven surfaces hold you back from creating a space you love—embrace the challenge with confidence and precision. Ready to take your flooring skills to the next level? Explore more at our site and share your experiences or questions below. Your perfect floor is within reach—start today!