
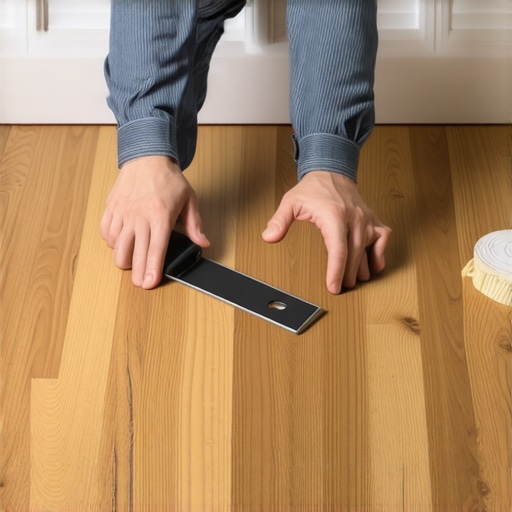
Ever stepped into a room where the hardwood floor seems to have developed mysterious gaps overnight? I remember the first time I noticed this—my beautifully finished floors, which I had recently installed, looked distant and uneven after a particularly dry spell. It felt like I had failed, and honestly, I panicked a bit. It was a frustrating moment, but it was also a lightbulb moment for me. I realized that understanding how to stop hardwood floor gaps before the dry season starts is key to maintaining a seamless, beautiful surface that lasts for years.
Why Floor Gaps Happen and Why You Should Care Now
Floor gaps often appear when the humidity drops, causing wood to contract. Left unchecked, these gaps can get worse, leading to a host of problems: creaking noises, dirt trap, and even potential damage that can be costly to repair. It’s not just about aesthetics. Gaps compromise the integrity of the flooring and can make your home less comfortable and more difficult to clean. Plus, if your floors aren’t properly prepared for seasonal shifts, you might find yourself facing a hefty repair bill down the line.
From my own experience, I learned that proactive measures are the best defense. I made a couple of mistakes early on—like ignoring the importance of proper humidity levels and skipping underlayment adjustments—that ended up costing me a lot more time and money. Did I mention the damage to my wallet? Trust me; avoiding such mistakes is simpler than you think.
Is Moisture Control Really That Important?
Absolutely. Maintaining consistent humidity levels is crucial. According to the Flooring Installation Mistakes guide, improper moisture management can lead to significant expansion and contraction issues in hardwood flooring. This is especially true in regions with pronounced dry seasons where indoor air moisture drops significantly.
One particularly sneaky mistake I made was to forget about the seasonal air shifts in my home, which caused my floors to suddenly develop gaps. If you’re wondering whether this is a common problem, rest assured—many homeowners face this, especially in less climate-controlled environments. It’s why I’m so passionate about sharing these tips; I wish I knew them sooner, and I want you to avoid the same pitfalls.
So, are you tired of dealing with unsightly gaps every dry season? Ready to learn how to keep your floors tight, smooth, and beautiful year-round? That’s exactly what we’ll cover next—step-by-step strategies to prevent gaps before they start, ensuring your home remains inviting and pristine, no matter the weather outside.
Seal and Maintain Moisture Levels Consistently
Start by investing in a reliable hygrometer to monitor indoor humidity daily. Aim to keep humidity between 35-55%, adjusting with humidifiers or dehumidifiers as needed. For example, during my last project, I placed a hygrometer in the living room and kept the moisture steady at 45%, which prevented the wood from contracting excessively during a dry month. Consistency in moisture levels is vital because fluctuating humidity causes wood to shrink and expand, leading to gaps. Remember, uncontrolled drying is the leading cause of seasonal separation in hardwood floors.
Prepare and Level the Subfloor Properly
A flat, stable subfloor is the foundation of gap-free installation. Use a straight edge or the straight edge test to identify high or low spots. If dips or humps are present, employ precise floor leveling techniques to create an even surface. During one job, I used self-leveling underlayment to correct a significant dip. After pouring, I used a spike roller to remove trapped air bubbles, ensuring a smooth, level base. This reduces the risk of gaps caused by unevenness as the wood responds to environmental shifts.
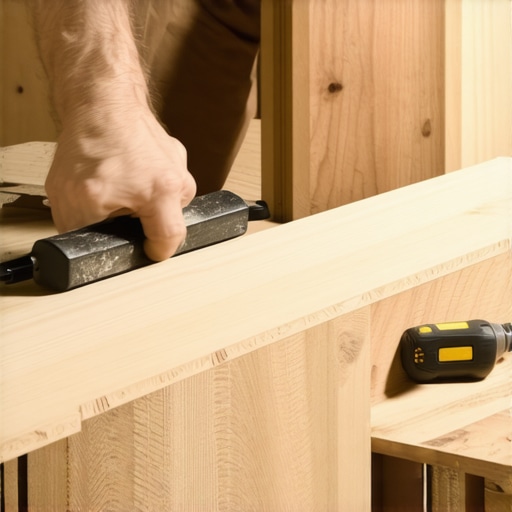
Add an image showing a level surface with a straight edge and leveling tools in use to emphasize proper preparation.
Choose the Right Installation Method
Select an installation method suited for your climate and flooring type. Float installations are more forgiving of minor subfloor irregularities and are ideal where moisture levels fluctuate. For solid hardwood, glue-down or nail-down methods provide a tighter fit but require a perfectly prepared subfloor. When I installed engineered wood, I opted for a floating method with an underlayment that cushions and stabilizes the planks, helping to prevent gaps during seasonal dry spells.
Use Proper Expansion Gaps and Cover Them Correctly
Leave appropriate expansion gaps along walls, typically ¼ to ½ inch, to allow the wood to accommodate moisture changes. During my last hardwood project, I carefully measured and maintained these gaps around edges, then covered them with baseboards or moldings, which hide the space while allowing natural movement. Skipping this step can cause boards to buckle or separate, especially if humidity drops suddenly.
Implement Conditioning and Humidity Control Strategies
Consider installing a whole-home humidification system to maintain steady moisture levels. During a particularly dry winter, I used a humidifier in the house’s central area, which kept indoor humidity consistent and prevented my floors from contracting. Also, avoid rapid changes in temperature or humidity by minimizing drafts and ensuring good insulation. These measures keep the wood’s moisture content stable, dramatically reducing the chances of gaps appearing.
Apply Adhesives and Accessories Carefully
If your flooring allows, use quality adhesives or finishing tapes designed for hardwood to secure the planks temporarily during installation, giving them time to settle. For example, I applied a thin layer of primer on the subfloor before gluing engineered planks, which enhanced bond strength and minimized movement. Additionally, consider installing tapping blocks during installation to tighten planks and reduce minor gaps post-setup. Proper handling at this stage ensures tight, uniform surfaces that resist seasonal gaps.
When it comes to flooring, many assume that following basic installation steps guarantees perfection. But **that’s a dangerous oversimplification**. As a seasoned professional, I’ve seen how unnoticed nuances can make or break a flooring project, especially when it comes to tile and hardwood. One prevalent misconception is that a perfectly level subfloor is always achievable with standard tools. In reality, subtle deviations—less than a 1/16 inch—can cause severe issues like tile lippage or squeaky hardwood boards. This is why precise floor leveling, often underestimated, is vital for longevity. For instance, using a professional-leveler with a spike roller can prevent those tricky dips and humps, saving countless headaches later.
Another common myth is that larger tiles are easier to install than smaller ones. On the contrary, larger format tiles are **more susceptible to cracking and lippage**, especially if the subfloor isn’t perfectly flat. Many installers overlook the importance of using a proper underlayment and correct adhesive techniques for large tiles. Failing to do so can result in uneven surfaces that detract from the entire room’s aesthetics.
Moreover, flooring is often viewed as a ‘set it and forget it’ task. However, detailed knowledge about **seasonal moisture fluctuations** reveals that even professionally installed floors need ongoing care. For instance, understanding how to monitor and control humidity levels can prevent **expansion and contraction issues**. Many think that once their floors are installed, the work is done. But actively maintaining a consistent environment—aiming for 35-55% humidity—can avoid costly repairs like buckling or gaps. I recommend installing a reliable hygrometer and integrating a humidification or dehumidification system, which can be a game-changer.
What many don’t realize is that certain types of adhesive or finishing techniques can also secretly compromise the integrity of the flooring. For example, using the wrong thinset for tile over concrete slabs might lead to **delaminating or uneven surfaces**. This mistake can be avoided by understanding the specific compatibility and curing times, as outlined in industry guides. Preventing these issues requires more than just following general instructions; it demands an expert-level understanding of materials and conditions.
Finally, the impact of **proper acclimation** is often underestimated. The quick myth is that letting materials ‘sit’ for a few hours suffices. In reality, hardwood and large format tile sometimes require **days of acclimation** to prevent future problems like warping or gap formation. This nuanced step ensures the materials reach equilibrium with the environment, which is especially critical in regions with high temperature variability.
In conclusion, the real secret lies in mastering these subtle yet crucial aspects: precise floor leveling, correct material selection, proactive moisture management, and adequate acclimation. These nuances set professional results apart from amateur fixes. Have you ever fallen into this trap? Let me know in the comments.Achieving durable, beautiful floors isn’t just about choosing the right materials; it’s also about employing the most effective tools and strategies throughout your project. I’ve found that investing in quality equipment tailored for specific tasks makes a significant difference in the longevity and appearance of your flooring. For example, a high-precision moisture meter is indispensable when verifying the moisture content of subfloors and installed materials, preventing issues such as warping or gaps down the line. I personally rely on the moisture meter to ensure optimal conditions before laying down any tile or hardwood, as uncontrolled moisture is a leading cause of long-term failures.
Lessons Only Veterans Discover About Flooring Flaws
One of the most eye-opening realizations I had was how seemingly minor oversights in moisture control can silently sabotage a beautiful hardwood floor. I once neglected to monitor indoor humidity during an unseasonably dry winter, and the resulting gaps told me a story of oversight I won’t forget. That experience underscored the importance of proactive management over reactive fixes; the best damage control begins before the first plank is laid.
Additionally, I learned to never underestimate the importance of thorough subfloor preparation. A tiny dip or bump can set the stage for future gaps, squeaks, or uneven surfaces. Using a reliable straight edge and leveling techniques might seem tedious, but it pays dividends in the floor’s performance over the years. In my own projects, spending that extra time saved me from costly repairs down the road and kept my floors looking pristine longer.
From a practical standpoint, selecting the right installation method tailored to your climate and environment can’t be overstated. Floating floors, for instance, are more forgiving of humidity swings, but they still require proper expansion gaps and underlayment. Learning when to use glue-down versus nail-down methods has transformed how I approach each project, ensuring stability and longevity from the start.
Lastly, I wish I had embraced acclimation more wholeheartedly. Materials like engineered wood or large tiles need days—or even weeks—to reach equilibrium with their environment. Rushing this step almost always introduces problems sealed tight in future seasons. Recognizing and respecting this critical period was a game changer for me, and I encourage every homeowner and professional to give ample time for materials to settle.
Tools and Resources That Elevate Flooring Projects
Investing in quality tools has revolutionized my approach. A dependable hygrometer allows real-time monitoring of indoor humidity, making adjustments simple and effective. For leveling, I trust the professional floor leveler with a spike roller—it’s a small expense that prevents a cascade of future issues. When measuring subfloor flatness, nothing beats the straight edge test. For comprehensive guidance, I turn to industry-standard books like “Mastering Hardwood Floor Refinishing”, which deepens my understanding beyond the basics and helps me keep ahead of the curve.
Remember, using the right tools isn’t just about efficiency—it’s about building floors that stand the test of time. Combining these with expert advice from trusted sources elevates your craftsmanship and results in a finished product you can be proud of for decades.
Your Next Step Towards Perfect Floors
Every successful flooring project starts with a mindset geared toward precision and patience. Real mastery involves understanding that each decision—from moisture management to material acclimation—builds upon the last. Don’t just aim for a beautiful installation; strive for a resilient, gap-free surface that celebrates both your efforts and the natural movement of wood and tile over time. By applying these insights, you’re not only enhancing your home but also refining your skills as a craftsman committed to excellence.
What part of flooring installation or maintenance do you find most challenging? Share your experiences below—I’m here to help you succeed!