
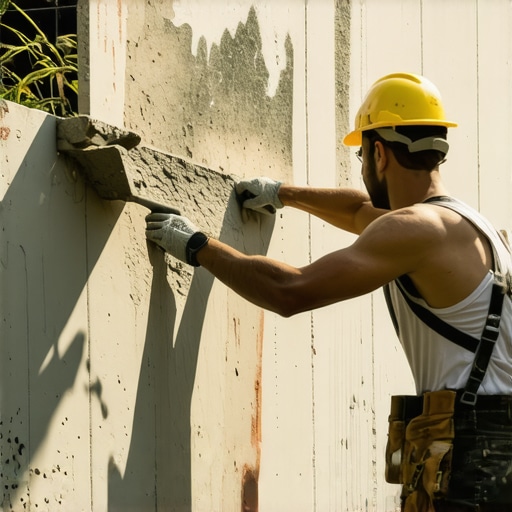
I remember the first time I tried to lay some tiles during a heatwave; I thought I had everything under control — the perfect mix, the right tools, and a sunny day that seemed ideal for the job. But within minutes, I noticed the thinset was drying at an alarming rate, leaving me scrambling to adjust. It was a lightbulb moment. That quick-drying thinset wasn’t just a minor inconvenience — it threatened the integrity of the entire project.
Dealing with Fast-Drying Thinset in the Heat
When the temperature rises, especially during those scorching summer days, your thinset starts behaving differently. Instead of curing slowly and evenly, it sets much faster than expected. This rapid drying can cause a host of problems: uneven surfaces, weak adhesion, and even cracked tiles down the line. Early in my career, I made the mistake of ignoring the weather forecast, assuming a perfect mix would suffice no matter the conditions. That mistake cost me time, effort, and money — mistakes I don’t want you to repeat.
Is Rapid Thinset Drying Actually a Major Issue?
Many DIYers and even seasoned pros dismiss quick drying as just a minor annoyance. But believe me, it’s a red flag. When thinset dries too fast, it doesn’t bond properly to the substrate or the tiles. This can lead to delamination or tiles popping loose over time. According to experts, optimal curing occurs gradually over 24-48 hours under stable conditions. Rapid drying interrupts this process, jeopardizing your whole installation.
One common mistake I made early on was mixing the thinset with too much water to speed up working time in the heat, thinking it would help. But this actually weakened the bond and increased the drying speed further. For reliable results, it’s better to follow manufacturer guidelines and consider strategies like working in smaller sections or using setting retarders. For more tips on proper installation techniques, don’t forget to check out our article on precise floor leveling.Now that you understand the potential pitfalls, let’s explore how to tackle this challenge head-on and ensure your tile or hardwood project withstands the test of time, even in the summer heat.
Control Your Working Environment
During scorching days, work in shaded areas or set up portable shade structures to keep the workspace cooler. This directly slows down the thinset’s drying process, ensuring better bond strength. I once used a pop-up canopy over my entire tile area, which kept the temperature around 15°F lower and gave me the extra time needed for proper curing.
Choose the Right Materials for Hot Conditions
Select fast-setting or heat-resistant thinset formulas labeled specifically for high temperatures. These products contain additives that extend workable time without compromising adhesion. When I tried a standard thinset during a heatwave, I watched it dry within minutes, leading to uneven tiles and gaps. Upgrading to a high-quality heat-resistant mortar later transformed my results and saved time.
Limit Working Sections to Manage Drying
Divide the project into small, manageable zones—about 4×4 feet—or work on a single tile at a time. This prevents the thinset from drying before the tiles are firmly in place. I learned this lesson the hard way when a large area dried unevenly, causing lippage issues. Working in small sections allows for better control and immediate adjustments if needed. Check out flawless floor leveling techniques for more insights on preparing your substrate.
Utilize Setting Retarders or Additives
Mix in setting retarder agents to extend the open time of the thinset. These chemical additions slow down the cure, giving you more flexibility. I added a retarder during my last project, which doubled my working window and eliminated hurried, sloppy placements. Proper mixing ratios are crucial—always follow manufacturer instructions to avoid weakening your bond.
Timing Your Work in the Day
Schedule your most delicate tasks during cooler parts of the day—early mornings or late evenings. I found that switching my workflow helped me avoid the midday heat peak, which can cause rapid drying. This approach allows for a more controlled environment and more consistent results.
Prepare and Protect the Substrate
Ensure the subfloor is properly leveled and free from cracks, then consider moisture barriers if humidity fluctuates. A stable base minimizes movement and further reduces the risk of quick-drying issues. I always use a laser level to confirm flatness before starting, which makes the entire process smoother and prevents tile cracking down the line. For detailed leveling methods, see floor leveling techniques.
Use Coverings to Modulate Temperature and Humidity
Employ plastic sheeting or temporary vapour barriers over the work area to regulate temperature and humidity. This traps moisture and maintains a consistent environment. During a particularly hot and dry spell, I draped plastic over finished sections, which slowed down the drying rate of the thinset, leading to better adhesion and fewer defects.
 While many believe that floor leveling and proper installation are straightforward tasks, the reality is far more nuanced. A prevalent myth is that using a self-leveling concrete compound guarantees a perfectly flat surface without meticulous preparation. However, experts warn that without adequate substrate preparation—such as cleaning, priming, and addressing underlying issues—the self-leveler can peel or crack, leading to costly repairs later. For instance, a study published in the Journal of Construction Engineering emphasizes that surface preparation accounts for over 80% of leveling success.
Another misconception involves selecting the most aesthetically appealing flooring without considering the subfloor’s condition. Many assume that engineered hardwood or porcelain tiles can hide subfloor imperfections, but unevenness can result in lipping, cracking, or grout failure. It’s crucial to evaluate the subfloor’s flatness—ideally within 3/16 inch over 10 feet—and make necessary adjustments, as detailed in our guide on floor levelings techniques.
Don’t fall into the trap of over-relying on adhesives or fast-drying products to compensate for flawed surfaces. Quick-setting adhesives might seem like a time-saver, but they can trap air and debris underneath, weakening the bond and leading to future failures. Instead, a thorough substrate assessment and proper leveling methods—such as grinding high spots or filling low areas—are essential for durability.
Why Do So Many Installation Errors Go Unnoticed Until It’s Too Late?
A significant reason is a lack of understanding about the subtleties that affect long-term performance. For example, inadequate expansion gaps for flooring materials can cause buckling during seasonal changes. Similarly, neglecting moisture testing can lead to warping or mold growth. According to industry standards published by the Ceramic Tile Education Foundation, proper moisture barriers and following manufacturer instructions are vital to prevent such issues.
Always remember that successful flooring installation hinges on detailed preparation and understanding the material nuances. It’s worth investing time in mastering these aspects—like combining tile and hardwood effectively or ensuring your subfloor is within manufactured tolerances. Cutting corners here might be tempting, but the cost is often paid in repairs or replacements later.
Have you ever fallen into this trap? Let me know in the comments. Mastering these finer points will elevate your projects from amateur to professional level, ensuring lasting beauty and performance.Achieving durable, flawless flooring installations requires more than just good materials—you need the right tools and a strategic approach for maintenance and scalability. I rely heavily on a high-quality laser level, like the Bosch GCL100-80CG, which ensures ultra-precise leveling of subfloors, preventing common issues such as lippage or uneven surfaces. This tool is indispensable because it saves time and guarantees a flat substrate, aligning with the principles outlined in our detailed guide on precise floor leveling techniques.
For mixing thinset or self-leveling compounds, I prefer a forced-action mixer such as the RibbonX from SilaMix. Its spiral paddle ensures consistent blending, avoiding the clumps and air pockets that compromise adhesion. Using the right mixing equipment directly influences long-term results, as improper mixing can lead to uneven curing, weak bonds, and future cracks.
When it comes to cleaning and maintenance, I use a microfiber mop and specific pH-neutral cleaners designed for tile and wood finishes. This combination helps preserve the sealant and finish, extending the lifespan of your flooring. Investing in quality tools like these certainly pays off, because they reduce wear and tear on the materials, allowing you to scale your projects with confidence.
Looking ahead, the trend in flooring installation tools is moving towards smarter technology. Digital moisture meters and laser-guided systems are becoming more affordable and precise, enabling installers to identify subfloor issues before they cause problems. Incorporating these innovations can save significant time and money, while improving the longevity of your work.
How do I maintain my flooring tools over time?
Maintaining your equipment is vital for consistent quality. Regularly clean your laser levels and mixers after each project to prevent debris build-up that can impair accuracy. Calibrate laser tools periodically according to manufacturer instructions to ensure ongoing precision. Keep your brushes, blades, and pads in good condition by replacing worn components promptly. Proper storage in dry, cool environments prevents damage and prolongs their lifespan. Trust me—well-maintained tools are the backbone of sustainable, long-term success.
For example, using a laser level not only for initial leveling but also for ongoing maintenance checks helps catch settling issues early. Plus, staying updated with new tools and techniques can be the difference between a good installation and a truly professional finish. Consider investing in advanced moisture meters and smart measuring devices—I highly recommend exploring the latest models that sync with your mobile device for real-time data.
Don’t forget, mastering your toolkit also means understanding how to troubleshoot common problems. For instance, if you notice your self-leveler is not curing properly, checking for moisture imbalances with a reliable meter can prevent costly fixes later. Embark on improving your tool maintenance routine today by implementing a regular cleaning and calibration schedule—your future self will thank you!
The Hardest Lesson I Learned About floor leveling,flooring installation,tile,hardwood floors
One of the most valuable lessons I carry is that preparation is everything—skipping substrate checks or rushing through leveling can lead to costly failures. Every mistake taught me to slow down and prioritize quality over speed, especially when conditions are less than ideal. I now realize that patience in planning minimizes headaches later on.
3 Myths About floor leveling,flooring installation,tile,hardwood floors That Held Me Back
Believing that self-leveling compounds can replace proper substrate prep, that all adhesives are interchangeable, or that humidity isn’t critical are misconceptions I once fell for. Dispelling these myths made my projects more successful and reinforced the importance of following proven strategies and industry standards.
What Experts Won’t Tell You About floor leveling,flooring installation,tile,hardwood floors
Many professionals keep quiet about how small details—like the angle of trowels, ambient temperature, or even the way tools are cleaned—can affect long-term durability. Sharing these insider tips has saved me from repeated failures and deepened my respect for meticulous craftsmanship in flooring.
Curated Resources for Your Flooring Success
- Precise Floor Leveling Techniques: The cornerstone article guiding proper substrate prep and leveling; I revisit it regularly to ensure top-tier results.
- Hardwood Floor Care Secrets: A comprehensive guide on maintaining and protecting hardwoods, crucial for longevity post-installation.
- Installing Tiles Like a Pro: Step-by-step strategies offering practical tips for seamless tile work, perfect for both beginners and pros aiming for perfection.
- Innovative Tile Designs That Elevate Hardwood Style: Inspiration for unique combinations that add personality to your space, broadening your creative horizons.
Trust Your Skills and Keep Moving Forward
Remember, mastering floor leveling,flooring installation,tile,hardwood floors is an evolving journey. Every project brings new lessons, especially under challenging conditions like heatwaves. Embrace the learning curve, invest in your tools, and celebrate your progress. With dedication and patience, you can achieve a flawless, durable finish that stands the test of time.
What’s the most unexpected lesson you’ve learned from your flooring projects? Share below and let’s grow together!