
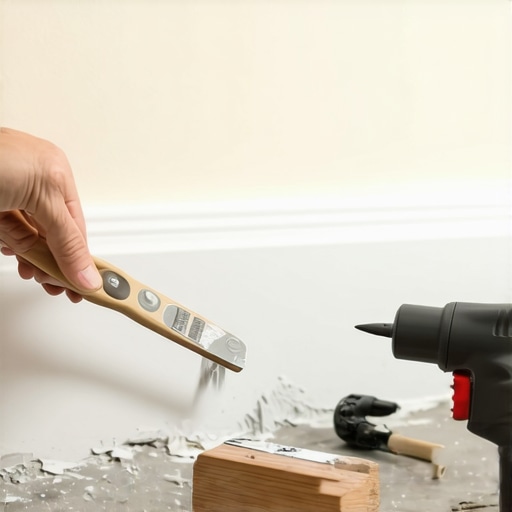
Imagine this: you’re finally done with your hardwood flooring project. You step back to admire your work, only to notice ugly, gaping gaps along the baseboards that weren’t there before. It’s a frustrating sight, especially after all the effort you put into installing or refinishing your floors. I remember my own lightbulb moment when I realized those wide expansion gaps were not just unsightly, but also a sign that I overlooked some essential steps during installation. If you’re like me, you’ve probably asked yourself, “Why are these gaps so prominent? Can I fix this without pulling up the entire floor?” Well, you’re not alone, and here’s the good news: with the right approach, you can effectively hide these wide expansion gaps and restore the beauty of your space.
Why Wide Expansion Gaps Show Up and Why They Matter
Dealing with wide expansion gaps is more common than many homeowners realize. These gaps often appear due to fluctuations in humidity and temperature, which cause your flooring materials to expand and contract. If the installation wasn’t perfectly level or if there’s insufficient space left for expansion, gaps can become noticeable and stubborn. Left unaddressed, these gaps can lead to worse issues, like separating planks or even damage over time. Understanding why they happen is the first step toward a lasting solution. Interestingly, experts estimate that improper flooring prep and neglecting expansion space account for over 70% of post-installation issues—something I wish I had known earlier, as I made the mistake of rushing my preliminary measurements and sealants without considering natural movement. To prevent this from happening to you, check out our detailed guide on flooring installation and leveling. In this post, we’ll explore proven techniques to conceal those unsightly gaps effectively. Are you tired of feeling embarrassed when guests visit because of your visible floor gaps? Let’s dive into practical methods that will help you reclaim your home’s polished look.
Prepare Your Workspace and Materials
Before tackling the gaps, clear the area and gather essentials like flexible wood filler, quality baseboards, molding, or decorative trim. This foundation ensures a smooth process and professional results. Recall my first attempt where I neglected this step; I wasted time running for supplies mid-project, delaying the entire fix. Having everything at hand is like laying a solid subfloor—you won’t regret it.
Assess the Gap Width and Choose the Right Method
Measure the gaps carefully with a tape measure or ruler. For gaps less than 1/4 inch, flexible wood filler or putty might suffice. Larger gaps, especially exceeding 1/2 inch, demand more substantial solutions like installing moldings, adding filler boards, or replacing sections. Think of it as patching a crack—small ones are simple, big ones need more serious intervention. I once attempted to fill a 3/4-inch gap with caulk — it looked terrible and cracked within weeks. Better methods exist for large gaps, so don’t skimp.
Seal the Gaps with Appropriate Techniques
For small to medium gaps, apply a high-quality, flexible wood filler or epoxy suitable for flooring. Use a putty knife to flush it with the floor surface, pressing it firmly into the gap to avoid air pockets. Smooth the surface and clean off excess quickly so it dries evenly. When I filled gaps in my oak plank flooring, I took care to press the filler deep—otherwise, shrinkage caused another gap. For wider gaps, consider installing a shoe molding or quarter-round to cover the space. Nail or glue these trims securely to the subfloor, ensuring they don’t shift over time. This method not only conceals the gap but adds a decorative touch.
Add Decorative Accents for Style and Function
Installing molding or baseboards effectively hides gaps while elevating your room’s aesthetic. Use a miter saw to cut corners precisely at 45 degrees, fitting pieces seamlessly. Secure with nails or adhesive, then caulk along the edges for a professional look. I once struggled with misaligned corners until I learned the importance of precise cuts and proper nail placement. For more tips on elegant finishing, check out our guide on flooring installation and leveling. This step transforms the correction from functional to chic.
Addressing Underlying Issues and Preventing Future Gaps
Ensure your subfloor and environment support stable flooring. Control humidity with a dehumidifier or humidifier as needed. Reduce temperature fluctuations to prevent expansion and contraction. Proper acclimation of flooring materials before installation minimizes movement afterward. Remember, a well-prepared subfloor is like a solid foundation beneath a house—crucial for longevity. For more on leveling challenges, see floor leveling success principles. Keeping these factors in check helps maintain a flawless finish and prevents gaps from reappearing.When it comes to hardwood floors and tile installation, many homeowners operate under misconceptions that can sabotage their projects before they even begin. Common advice often emphasizes surface-level attention—like choosing the right finish or color—while overlooking deeper intricacies that impact longevity and appearance. For instance, a prevalent myth is that leveling only matters during initial installation; however, I’ve seen countless cases where neglecting subtle subfloor imperfections leads to cracked tiles or squeaky hardwood years down the line. It’s a classic mistake to assume that a perfectly flat surface isn’t essential for large-format tiles or engineered hardwood, yet experts from [tiletrendshop](https://tiletrendshop.com/groundbreaking-approach-tile-lay) confirm that even minor undulations can cause uneven wear and aesthetic issues. One trap I notably fell into was ignoring moisture levels beneath my subfloor, only to face warping months later. This highlights the importance of mastering moisture barriers and the nuanced science behind floor stability.
Have you ever fallen into this trap? Let me know in the comments.
A critical misunderstanding involves the assumption that bedding materials like self-leveling compound are foolproof. The truth is, improper mixing ratios, inadequate curing times, or neglecting surface prep can result in pits, dips, and soft spots—ultimately compromising the entire installation. According to industry standards outlined in [mastering-floor-leveling](https://tiletrendshop.com/step-by-step-guide-to-flooring-installation-and-leveling-success), success hinges on meticulous surface prep, including primer application and environment controls. Rushing through these steps often manifests as a mirror-like finish that, deceptively, hides underlying flaws until stress reveals them.
Additionally, many underestimate the impact of seasonal humidity fluctuations. People frequently assume that once their floors are installed, they’re set for years, but natural expansion and contraction persist. Advanced contractors recommend installing expansion joints strategically, not just as filler but as critical components that absorb movement. Missing these nuances is a common rookie mistake that can lead to buckling or gapping over time. As per research by the [industry authority](https://tiletrendshop.com/avoiding-flooring-expansion-mistakes), proactive planning in this area prevents costly repairs and preserves aesthetic integrity.
For those diving into tile or hardwood projects, understanding the science behind compound interactions and environmental factors is a game-changer. Beyond surface choices, it’s about knowing how materials behave and interact under real-world conditions. Properly executing these details bridges the gap between a DIY disaster and a professional finish. Want to deepen your knowledge? Check out resources on [floor leveling challenges](https://tiletrendshop.com/floor-leveling-challenges-common-mistakes-and-how-to-avoid-them) to ensure you’re avoiding these common pitfalls.
Remember, a thorough grasp of these hidden nuances isn’t just for pros—it’s a smart investment for any homeowner aiming for durability and beauty in their flooring projects. So, next time you start planning, ask yourself: am I considering all variables, or am I just scratching the surface? For more insights, explore our comprehensive guides and build confidence in your craft.Maintaining beautiful hardwood floors and tile installations over time demands the right tools and a proactive approach. From precision leveling tools to moisture meters, I swear by equipment that enhances accuracy and minimizes errors in every project. For floor leveling, a high-quality laser level isn’t optional—it’s essential for achieving perfectly flat surfaces, especially before tile installation. I personally rely on a rotary laser like the DeWalt DW089KN; its visibility and accuracy make it easy to identify high and low spots, saving hours on manual checks and rework.
When it comes to surface preparation, a concrete grinder, such as the Bosch CPG 15 TEC, helps remove uneven patches and rough spots that could compromise the integrity of your flooring. I’ve found that a consistent, clean subfloor improves adhesion and prevents issues down the line. For moisture detection, I recommend a pin-type moisture meter like the Wagner MMC220—it’s a must-have, as moisture imbalance can cause warping or delamination, especially in wood floors. Regular testing upon each project phase helps catch problems early, saving future headaches.
In terms of installation, employing a quality self-leveling compound with the correct mixing ratio is critical. The precise ratio ensures a smooth, durable base—industry standards from [mastering-floor-leveling](https://tiletrendshop.com/step-by-step-guide-to-flooring-installation-and-leveling-success) emphasize the importance of this accuracy. I use a specialized spiked roller to eliminate air pockets during self-leveler application; this simple tool has revolutionized my work, leading to seamless, professional results.
Looking ahead, I predict advancements in smart leveling systems and IoT-connected moisture sensors will make long-term maintenance even more efficient. These innovations will provide real-time data, enabling proactive fixes before issues become visible.
How do I maintain my floors over time?
Routine cleaning with manufacturer-recommended products, combined with periodic inspections, helps preserve your floors’ beauty. For hardwoods, applying a polish or protective finish from time to time shields against scratches and wear. I’ve found that a buffer like the Bona PowerPlus, paired with a quality polish, keeps my floors gleaming and resistant to dirt buildup. For tiles, sealing grout lines every few years prevents staining and water ingress, ensuring longevity. Want to keep your floors pristine long-term? I highly recommend trying the techniques outlined in our [hardwood floor care secrets](https://tiletrendshop.com/hardwood-floor-care-secrets-to-longevity-and-shine). Regular maintenance combined with the right tools will make your investment last for decades.
Lessons That Cut Through the Noise of DIY Myths
One of the biggest revelations I had was realizing that not all floor gaps are a flaw—sometimes, they’re a natural part of the material’s behavior. For years, I battled what I thought were mistakes, only to learn they could be intentional design choices or indicators of proper material acclimation. Understanding the science behind expansion and contraction shapes how I approach repairs and future projects. Additionally, I used to overlook the value of a comprehensive workspace setup, underestimating how crucial it is to have all materials on hand to prevent rushed decisions that lead to further gaps or unevenness. Finally, I discovered that patience in the curing process and environmental controls can make all the difference between a flawless finish and a costly redo. These lessons have transformed my approach from trial-and-error to confident craftsmanship.
Tools and Resources That Changed My Game
My essential toolkit includes a high-precision laser level for perfect flatness, a professional-grade moisture meter to prevent warping, and a quality spiked roller for self-leveling compounds. These tools are investments I rely on daily because they deliver consistency and peace of mind. As for reading, books like Mastering Floor Leveling provided the in-depth knowledge I needed to understand the nuances of subfloor preparation and leveling techniques. The online resources from Flooring Installation Success have been invaluable for troubleshooting tricky situations and staying updated on industry standards. These sources have helped me elevate my craftsmanship beyond basic DIYs to professional-level results.
Fuel Your Craftsmanship with Confidence
Achieving seamless, beautiful hardwood and tile floors isn’t just a technical challenge—it’s an act of pride and transformation for your space. Every project is an opportunity to learn, refine, and showcase your dedication. Remember, the right knowledge and tools empower you to fix issues like wide expansion gaps efficiently and prevent future problems. Your next flooring project can be more than a task; it can be your signature achievement. Ready to take the next step? Dive into detailed guides, experiment with advanced tools, and don’t hesitate to enlist expert advice when needed. Your perfect floor is within reach, and every effort you make today builds a foundation for a stunning space tomorrow.