
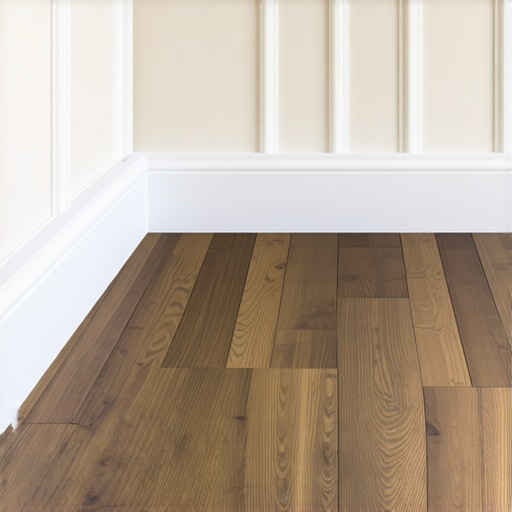
I vividly remember the day I stood in my living room, staring at the massive gap between my newly installed hardwood floors and the baseboard, feeling a mix of frustration and uncertainty. Despite all the careful measurements and meticulous planning, the expansion gap had become a glaring eyesore. It was a lightbulb moment for me—realizing that there had to be a simple, effective way to hide these unsightly gaps without resorting to messy fillers or awkward trim adjustments.
The Secret to a Seamless Finish: Quarter-Round Magic
Imagine this: a small, elegant molding that effortlessly conceals the large expansion gaps that naturally occur in hardwood and tile installations. This isn’t just about aesthetics; it’s about preserving the integrity and longevity of your flooring while keeping your space looking polished.
Is Covering Large Gaps Just a Vanity Trick?
You might be skeptical—”Is this little quarter-round really enough to hide those wide gaps?” Early on, I made the mistake of underestimating the power of proper molding selection, thinking a wider baseboard would do the trick. Turns out, it often accentuates the problem rather than solving it. Instead, using the right quarter-round can give your flooring a professional finish without the need for extensive wall modifications. For more insights on achieving flawless flooring, check out [this comprehensive guide on floor leveling techniques](https://tiletrendshop.com/the-ultimate-guide-to-floor-leveling-for-a-perfect-finish).
The key is understanding how to choose and install your quarter-round so it works with your floor type and room layout. When done correctly, it creates a clean, finished look that seamlessly blends with your baseboards and conceals those problematic gaps. Plus, it’s a budget-friendly solution that can be tailored to any room.
Are you tired of dealing with awkward gaps or mismatched moldings? If so, you’re not alone. Many homeowners overlook the importance of this finishing touch, only to regret it later when their floors look incomplete. My own experience taught me that the devil is in the details—small tricks like this can make a huge difference.
Now, let’s move on to the practical steps to master this technique. You’ll see why this simple method has become a game-changer for countless DIYers and professionals alike.
Measuring and Planning Before Installation
Start by assessing the size of the gaps between your flooring and baseboards. Use a tape measure to determine the width of each gap—think of it like checking the gaps in a quilt to ensure a snug fit. Mark these measurements so you know exactly what length of quarter-round molding to cut. During my first project, I overlooked this step and underestimated the length needed, resulting in too short pieces that couldn’t cover the gaps completely. This taught me the importance of precise measurement from the outset.
Selecting the Right Quarter-Round
Choose quarter-round molding that complements your flooring color and style. A good rule of thumb is to select a diameter that slightly exceeds the measured gap—if your gap is 1/2 inch, opt for a quarter-round with a 3/4 inch radius. When I filled a notably large gap in my living room, I opted for a thicker profile, which not only concealed the gap but also added a subtle decorative element. If you’re unsure, many hardware stores allow you to test sample pieces to see which matches best.
Cutting and Preparing the Moldings
Use a miter saw to cut your quarter-round pieces to length, making sure to account for corners by cutting the ends at 45-degree angles for a seamless fit. I once tried to measure each piece with a manual saw and ended up with uneven cuts, causing gaps and misalignments. To avoid this, set your saw firmly and double-check measurements before cutting. Connecting several pieces in a straight line is like assembling puzzle pieces—precision matters.
Applying Adhesive and Fixing in Place
Apply a thin layer of construction adhesive along the backside of the molding—think of it like spreading peanut butter evenly on bread. Press the quarter-round onto the subfloor and baseboard, holding it firmly for a few seconds. For larger gaps, consider using finishing nails to secure the molding—hammer them in at slight angles to avoid splitting and make sure they sink below the surface for a clean finish. During my last installation, using adhesive alone wasn’t enough for a large gap, but adding nails made a noticeable difference in stability and appearance.
Finishing Touches and Touch-Ups
Once the molding is in place, fill nail holes with wood filler matching your molding’s color. Smooth out excess with a putty knife and let it dry. Sand lightly to achieve a flush surface. To ensure a seamless look, paint or stain the quarter-round to match your baseboards. After painting, I always inspect the corners to ensure the cuts align perfectly—any misalignment shows up immediately. This step transforms your repurposed molding from rough to refined, hiding those gaps effectively.
Tips for a Perfect Result
Remember, patience and precision are key. Don’t rush through measurements or cuts. Use clamps to hold the molding steady during adhesive application, and always measure twice before cutting once. Regularly stepping back to view your work in the room helps catch misalignments early. For challenging corners, consider mitering the ends at 45-degree angles—this is like creating a tiny, interlocking handshake between pieces. If you’re facing stubborn gaps, explore floor leveling techniques to prep the surface for a flawless finish.While many homeowners focus on selecting the right wood species or perfect finish, there are subtler aspects of hardwood flooring and tile installation that often go overlooked, leading to costly mistakes later. One pervasive myth is that featuring wide planks automatically adds luxury; however, wide planks can accentuate uneven subfloors and reveal flaws that narrower boards hide, making proper subfloor preparation essential. Additionally, many assume that unsealed edges aren’t a big deal—that’s false, since unsealed cuts allow moisture ingress and promote warping over time. When installing tile over uneven surfaces, some skip the crucial step of meticulous floor leveling, which can cause lippage and cracking, ultimately compromising durability. Using self-leveling compounds incorrectly, such as rushing the mixing process, can result in soft spots that compromise surface integrity—a mistake often made by DIYers eager to expedite the project. As experts note, neglecting to allow sufficient curing time for adhesives and leveling compounds leads to weakened bonds and long-term failures. For advanced flooring projects, understanding the nuances of moisture barriers and their correct installation is vital; improper application can trap moisture beneath the surface, causing expansion and buckling. Moreover, a common oversight is mismatching subfloor materials with the chosen flooring type, leading to premature wear or damage. For instance, engineered wood isn’t suitable for damp areas, despite its versatility, because moisture can still penetrate and cause expansion. When it comes to tile, many installers underestimate the importance of proper substrate preparation—failing to grind high spots or address substrate ridges results in uneven tiles and grout lines, as detailed in this comprehensive guide on floor leveling techniques. Another critical point is the misconception that bigger tiles hide subfloor imperfections better; large-format tiles require even more precise leveling and suitable trowel sizes. One advanced mistake to avoid is using the wrong adhesive for your tile or floor type, which can lead to delamination or cracking, especially in areas with frequent temperature fluctuations. To ensure lasting results, it’s essential to understand the specific needs of your project and consult expert sources or professional guides, like this one on mastering professional installation. Remember, even the most beautiful floors will fail prematurely if foundational issues aren’t addressed properly right from the start. Have you ever fallen into this trap? Let me know in the comments.Maintaining the longevity and functionality of your hardwood floors and tile installations requires the right tools and established methods. One essential piece of equipment I rely on is a laser level, such as the Bosch GLL 55, which provides precise, quick alignment over large surfaces, especially when ensuring floor leveling consistency during installation or after refinishing. paired with a reliable self-leveling compound like QUIKRETE’s Self-Leveling Floor Resurfacer. This combination allows me to address uneven subfloors effectively, resulting in a smooth, durable surface that stands the test of time. Additionally, I highly recommend investing in a quality diagrammatic miter saw with adjustable bevel capacity, which makes cutting molding or tiles with perfect angles straightforward—saving time and reducing errors in finishing touches. To keep everything in top shape, I use a multi-function floor buffer, like the Bona PowerDrive, which not only cleans but also gently buffs out small scratches on finished hardwood, extending the period before you need refinishing. Looking ahead, I predict that automation and smart diagnostic tools will become integral to flooring maintenance. Imagine sensors embedded in your floors that alert you to humidity changes or wear patterns—these innovations could revolutionize how we manage floor longevity.
How do I maintain hardwood floors and tiles over time?
Regular cleaning with a gentle, pH-neutral cleaner coupled with periodic buffing ensures your floors stay pristine. Maintaining optimal humidity levels, ideally between 35-55%, prevents wood expansion or contraction, which is crucial for preventing gaps or cracks. For tiles, inspecting grout lines for cracks or discoloration and performing timely resealing can thwart water ingress and staining. For both surfaces, adhering to a consistent cleaning schedule with proven tools like microfiber mops and avoiding excessive moisture keeps your investment looking its best. When addressing stubborn spots or minor damages, using a detailed guide on refinishing hardwood floors can reveal advanced techniques to revive and protect your floors long-term. Remember, the key is proactive maintenance—don’t wait until small issues turn into costly repairs. If you’re ready to elevate your flooring game, try applying a high-quality wood oil or polyurethane to your hardwood periodically, which creates a protective barrier against everyday wear. 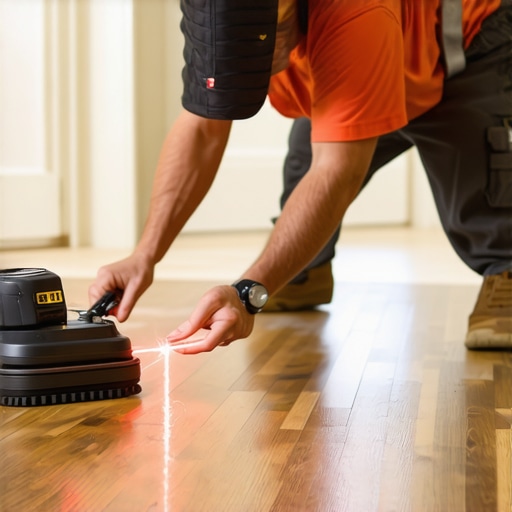
*Image prompt:* An overhead view of a professional using a laser level and buffer on hardwood floors in a modern home, emphasizing precise tools and care, alt text: “Professional maintaining flooring with laser level and buffer”. Keeping your floors in peak condition isn’t just about reactive fixes; it’s about implementing the right tools and routines that make long-term maintenance manageable and effective. For in-depth strategies, reviewing floor leveling techniques can provide critical insights into maintaining a perfectly flat and durable surface for years to come. Remember, the investment in quality equipment and consistent upkeep will pay dividends in the beauty and function of your living space over the years.
Lessons That Changed My Flooring Perspective
One of the most profound lessons I learned was how seemingly small details, like perfect measurement and precise cuts, can dramatically impact the final appearance of your floors. I once underestimated the importance of double-checking measurements, which led to misaligned molding and gaps that were tough to conceal. This experience taught me to always measure twice and cut once, a simple rule that saves time and frustration.
Another insight was realizing that choosing the right quarter-round isn’t about size alone but about harmony with your existing decor. A thicker profile can conceal larger gaps and add a subtle decorative touch, transforming basic filler into a design element. It’s about intentional selection rather than guesswork.
Finally, mastering the application of adhesive and nails taught me patience and the value of holding every piece securely until it’s set. Rushing these steps often results in misalignment or looseness over time. Taking the extra time to secure and finish trims ensures durability and a professional look that lasts. These lessons have been invaluable in my journey to create beautiful, lasting floors, and I hope they inspire you to pay attention to the details that matter most.